Function+Form east London house tour

Last weekend I was lucky enough to attend the second Function+Form event hosted by Tiff and Annie with the brilliant houzz team and a group of some of my favourite fellow bloggers.  We met at Ottolenghi for cake and coffee before a very exciting morning of touring two beautiful east London homes – my favourite pastime.

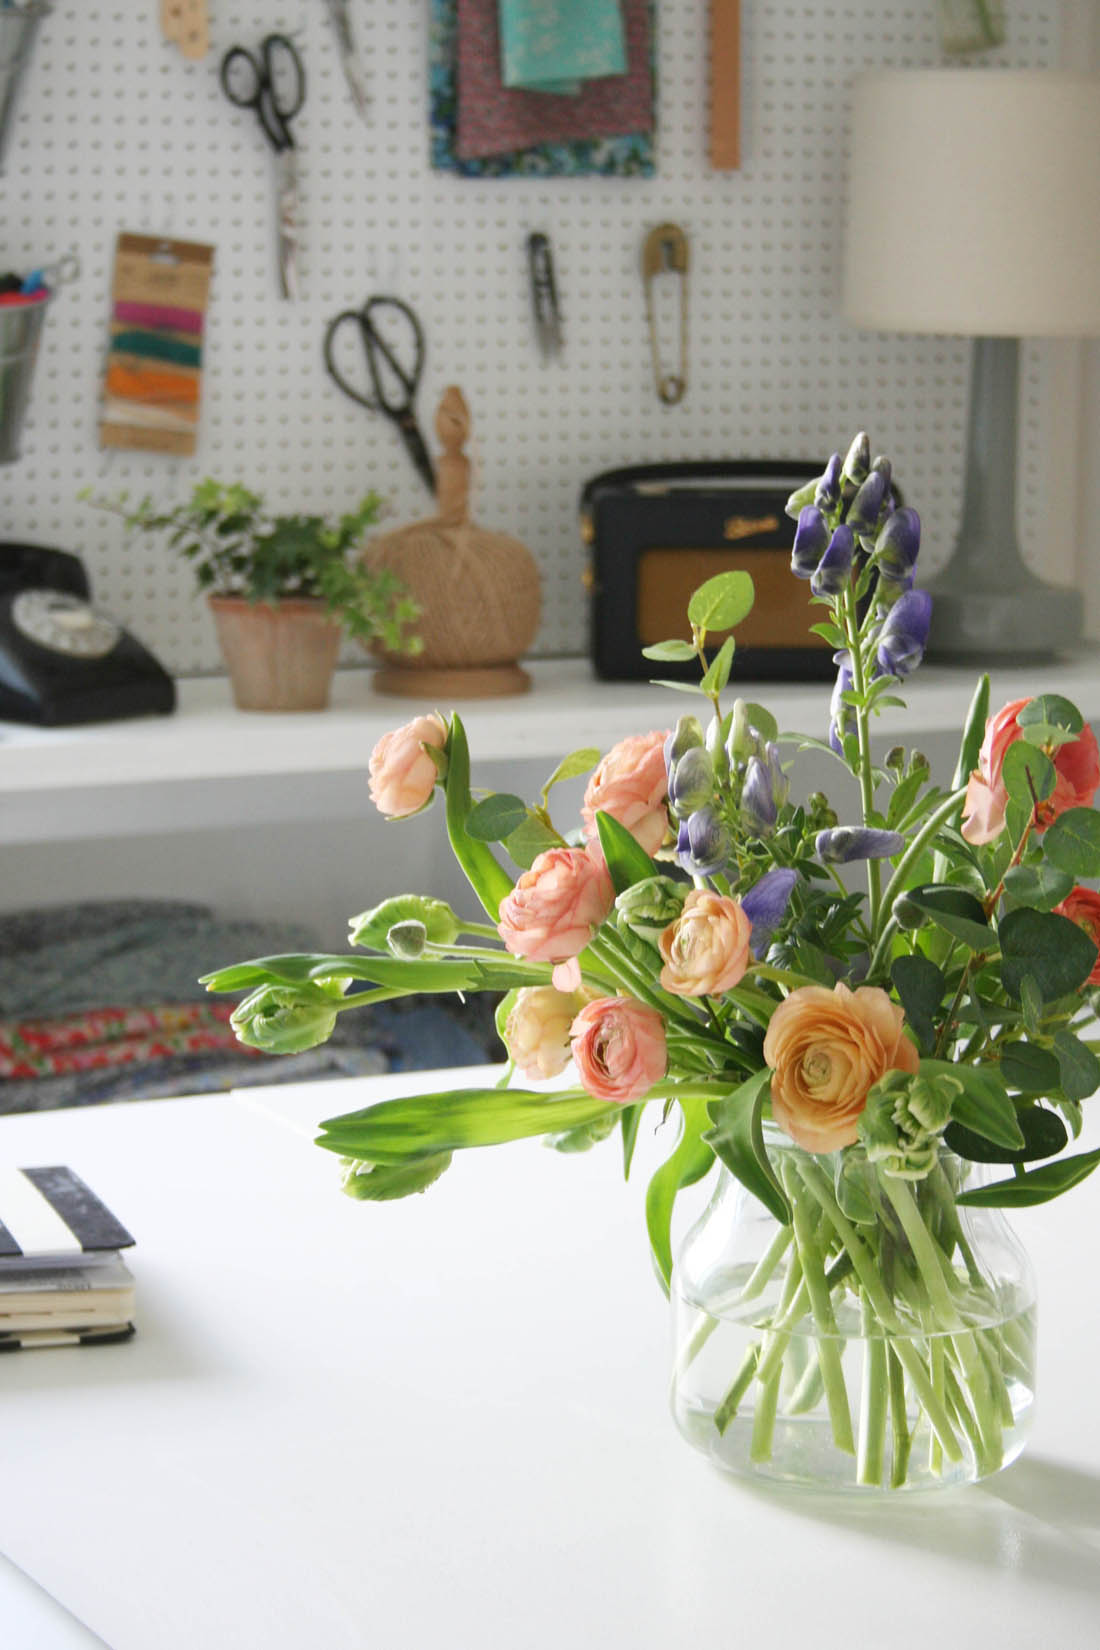
We visited two very different homes but there was so much inspiration to be had from both. I walked away from interior designer Laura Lakin‘s home with major house envy: I loved the space, light and monochromatic scheme of the Hackney loft in a converted school house.

Function+Form east London house tours with Houzz | Hackney loft apartment in converted school | Apartment Apothecary


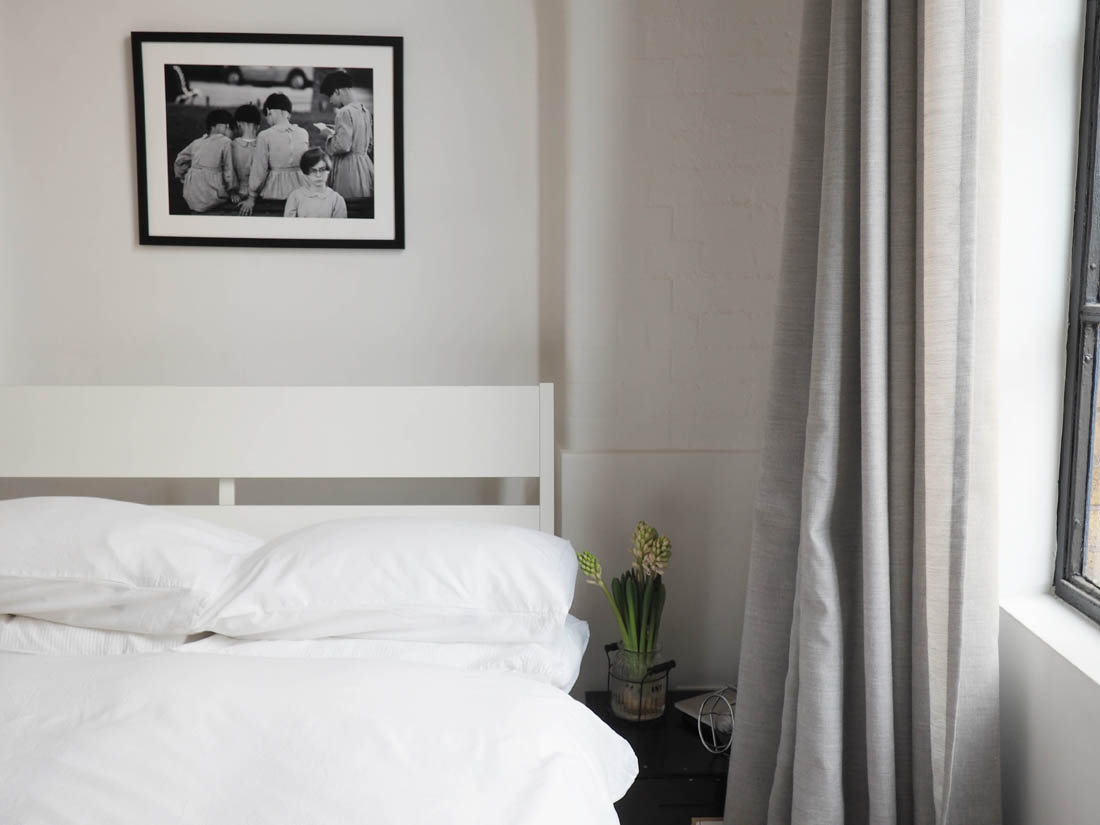
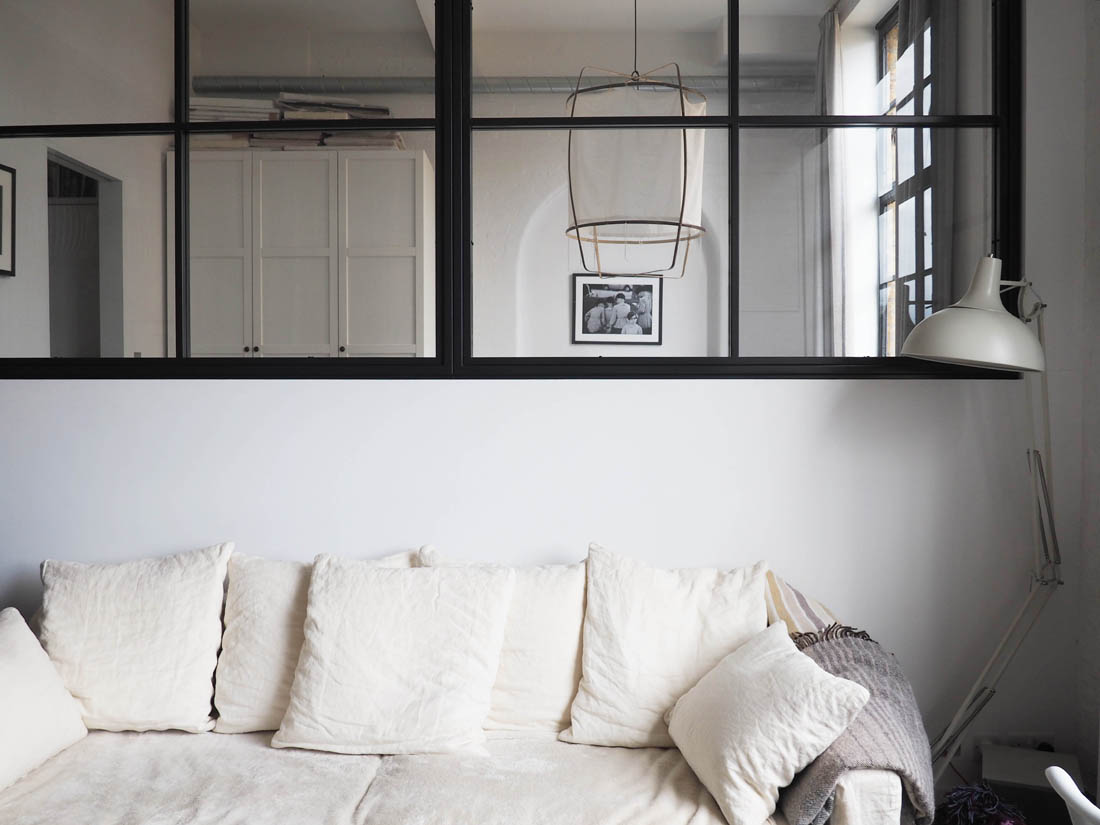
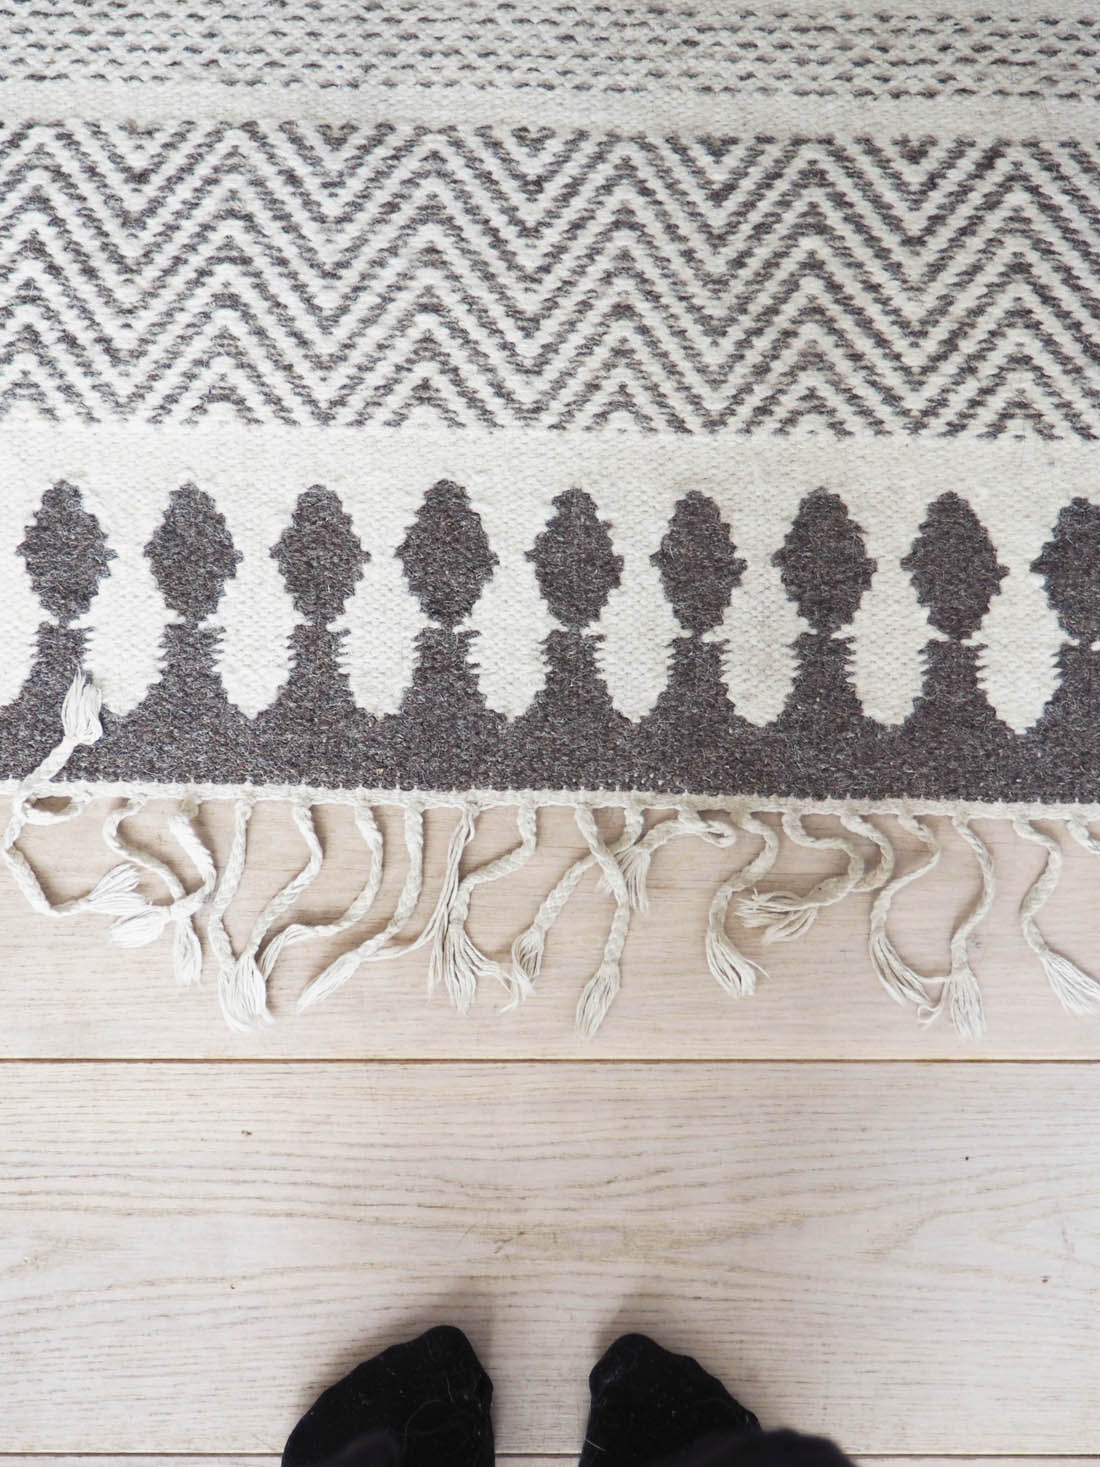
Laura wanted the the architectural features such as the windows to do the talking in her flat so she kept to a black and white palette and the simplicity of this really appeals to me. Clever design such as the internal window to break up the second bedroom and living space keep the light flowing throughout and creates an illusion of more space.

Function+Form east London house tours with Houzz | Hackney loft apartment in converted school | Apartment Apothecary


Function+Form east London house tours with Houzz | Hackney loft apartment in converted school | Apartment Apothecary

Function+Form east London house tours with Houzz | Hackney loft apartment in converted school | Apartment Apothecary

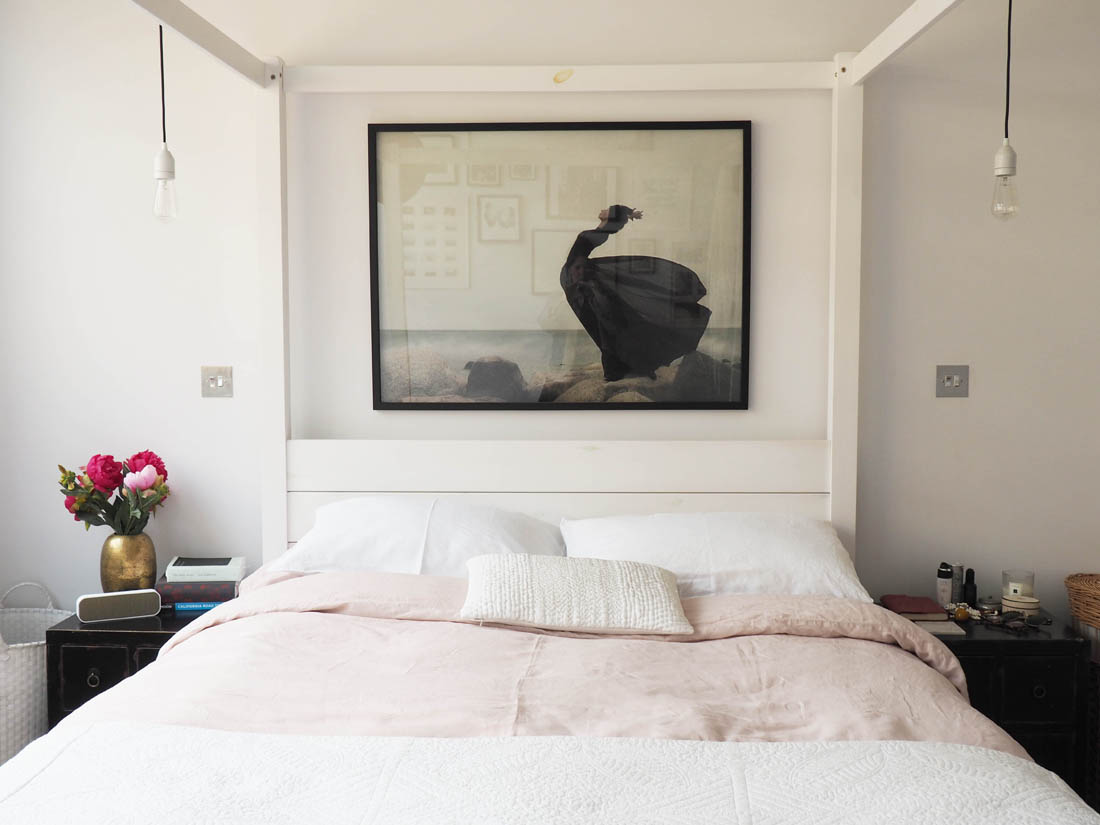
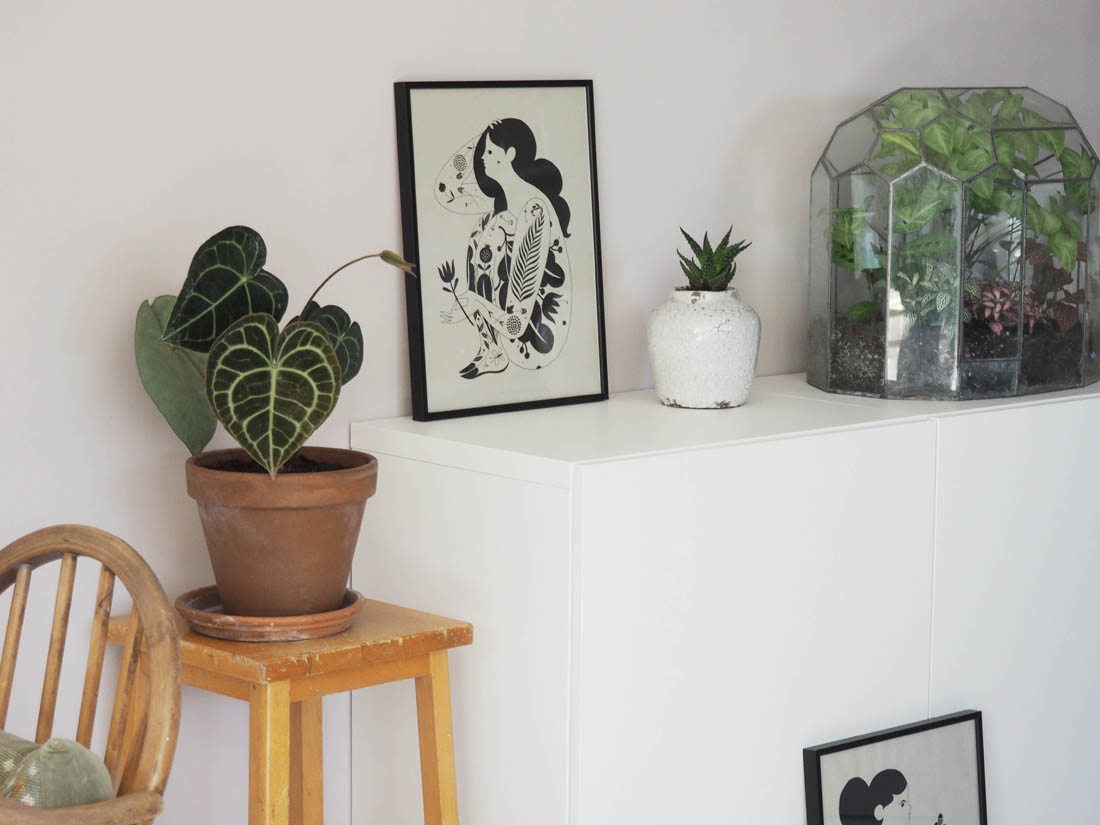
I fell in love with Laura’s artwork collection especially this piece by Kylli Sparre that she has hung above her bed.

Function+Form east London house tours with Houzz | Hackney loft apartment in converted school | Apartment Apothecary

Function+Form east London house tours with Houzz | Hackney loft apartment in converted school | Apartment Apothecary

Function+Form east London house tours with Houzz | Hackney loft apartment in converted school | Apartment Apothecary

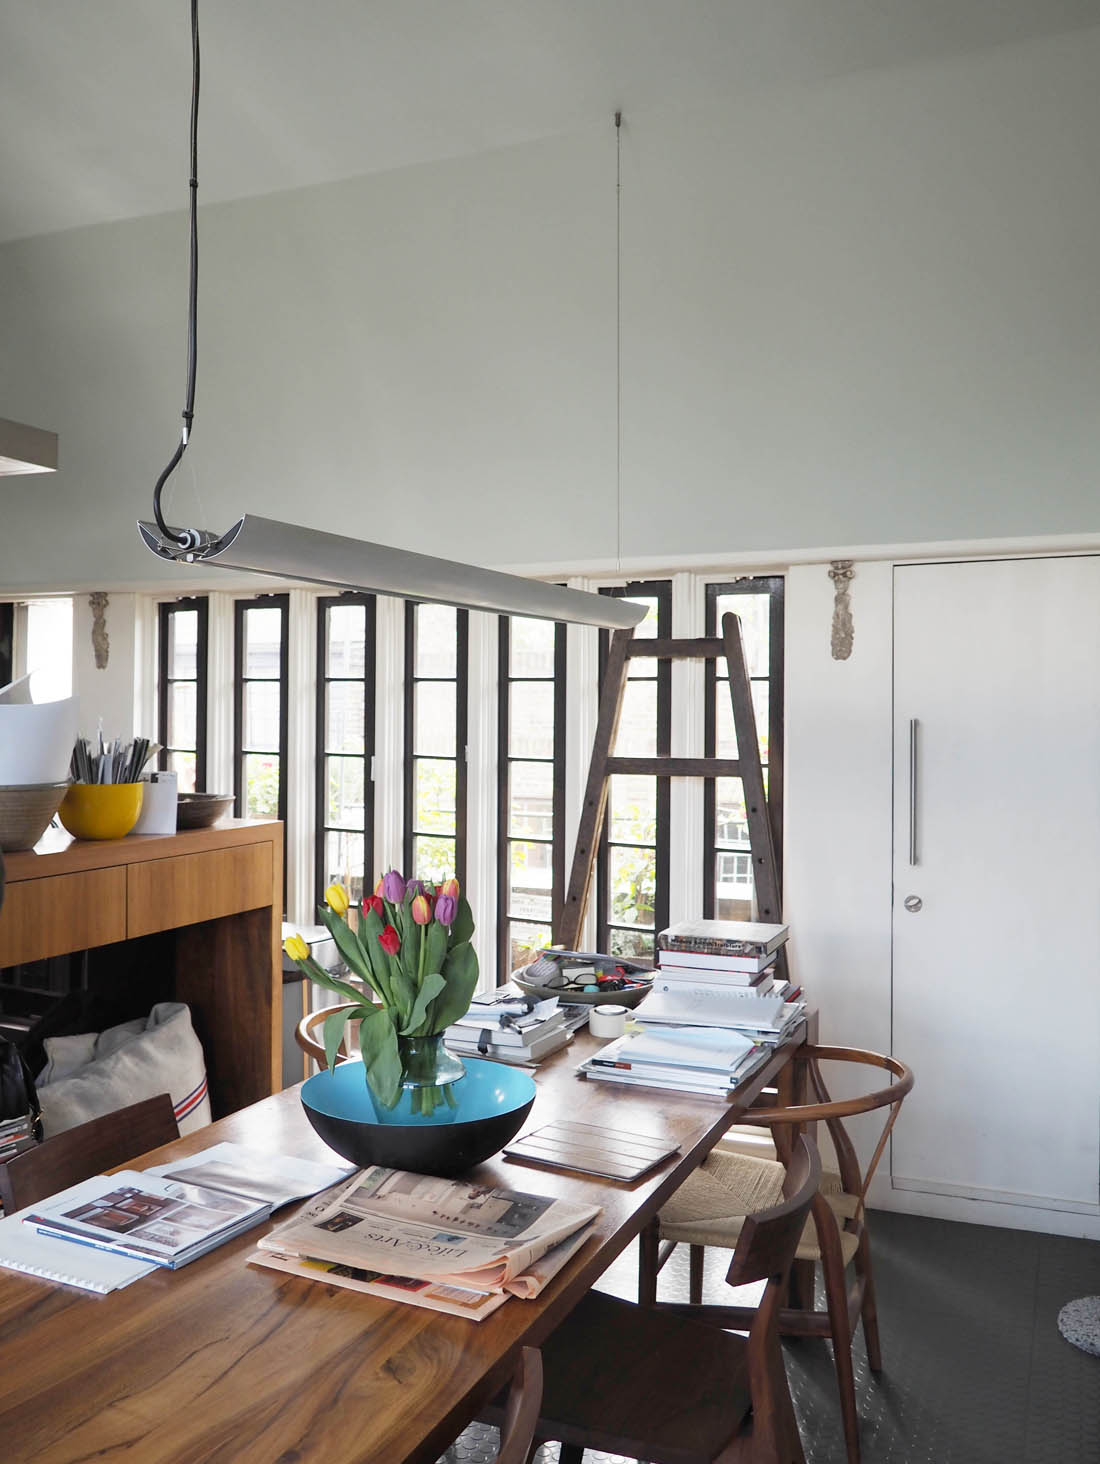
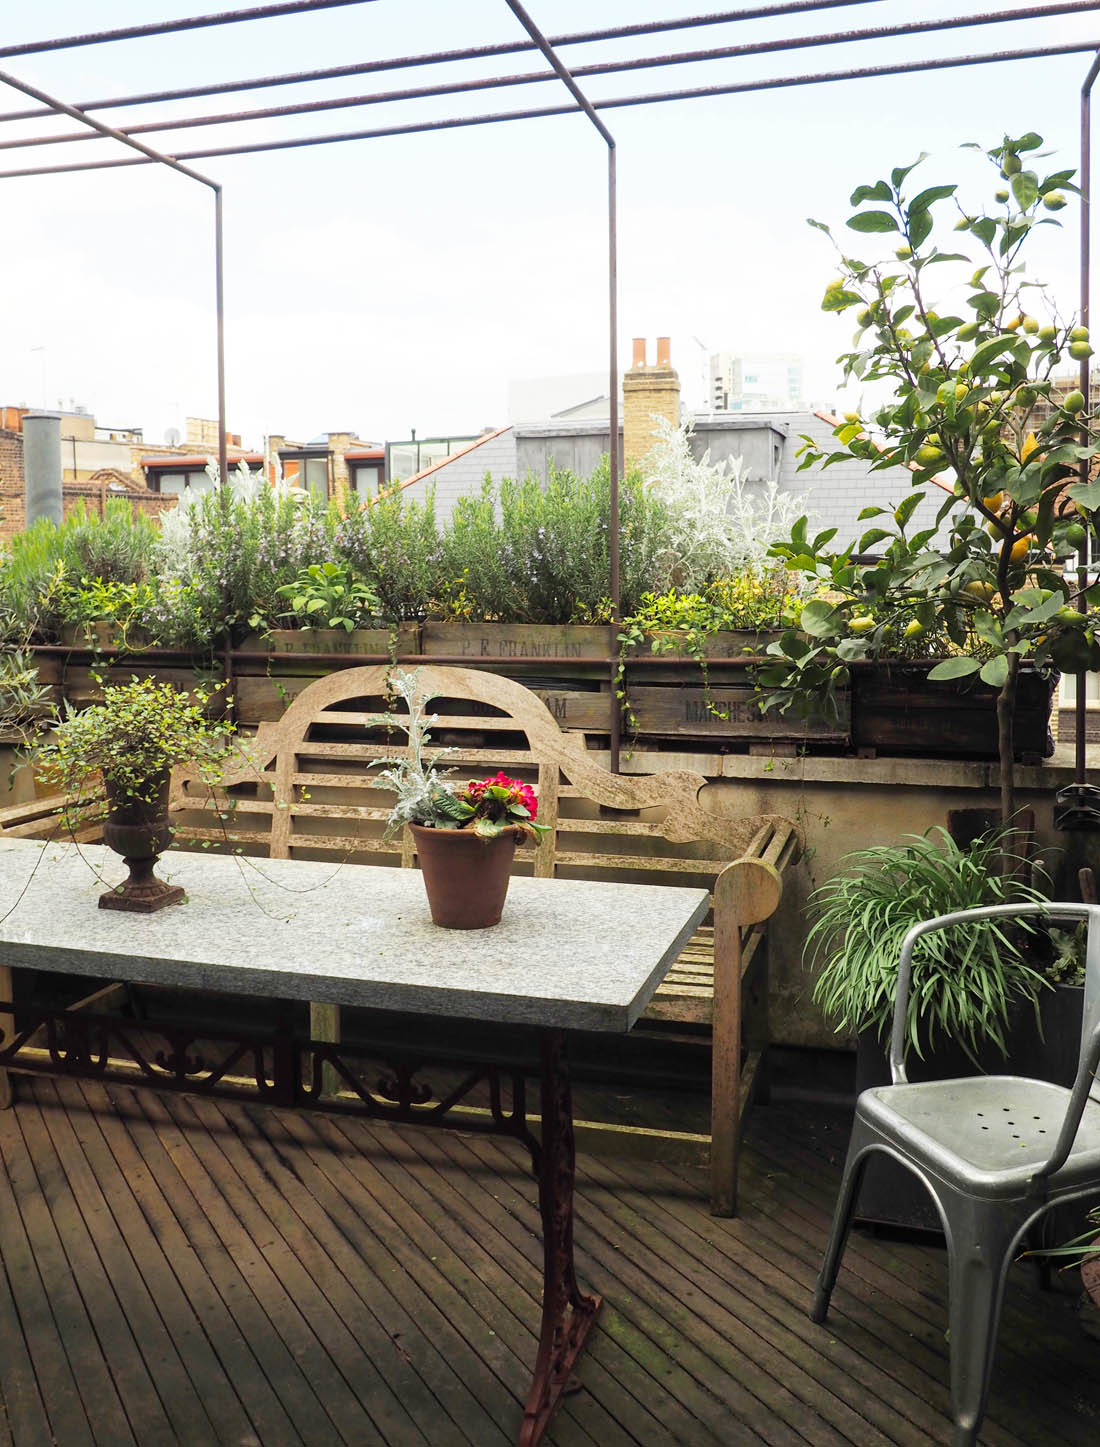
We also visited architect Chris Dyson‘s Georgian townhouse in Spitalfields. I often walk down the streets in this area and wonder what the houses behind the facades are like so I really enjoyed the opportunity to nose around this beautiful home.

Function+Form east London house tours with Houzz | Spitalfields Georgian townhouse | Apartment Apothecary

The kitchen/diner was my favourite room in the house located on the top floor with terraces on both sides. Such a clever use of space and the kind of room you would spend all day in.

Function+Form east London house tours with Houzz | Spitalfields Georgian townhouse | Apartment Apothecary

Function+Form east London house tours with Houzz | Spitalfields Georgian townhouse | Apartment Apothecary

Function+Form east London house tours with Houzz | Spitalfields Georgian townhouse | Apartment Apothecary

Function+Form east London house tours with Houzz | Spitalfields Georgian townhouse | Apartment Apothecary

Function+Form east London house tours with Houzz | Spitalfields Georgian townhouse | Apartment Apothecary

My favourite kind of day and I will admit to coming home and making a couple of purchases and tweaks in my own home after being inspired by what I’d seen.

Thank you so much to Tiff, Annie, the houzz team, Laura Lakin and Chris Dyson, as well as the fabulous group of fellow design bloggers who attended the event for making it such a wonderful day. If you are interested in future Function+Form events you can register your interest here.

Katy x


April: a review

What a funny month April has been: from beautiful sun one minute to snow the next, from Bluebells thriving to Sweet Peas dying in the frost. Personally, it’s been a bit of a rollercoaster month for me too. I started the month feeling pretty horrendous, dosed up on IVF drugs in preparation for our fifth round to finishing the month with a glimmer of hope after both our frozen embryos survived the thawing process and were transferred.  This month has been one of counting down the days, literally, and that will continue into May as we countdown to finding out whether this round of treatment has worked. Every day feels like a month and I’ve been taking long walks with Otto to help pass the time so I feel even more aware of the changing seasons compared to most. There’s a gorgeous bank in our local park that represents the seasons perfectly and as the snowdrops, crocuses and daffodils wilt they are very quickly taken over by a blanket of Bluebells and then the Cow Parsley comes in May. Hopefully I can snip a stem or two for next month’s Styling the Seasons post.

This month I’ve spent a fair amount of time at home and as always I’ve been thinking of things I can change/improve. When I visited Laura Lakin‘s home this month I fell for her blush pink duvet cover – a perfect update for spring/summer –  and then I saw Jane’s delicious looking bed with folds of glorious linen in Spring colours so I had to order one! As soon as I saw Jane’s post on Tea with Ruby I wanted to jump into the picture and soak it all up for myself. Isn’t it beautiful? You must pop over and see the full post.

Here’s a list of all the wonderful Styling the Seasons blog posts from April:

Let’s talk MommyThe Vintage House That CouldLobster and Swan / Growing Spaces / Bradshaw and Sons / Three Sons Later / The Nice Nest / The Twinkle Diaries / Tea with Ruby / The Cabinet Maker’s Love Tale / The Lovely Drawer / Under the Plum Blossom TreeLotts and Lots / Apartment Apothecary

Don’t forget, you can see all previous posts on our Styling the Seasons Pinterest board. If you’d like to take part in Styling the Seasons next month, all you have to do is style any surface in your home – window sill, hallway table, wall, dining table, sideboard – to represent what May means to you. Either blog about your styled surface or post a shot on Facebook, Instagram or twitter and tag Lotts and Lots and I and use the hashtag #stylingtheseasons. And let’s hope for some warmer weather in May!

Katy x

Tips for hanging wall art

Hanging wall art is a problem that hampers a lot of us, I think, and I often go to friends’ houses and notice that nothing at all is on the walls for fear of making holes everywhere or choosing the wrong place for a piece of art. Therefore, I just want to chat you through a couple of things that can make the job a lot easier.

Firstly, I always tend to buy picture frames from Habitat (they also do mounts) or John Lewis because they have a good range of materials and sizes and I far prefer quite thin frames to bulky thick frames. Alternatively, for special pieces I will invest in taking wall art to the local framers – worth every penny in my mind. One of these days I will commit to sourcing some vintage frames and taking them to the framers to use for special prints (they often lack glass, mounts or clips if you buy them at antiques markets or car boots so the framer can rebuild them).

Once the prints are framed you then need to choose the right place for it to make it shine…

Planning a gallery wall

I saw a completely gorgeous gallery wall arranged by Holly over at Avenue Lifestyle in a recent bedroom makeover she did (I warn you, if you pop over and look at the full room you will feel the need to completely redesign your own – it’s to die for!). Quite often I hear people saying that they would have no idea about how to go about this but, as Holly shows in the picture below, all you have to do is lay them out on the floor first and play around with the composition.

Easy ways to hang wall art | Vintage gallery wall by Hollly at Lifestyle Avenue | Apartment Apothecary

I want everything in this bedroom but I want the art work most of all! Image via Avenue Lifestyle.

Easy ways to hang wall art | Vintage gallery wall by Hollly at Lifestyle Avenue | Apartment Apothecary

Holly lays the pictures on the floor to help her arrange them. Experimenting with he composition is the easiest way to create a gallery wall. Image via @holly_avenuelifestyle

Command strips

I know lots of people fear making holes in their walls, especially if you rent your property. That’s why you need to become best friends with Command Strips. They behave a bit like velcro so you press two pieces together, stick one side to the back of your frame and the other side to the wall. I swear on my life these things work and when you want to move the picture all you have to do is pull the strip off  and it takes no paint with it. They are brilliant (hooks are also available that I use all the time). The point is that you will not need to make any holes in your walls and your picture will never be wonky as it is firmly stuck in place.

Paper templates

When you have attached your command strips and you are ready to hang your pictures to help you figure out where to put them and how to space them use paper templates. Draw around your pictures to make your templates and use blu-tack to attach them to the wall to help you visualise what they will look like in a certain position. Again, experiment!

Easy ways to hang wall art | Using command strips to hang pictures | Apartment Apothecary

Paper templates will help you hang pictures evenly and in the best position.

Easy ways to hang wall art | Using command strips to hang pictures | Apartment Apothecary

A set of my favourite prints drawn by Rikkianne Van Kirk

Easy ways to hang wall art | Using command strips to hang pictures | Apartment Apothecary

Illustrations by Rikkianne Van Kirk. See more of her work in her Etsy shop.

Easy ways to hang wall art | Using command strips to hang pictures | Apartment Apothecary

Hope this may help anyone who struggles with hanging their wall art (I know I do). I *think* I have decided where to hang it all in my living room.

Katy x


Wall art from The Future Kept

I was spurred on last week after I wrote a post about adding the finishing touches to my living room. I bought a few new plants, re-potted others, framed and hung wall art and styled up a few surfaces – it is finally finished! I promise to share it with you soon (I know I’ve been rabbiting on about it for months now – you must all be very bored!).

In the meantime I want to share with you two of my favourite additions to the room, which are a pair of prints from The Future Kept. I don’t know about you but I find it incredibly difficult to find affordable wall art so these prints are a revelation and they are perfect for the room.

Wall art from the Future Kept | Apartment Apothecary

Both goddesses seen here propped up ready to be hung.

I have the Spring and Autumn Goddess, both made in collaboration with the artist Karolin Schnoor exclusively for The Future Kept. I love the seasonal designs and the black is a great way to add some contrast to an otherwise light coloured scheme: simple, beautiful and unique.

It took me a while to decide how to frame the prints so I thought it might be a good idea to do a quick post about frames and hanging pics – will try to get that up next week.

Hope you all have a lovely weekend!

Katy x


DIY pegboard

Last week a TV crew came in to film my pegboard for a new show about decluttering and storage (I’ll let you know when it airs in a couple of months). Whenever I post a pic of my pegboard on my instagram feed I always get people asking me where I bought it from, which has made me realise that I’ve never actually written a post about it, it was just included in my home office makeover reveal post. So, I thought it would be useful to have a dedicated post that I can direct people to.

DIY pegboard | how to mount your own pegboard | Apartment Apothecary

There are now lots of lovely companies that sell swish pegboards but they cost a lot and when I made mine about three years ago no one was really selling them; it seemed to be a much more ‘American garage’ type thing. Therefore, I sourced mine from Amazon after trawling around elsewhere for ages and I found this seller who offers sheets of 120 x 60cm pegboard for £10 (they were only £8 when I bought them) so I bought two to make a 120cm square, which fit perfectly next to the window in my office above a slim sideboard where I keep my sewing stuff.

I painted the sheets in white satin paint because they need to withstand a fair bit of wear and tear and then I had to mount them.

DIY pegboard | how to mount your own pegboard | Apartment Apothecary

I couldn’t resist some fresh flowers for the TV crew but they were very quickly pushed aside in favour of lights and rigging – ha!

DIY pegboard | how to mount your own pegboard | Apartment Apothecary

To mount:

The board needs to sit roughly 2cm away from the wall so that there is space between the wall and the board for the pegs. Therefore, you need to screw in vertical batons of wood on the left and right side of your board (and in the middle if you have two like me).

Very simply, screw the board to the batons at the top, middle and bottom, using washers to keep it secure.

DIY pegboard | how to mount your own pegboard | Apartment Apothecary


I bought a variety of pegs for my board from this Etsy seller, which are perfect for the types of things I store.

DIY pegboard | how to mount your own pegboard | Apartment Apothecary

Hope that helps for anyone thinking about setting up their own pegboard whether it be in a workspace, kitchen, the inside of a storage cupboard or even a playroom.

Do you have any good storage ideas in your home?

Katy x