Shutter love

It is with a bit of sadness that I write this post. You see, I had plans of installing plantation-style shutters into my home during this bout of re-decoration but it turns out that my stupid windows are not suitable – gutted, totally gutted. However, it didn’t seem fair to keep all this shutter love to myself so I wanted to share some of it with you today.

I always think that window treatments are one of the things that people get stuck on most when it comes to decorating. It can feel like a bit of a minefield – do you go with curtains (black out, full length, triple pleat…) or blinds (roller, venetian, roman…) or shutters (full height, solid panel, cafe-style…)? Not only is the choice a bit overwhelming but because everyone’s windows are different it can be difficult to know how to measure them and then how to install them. That’s why I think it is important to turn over the job to the experts and in fact that was the first thing I did before I moved into my current flat; I got custom made curtains for my bedroom.

I really wanted shutters from Luxaflex for my office and kitchen as I love the character and style that they can bring to a room. They are also very practical as you can easily control the amount of light coming into the room. Just look at how dreamy they are…

Wooden plantation style shutters in kitchen by Luxaflex | Apartment Apothecary

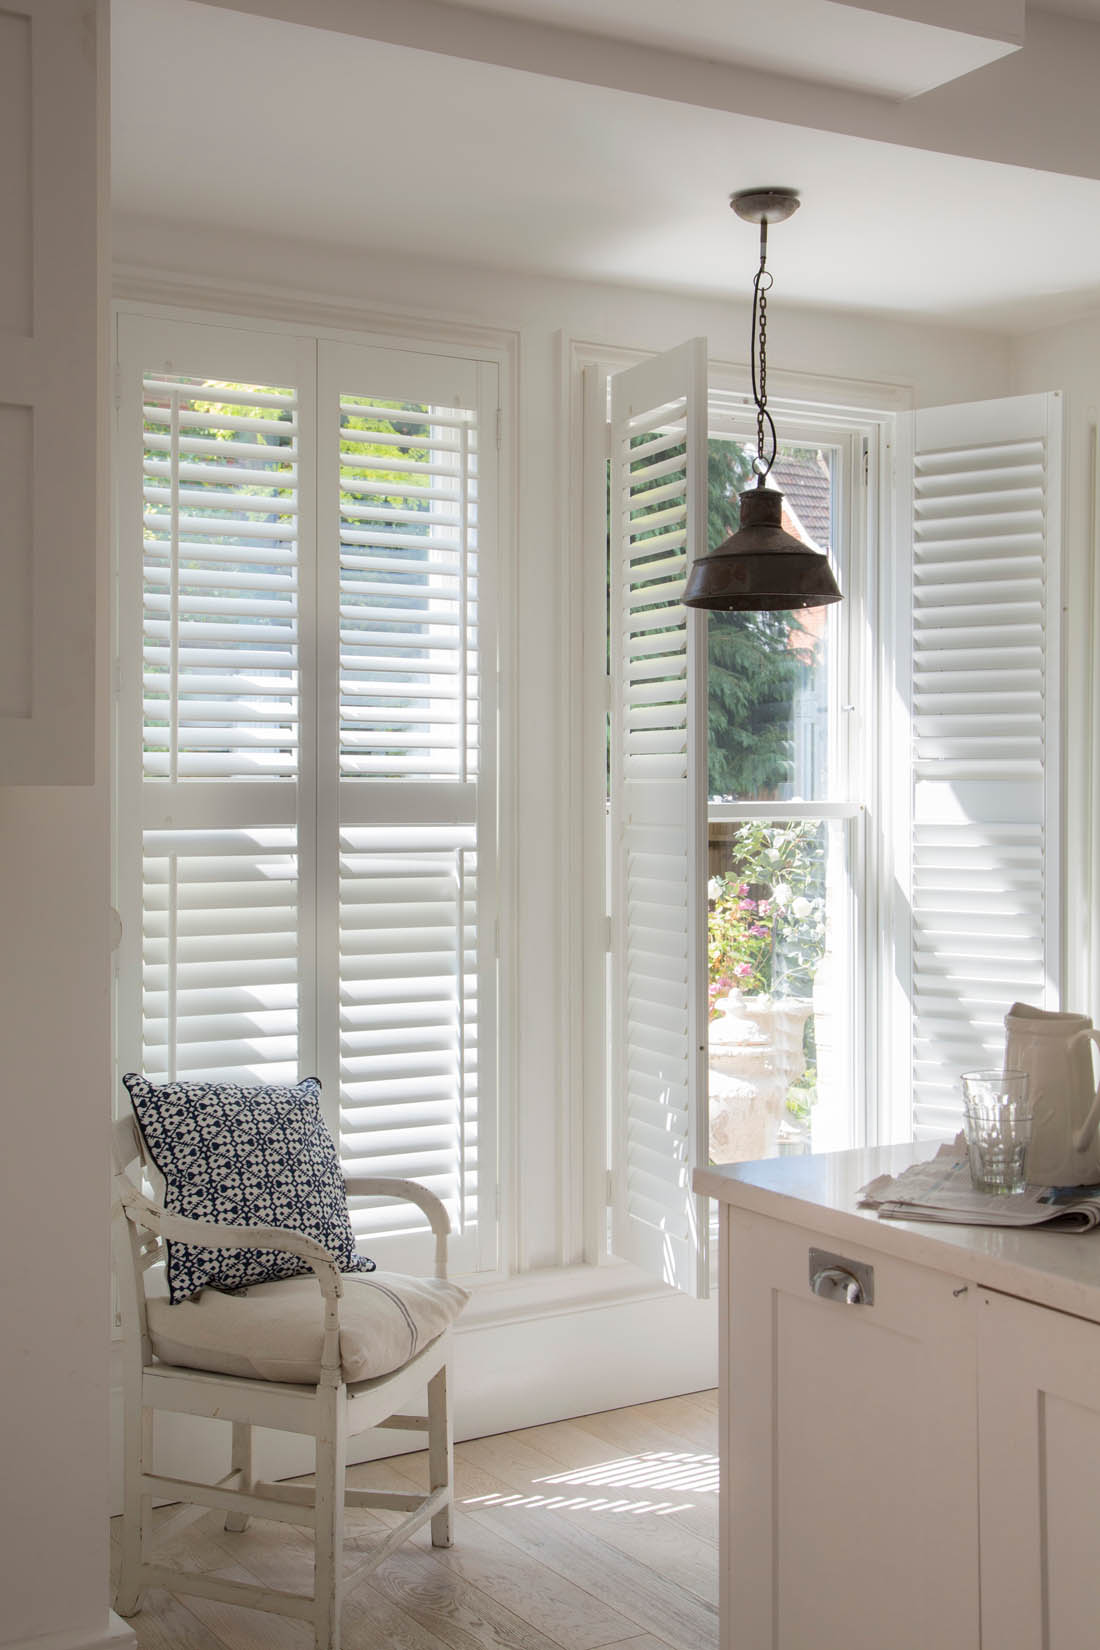
I love the idea of throwing open the shutters in the kitchen in the morning to let the light pour in. I love how fresh and modern they look, whilst still reminding me of old characterful French houses.

Closed faux shutter living room 2014 copy

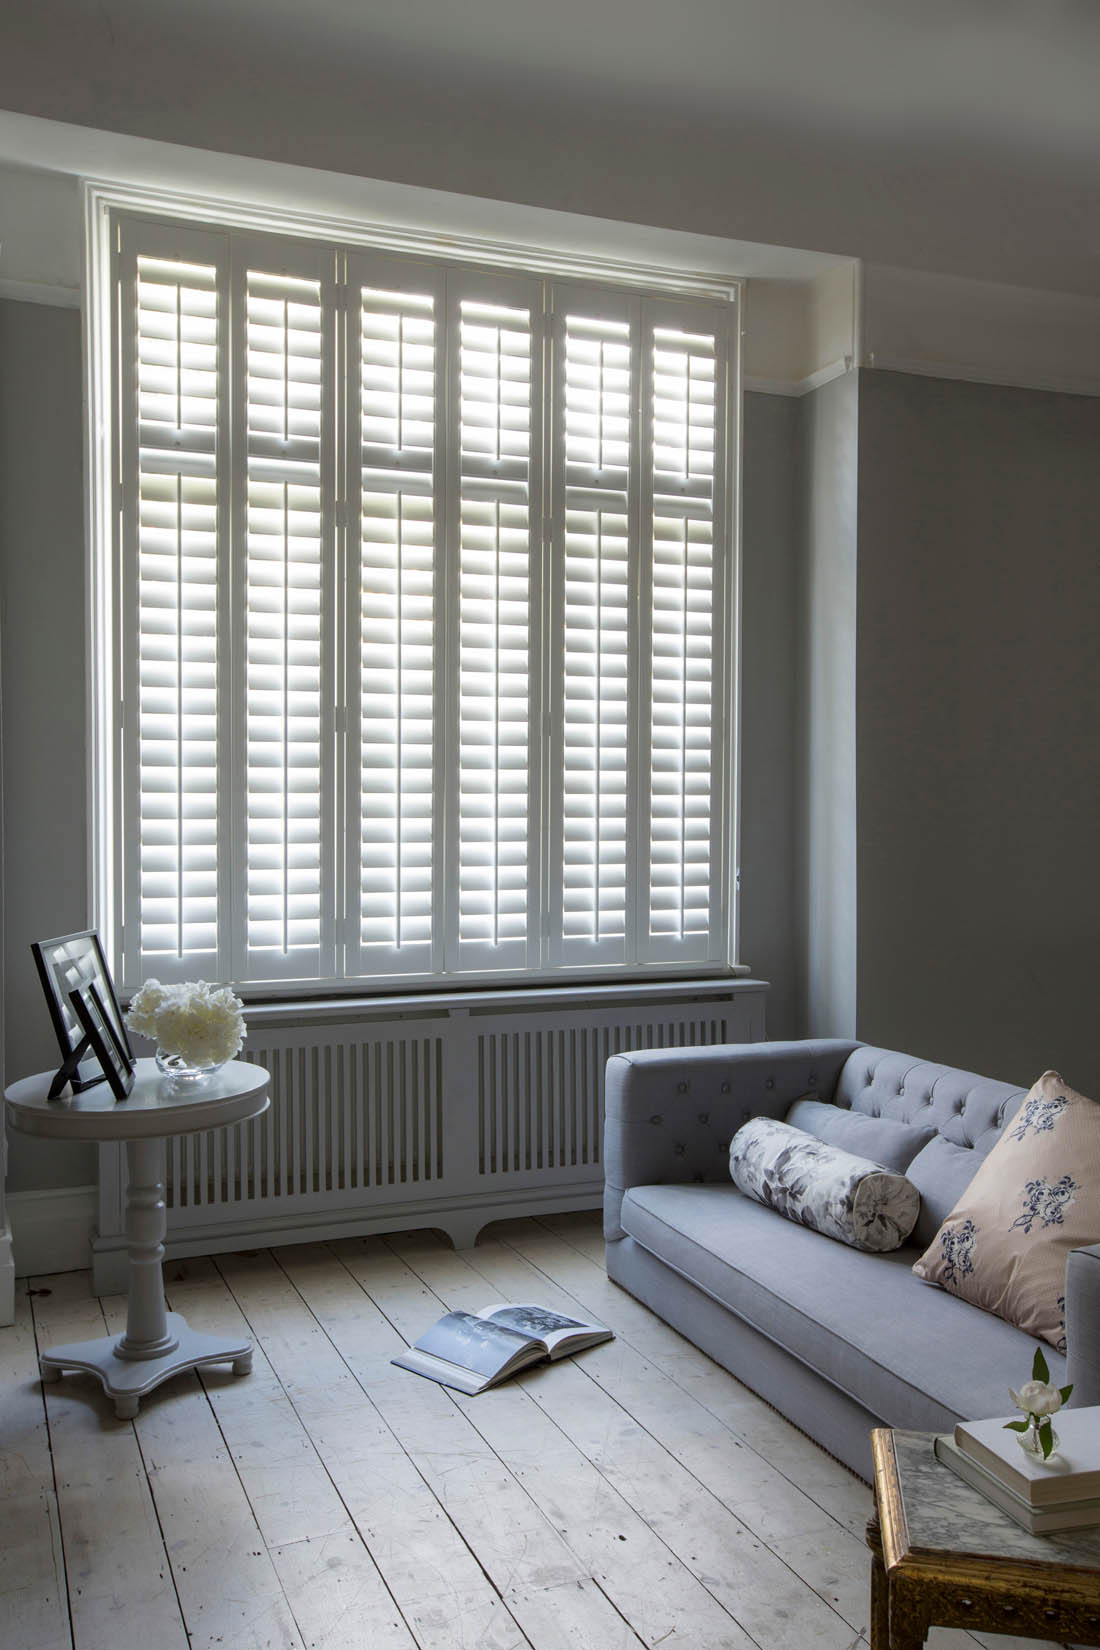
Shutters in a sitting room would work really well as there are often times that I want to block some light out, whether I am reading the papers at the weekend or guiltily watching a matinee movie, and they are great for privacy too, especially if your sitting room looks on to the street (or over at other apartment blocks like mine does).

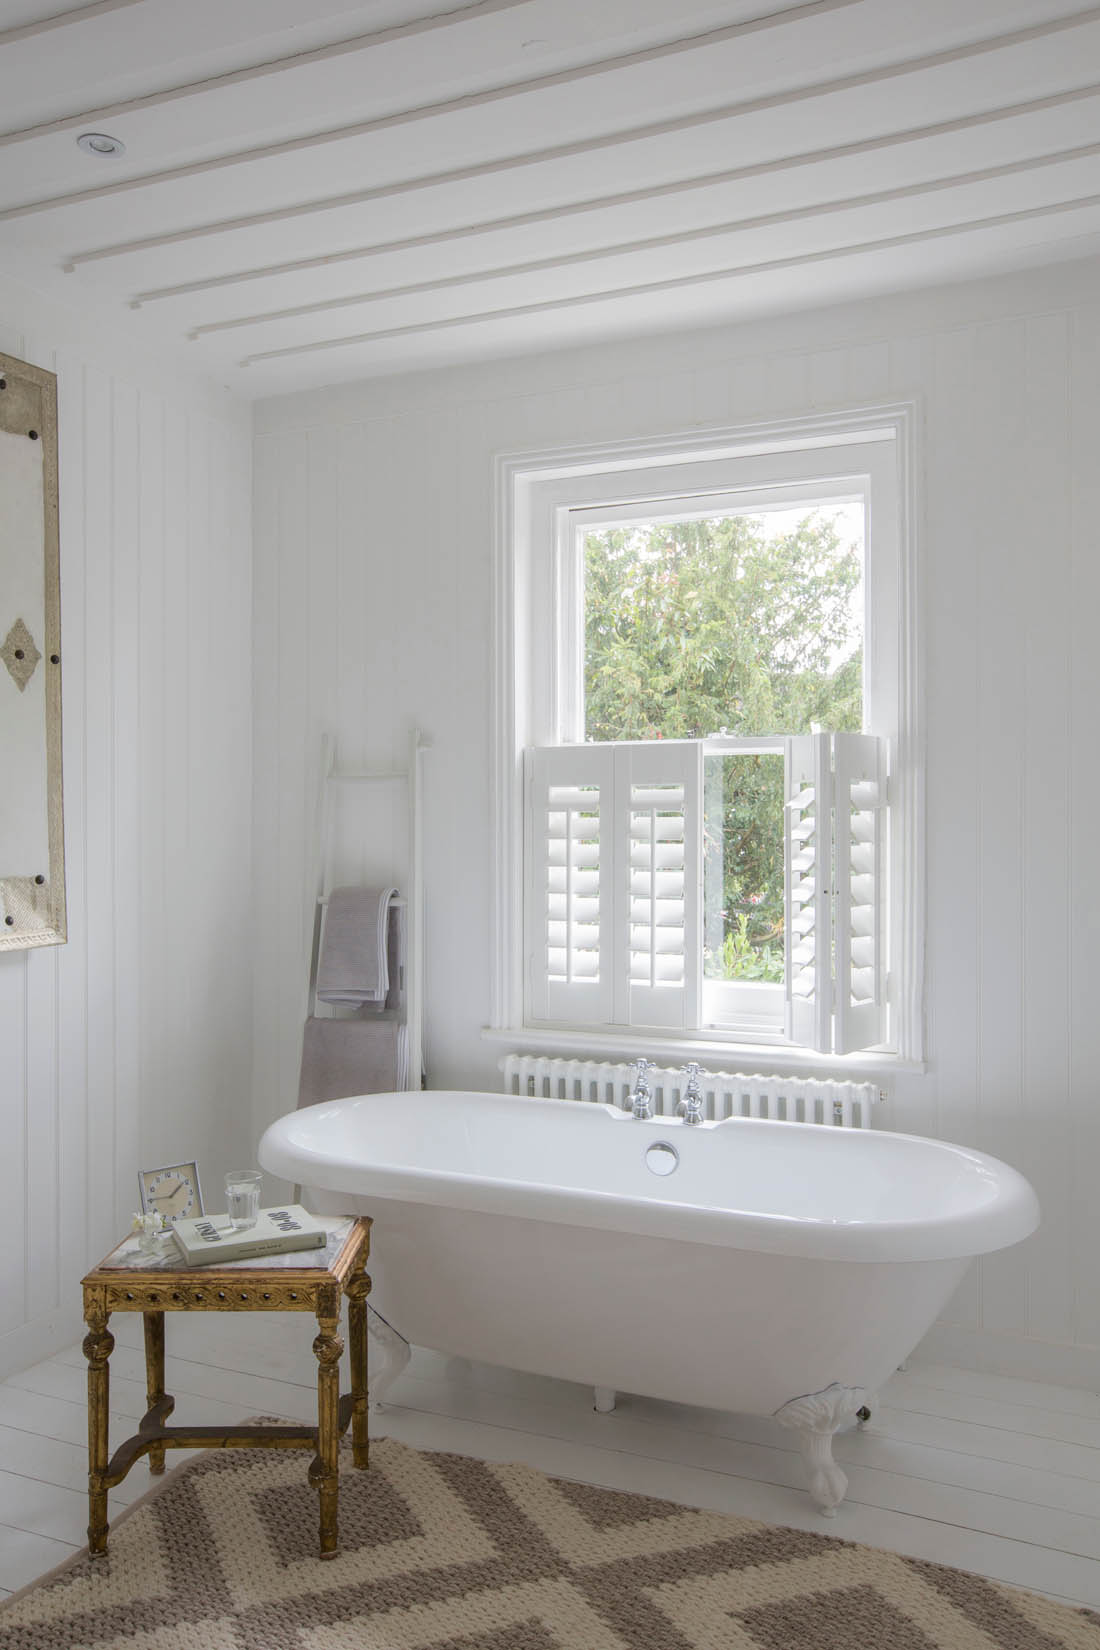
This cafe-style shutter on a bathroom window is the perfect solution to achieving privacy yet not blocking out too much light.

Cafe-style shutters from Luxaflex | Apartment Apothecary

Luxaflex will provide a made to measure service from start to finish to help you figure out what will work best for your windows. If you do get shutters, please don’t rub it in my face!

By the way, Luxaflex are running a brilliant competition at the moment to win a trip to Milan (err, yes please!). All you have to do is snap something which says ‘interior style’ to you (it could be anything…a pattern, a small detail or a big interior design statement) and upload the picture to Instagram remembering to tag @luxaflexuk and use the #MyStyleEye hash tag. Alternatively, if you don’t use Instagram you can upload your pic here.

Katy x


*Written in collaboration with Luxaflex and all images from their website.

Liberty print pyjama trousers

I love the feeling of the coming of Spring and it is the best time to plan new projects. I have a few sewing projects that I would like to get going on once my flat is back to normal (is it just me or is anybody else unable to start something new when the house is in disarray?). In the meantime I thought it would be nice to share the perfect Spring pyjama trousers tutorial that I made for a magazine last year. The template for the PJ’s can be found in The Liberty Book of Simple Sewing (p.118) and I hope my photos of each step will help sewing the pattern together easier. Aren’t these prints so pretty and Spring-like?

You will need

Two trouser leg pieces (one in reverse) – I used Betsy S Tana Lawn

Two cuff pieces in a contrasting fabric – I used Phoebe H Tana Lawn

One waistband piece in contrasting fabric

2cm width elastic for waistband (length will depend on size of child) and large safety pin

Fabric scissors, pins, hand sewing needle and matching thread.

N.B. All seam allowances are 1cm / You can tack the pieces of fabric together at every stage before you machine stitch / I followed the pattern in the Liberty book of sewing for a 7-8 yr old.

Liberty print pyjamas tutorial |Liberty Book of Sewing | Apartment Apothecary

Step by step

Step 1 – To make the leg, press a 1cm hem on the bottom edge of the cuff piece. Pin the top edge of the cuff to the bottom edge of the leg piece, right sides facing.

Liberty print pyjamas tutorial |Liberty Book of Sewing | Apartment Apothecary

Step 2 – Stitch the cuff to the leg piece and press the the seam allowance over the cuff.

Liberty print pyjamas tutorial |Liberty Book of Sewing | Apartment Apothecary

Step 3 – Fold the leg in half lengthways, right sides facing, and pin together up to the crotch.

 Step 4 – Stitch the leg piece together.

Step 5 – Press open the cuff seam.

Liberty print pyjamas tutorial |Liberty Book of Sewing | Apartment Apothecary

Step 6 – Overlock or zig zag stitch the seam allowance of the leg piece.

Liberty print pyjamas tutorial |Liberty Book of Sewing | Apartment Apothecary

Step 7 – Turn the cuff up in half so that the hemmed edge meets the seam line. Pin and then stitch about 3mm from the top of the cuff.

Liberty print pyjamas tutorial |Liberty Book of Sewing | Apartment Apothecary

Complete steps 1 – 8 for the second leg.

 Step 8 – To sew the legs together, pin the two trouser legs together where the two inside leg seams meet, with the right sides facing. Pin the front and back seams together and then stitch. Overlock or zig zag stitch the seam allowances.

Liberty print pyjamas tutorial |Liberty Book of Sewing | Apartment Apothecary

Step 9 – Turn the trousers right sides out and to add the waistband, press a 1cm hem on each end and over the top edge of the waistband (checking that it fits around the waist of the trousers – adjust the hem at either end accordingly).

Liberty print pyjamas tutorial |Liberty Book of Sewing | Apartment Apothecary

Step 10 – With right sides facing, match up the raw edges of the waistband and the waist of the trousers. Pin the waistband in place and stitch together.

Liberty print pyjamas tutorial |Liberty Book of Sewing | Apartment Apothecary

Step 11 – Turn the waistband inside the waist so that it covers the raw edges of the seam allowance. Pin in place and stitch around the waistband as close to the seam as possible.

Liberty print pyjamas tutorial |Liberty Book of Sewing | Apartment Apothecary

Step 12 – Measure the waist size of your child and mark this on the elastic. Attach a large safety pin to one end of the elastic and thread this through the waistband until it comes out the other side. Find the mark you made and sew the two ends of the elastic together at this mark very securely. Push the elastic back into the waistband and slip stitch the opening closed. You can add a bow if you desire.

Liberty print pyjamas tutorial |Liberty Book of Sewing | Apartment Apothecary

All done! This little pair of PJ’s went to the lovely Ella x

Liberty print pyjamas tutorial |Liberty Book of Sewing | Apartment Apothecary

What’s next on your sewing list?

Katy x


Spring/Summer styling with B&Q

Massive DIY shed and stylish homewares shouldn’t really be found together in the same sentence, should they? However, one of the things I love most about styling for different brands is being able to pluck products from store shelves you might have walked by otherwise and making them shine.

B&Q have just launched their new SS/16 décor collection as part of their ‘Let’s Decorate’ campaign. I go to B&Q ALL the time as it is just a few minutes from our house and as you know I am a DIY enthusiast. I have to admit, however, that I am usually more focused on buying screws, wood and plants (it is great for plants) than making a foray into the homewares section. So, when they got in touch to ask me to style some products from their new homewares collection I was intrigued. When I had a look online I was pleasantly surprised and when I saw them in real life I was delighted! Inexpensive, on-trend and extremely high quality.

Therefore, I am very pleased to be able to show you three different looks from three of the new collections…

Summer Daze

The Summer Daze collection is inspired by Scandinavian style with soft greys, pastels and geometric designs. I immediately honed in on the ceramics collection and I nearly fell off my chair when I realised how little they cost (these bottles!) – and they are so lovely. I teamed these with a taller ceramic bottle and candle filled pot. I then chose some Scandi-style wallpaper from the collection to offset the whites and styled them up on my String shelves. I love this soft, calm look.

SS/16 styling with B&Q | Summer Daze collection | Ceramics and wallpaper | String shelving | Scandi style | Apartment Apothecary

Meadow

The Meadow collection captures the essence of Spring by bringing the outdoors in. Inspired by the name of the collection I wanted to gather lots of bottles filled with pretty flowers that can make a beautiful table decoration. I also chose a mauve cushion, which is a colour that always makes me think of Spring flowers.

SS/16 styling with B&Q | Meadow | Flowers in vintage bottles | Apartment Apothecary

Meadow collection

Kasbah

The third look is called Kasbah, which is a nomadic-inspired collection, featuring lots of textured cushions and patterned throws perfect for layering and adding an eclectic feel to your home. I am currently waiting for my new sofa and it is running very late (grrr!) so we have been sitting on the floor a lot recently! Therefore, floor seating seemed like the obvious way to style these gorgeous textiles (I’ve also got my eye on this amazing pouf). The rug is wonderful quality and could fit with any type of interior style and I love the way it picks out the black from the patterned cushions. The coral highlights of the throw and cushion (online they are described as red but with the white flecks they are definitely more coral) set off the look perfectly. I just added mint tea…

Which is your favourite of the three looks?

I hope this has given you a bit of inspiration for any changes you might want to make to your home as we head towards the brighter, warmer days of Spring and Summer. You can find more from all four collections over on my ‘SS/16 Styling with B&Q’ Pinterest board here.

Katy x


*This post was written in collaboration with B&Q

DIY leather kitchen door handles

I’m pretty sure this is the BEST thing I have ever made. I’m super proud of these handles because they look good, they are inexpensive, they are very useful AND they are made from bookmarks, yes bookmarks!

I’ve hated the handles on my kitchen cabinets since I moved in six years ago (you can see them here) but because they are so long I didn’t know what to do about the fact that they would leave two holes – how would I fill one of them in? Well, turns out that the hole is much smaller than I thought it would be and a squeeze of sealant later and you really can’t see it – hurrah! So that left me with a better problem of what handles to replace them with. I sold the old solid steel handles on eBay for £40 and I started looking around and realised that nice handles are pretty expensive. I decided to challenge myself to make myself new door handles for less than I sold the old ones for.

The wonderful Katharine Peachey bought some rather lovely leather handles for her kitchen that I instantly fell in love with – total swoonage!

DIY leather kitchen door handle tutorial | Home of Katharine Peachey | Photo by katharinepeachey.co.uk | Apartment Apothecary

Katharine’s kitchen, photographed by her.

I had a look online and each handle cost between £10 and £20 and I have 18 cupboard doors – you do the maths (ok, I will, a set would cost me between £180 and £360 – wowzers). So I started searching for leather online instead and hatched a plan to make my own.

You will need

Leather – I bought these pre-cut bookmarks from The Identity Store £16.50 for a pack of 10. You can oil or stain them if you like.

Cup square bolts – I bought these from B&Q £3.57 for 10

Sharpened screwdriver – I used a 6mm one as it has to be the same width as the square bolt (the little square on the back of the round head of the bolt). To sharpen it I used a diamond stone. Alternatively you can use a chisel.

Hammer

Hacksaw

Pen

Tape measure

Leather wax or even shoe polish (I already had some)

Optional – Stanley knife blades or a sharp craft knife (I already had this but you can also use sand paper for this

Offcut of wood to work on

TOTAL for 20 handles: £40.14  (14p over budget!)

DIY leather door handles for kitchen cabinets | Tutorial | Apartment Apothecary

Step by step

To make 8.5cm long handles.

1. Wax or ‘feed’ the leather strips so that they don’t crack.

2. Measure and mark 5cm from the tip of the rounded edge.

DIY leather door handles for kitchen cabinets | Tutorial | Apartment Apothecary

3. Score this mark with a craft knife – I used a stanley knife blade as that was all that I had. Note the plaster on my thumb by the end of the tutorial 😉

DIY leather door handles for kitchen cabinets | Tutorial | Apartment Apothecary

4. Use the knife/blade to shave off the bulk of the leather from the suede side. You don’t have to do this but it helps the handle lie as flat as possible on the door.

DIY leather door handles for kitchen cabinets | Tutorial | Apartment Apothecary

5. Mark the three points where the bolt will pass through the handle. To make a 8.5cm long handle from a 22cm long piece of leather your three marks will be 165mm, 175mm and 275mm from the straight top edge.

DIY leather door handles for kitchen cabinets | Tutorial | Apartment Apothecary

6. Sharpen the 6mm screwdriver on a diamond stone or whet stone and place the leather on a wooden offcut. Cut out a 6mm square with your mark in the middle of the square. Use the hammer to force the screwdriver through the leather.

DIY leather door handles for kitchen cabinets | Tutorial | Apartment Apothecary

DIY leather door handles for kitchen cabinets | Tutorial | Apartment Apothecary

DIY leather door handles for kitchen cabinets | Tutorial | Apartment Apothecary

7. Use the hacksaw to cut the bolt to the right length to go through your kitchen cabinet door (or wardrobe/drawers) making sure that there is enough length to screw on a washer and the nut.

DIY leather door handles for kitchen cabinets | Tutorial | Apartment Apothecary

8. Fold the leather over so that the scored mark is at the top and the curved end folds over the back and all three holes line up.I didn’t want my handles to be folded in half as I wanted a smooth top edge instead of raw leather.

DIY leather door handles for kitchen cabinets | Tutorial | Apartment Apothecary

9. Screw the bolt through all three holes.

DIY leather door handles for kitchen cabinets | Tutorial | Apartment Apothecary

10. Pass the bolt through the door and use a spanner or socket set to screw on the washer and nut as tightly as possible so that the handle can’t spin.

DIY leather door handles for kitchen cabinets | Tutorial | Apartment Apothecary

And there you have my new DIY leather door handles and a glimpse of my ‘new’ kitchen. Over time the handles should age and take on a lovely patina to the leather.

DIY leather door handles for kitchen cabinets | Tutorial | Apartment Apothecary

They work really well as they are large enough to get your fingers through the loop or you can pull the whole thing to open the cupboards.

DIY leather door handles for kitchen cabinets | Tutorial | Apartment Apothecary

Love them! What do you think?

Katy x


Shades of Grey by Kate Watson-Smyth

A while ago I decided to join the craze for grey and painted my hallway in Little Greene’s French Grey Mid. The only problem was that it was brown in my flat – massive error. I just wish I had had the insight of journalist and blogger Kate Watson-Smyth at the time and her brilliant new book, Shades of Grey.

I’m thrilled to be the second stop on Kate’s book blog tour because I fell in love with her style and AH-MAZING home a while ago so I knew her book would be filled with brilliant advice, inspiring images and Kate’s witty writing style is the cherry on the top. I particularly enjoyed the practical advice in the book, which makes it a really useful design resource: which shade to choose, advice on paint finishes, what works well with grey.

Here are a few of my favourite interiors and pieces of advice from the book to give you a quick sneak peek…

Shades of Grey by Kate Watson-Smyth  | Interior design advice | How to use grey paint in your home | Book review by Apartment Apothecary

Shades of Grey by Kate Watson-Smyth, published by Ryland Peters & Small, all photography © Ryland Peters & Small p.42

I have always wanted to find a pale neutral grey like the colour in the bedroom above. There is in depth advice in the book about specific paint colours, which is always useful.

Shades of Grey by Kate Watson-Smyth  | Interior design advice | How to use grey paint in your home | Book review by Apartment Apothecary

Shades of Grey by Kate Watson-Smyth, published by Ryland Peters & Small, all photography © Ryland Peters & Small p.106

Kate advises using a very dark grey, similar to the image above, to give small objects or pieces of art great impact – isn’t that bedroom beautiful?

Shades of Grey by Kate Watson-Smyth  | Interior design advice | How to use grey paint in your home | Book review by Apartment Apothecary

Shades of Grey by Kate Watson-Smyth, published by Ryland Peters & Small, all photography © Ryland Peters & Small p.96

There are also ideas in the book for different ways to use grey, whether it be painting  kitchen cabinets or pieces of furniture. I love the kitchen above and the way grey has been used to give greater impact to the shelving.

Shades of Grey by Kate Watson-Smyth  | Interior design advice | How to use grey paint in your home | Book review by Apartment Apothecary

Shades of Grey by Kate Watson-Smyth, published by Ryland Peters & Small, all photography © Ryland Peters & Small p.160

My current favourite combination of dusky pink and grey works perfectly in the bedroom above. I really like the idea of painting half the wall, too.

Shades of Grey by Kate Watson-Smyth  | Interior design advice | How to use grey paint in your home | Book review by Apartment Apothecary

Shades of Grey by Kate Watson-Smyth, published by Ryland Peters & Small, all photography © Ryland Peters & Small p.46

Kate also explores how grey can be use in modern settings as well as more traditional rural settings like the dining hall above.

Shades of Grey by Kate Watson-Smyth  | Interior design advice | How to use grey paint in your home | Book review by Apartment Apothecary

Shades of Grey by Kate Watson-Smyth, published by Ryland Peters & Small, all photography © Ryland Peters & Small

As the grey bandwagon looks set to continue rolling for a long while if you would like to use it in your home, this is the book for you.

Katy x