Design Sponge feature

Eeeeek! I am absolutely delighted to tell you that my little London home has been featured on Design Sponge this week. This was the first blog that I discovered about three years ago and was one of the main inspirations behind starting my own blog a year later. It seemed beyond the realm of possibilities at that time to have my own home featured but if there’s one thing I have learnt on this blogging journey is that you can make so much happen if you are open to it and put the work in.

I would love for you to pop over and have a look as Katharine Peachey has taken such beautiful photos of my home that are so rich in colour and capture the light in my flat so well. Here are a few of my favourite photographs from the shoot…

Design Sponge feature photographed by katharinepeachey.co.uk | Apartment Apothecary

Design Sponge feature photographed by katharinepeachey.co.uk | Apartment Apothecary

Design Sponge feature photographed by katharinepeachey.co.uk | Apartment Apothecary

Find the full feature here and I really hope you like it!

Katy x


Bedroom makeover

Another season, another room makeover! This time I wanted to tackle my bedroom but it’s not so much a makeover, as more of a spruce up and de-clutter. To me, my bedroom was feeling heavy, dark and full of stuff and it was the last room in our flat that I would want to spend time in so it was time to rip up the carpet and get out my trusty Farrow and Ball floor paint. Here are the changes I made:

1. Painted the MDF boards under the carpet with Farrow and Ball All White floor paint (find out how I did it here). I also used Farrow and Ball’s wood floor primer and undercoat, which makes all the big difference to the quality of the finish and how long it will last.

2. Gorgeous new Lazy Linen bundle and a dusty pink linen Scrunch cushion from Loaf.

3. Hung a beautiful brass Bloomingville hanging flower pot holder from Out There Interiors, inspired by Urban Jungle Bloggers.

4. New bedside lamp from Occa-Home.

5. Painted the wardrobes white.

6. De-cluttered the top of the wardrobes as they had become a storage dumping ground and moved more plants up there.

7. New jute rug from Heal’s.

8. Completely cleared my dressing table and all the pictures around it, which feels soooo much better.

9. Sheep skin rug and House Doctor vase from Holly’s House.

10. House Doctor jug vase and Bloomingville pink vase from Royal Design.


I know it’s not a radical makeover in the same way as my office or hallway, but this room now feels so much better, which is the most important thing. I know it may look very bare to some, but I love the simplicity of having so few things in this room, especially as it is where we sleep. Over time, I will add more artwork and I’m sure other bits and bobs will creep back in and there are still a few things I need like a lamp shade for the main overhead light. For now, I’m really enjoying how bright and uplifting it feels, especially with all this sun that has been streaming in and bouncing around the new white floor (my favourite thing about the room!). I hope you like it.

Katy x

P.S. You can buy a lot of the lovely items I have chosen for my bedroom right here…

*This post was written in collaboration with Farrow and Ball.

Fabric buckets tutorial

This was such an enjoyable sewing project to do for Love Sewing magazine and I’m really pleased to be able to share it here with you today. These fabric buckets are quick and easy to make and useful for all sorts of purposes whether in the craft room, as plant pot covers, in the nursery or bathroom.

How to make fabric buckets for storing craft materials, toys or stationery | Simple sewing project | Hand printing fabric tutorial | Apartment Apothecary

You will need:

Two pieces of calico for outside of bag 40 (h) x 30 (w) cm (I bought unbleached calico from Homecrafts)

Two pieces of heavy weight interfacing 40 (h) x 30 (w) cm

Two pieces of lining fabric 40 (h) x 30 (w) cm – I used Koi Cloud fabrics, Smile and Wave print

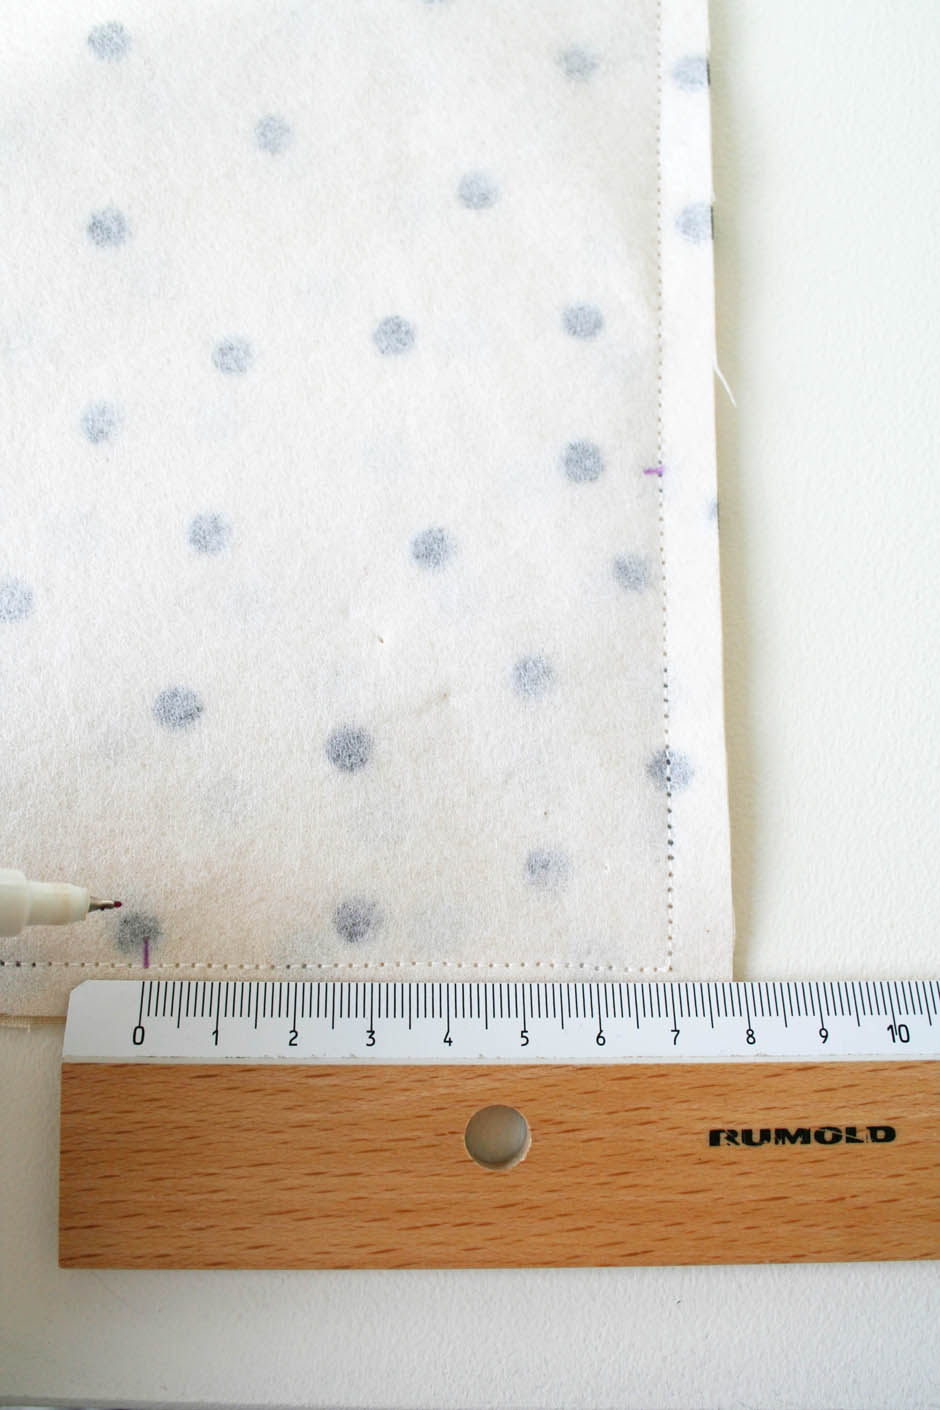
Ruler and fabric pen or chalk to make and mark boxed corners

Tape measure and scissors to cut pattern

Black fabric paint and pencil with round eraser tip to print calico (I used Dylon black fabric paint)

Plastic sheet to protect table whilst printing calico

All seam allowances are 1cm.

Dimensions for the other sized fabric buckets:

Finished large bucket (pictured filled with wrapping paper) 40 x 35 cm – use 50 x 38 cm pieces of fabric and interfacing. Measure the boxed corners 10cm from corner.

Finished small bucket (pictured filled with embroidery flosses) 28 x 22 cm – use 34 x 26 cm pieces of fabric and interfacing. Measure the boxed corners 6cm from corner.

Finished extra small bucket (pictured filled with paint brushes) 16 x 14 cm – use 24 x 18 cm pieces of fabric and interfacing. Measure the boxed corners 4cm from corner. The gap in the lining should only be 7cm.

Tutorial:

How to make fabric buckets for storing craft materials, toys or stationery | Simple sewing project | Hand printing fabric tutorial | Apartment Apothecary

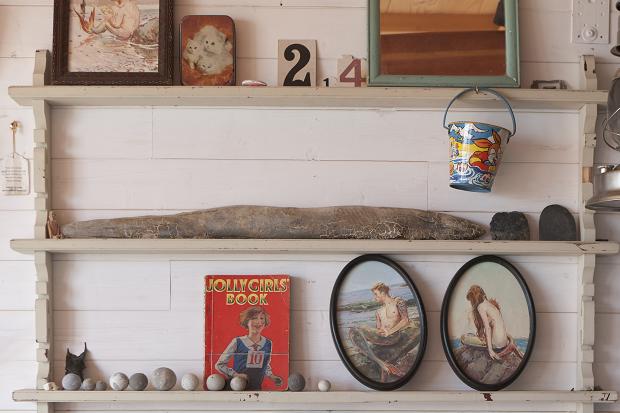
N.B. Instructions are for the medium 32 (h) x 26 (w) cm fabric bucket (pictured filled with balls of string).

Step 1 -Personalise the calico by hand printing polka dots using the eraser tip of a pencil. Protect your table with plastic sheeting (or use a bin liner). Dip the eraser into the paint and print onto fabric, making sure you press firmly and that all of the eraser comes into contact with the fabric. Print polka dots – no pattern is necessary, just random spots look great. Follow the instructions on your paint to fix the colour. This really is as easy as it looks!

How to make fabric buckets for storing craft materials, toys or stationery | Simple sewing project | Hand printing fabric tutorial | Apartment Apothecary

Step 2 – Attach the interfacing to the calico pieces by following the manufacturer’s instructions. I used iron-on heavy weight interfacing to make it as rigid as possible so the bucket will stand on it’s own.

Step 3 – Place the the two calico outer pieces right sides together and sew the two sides (40cm) and bottom (30cm).

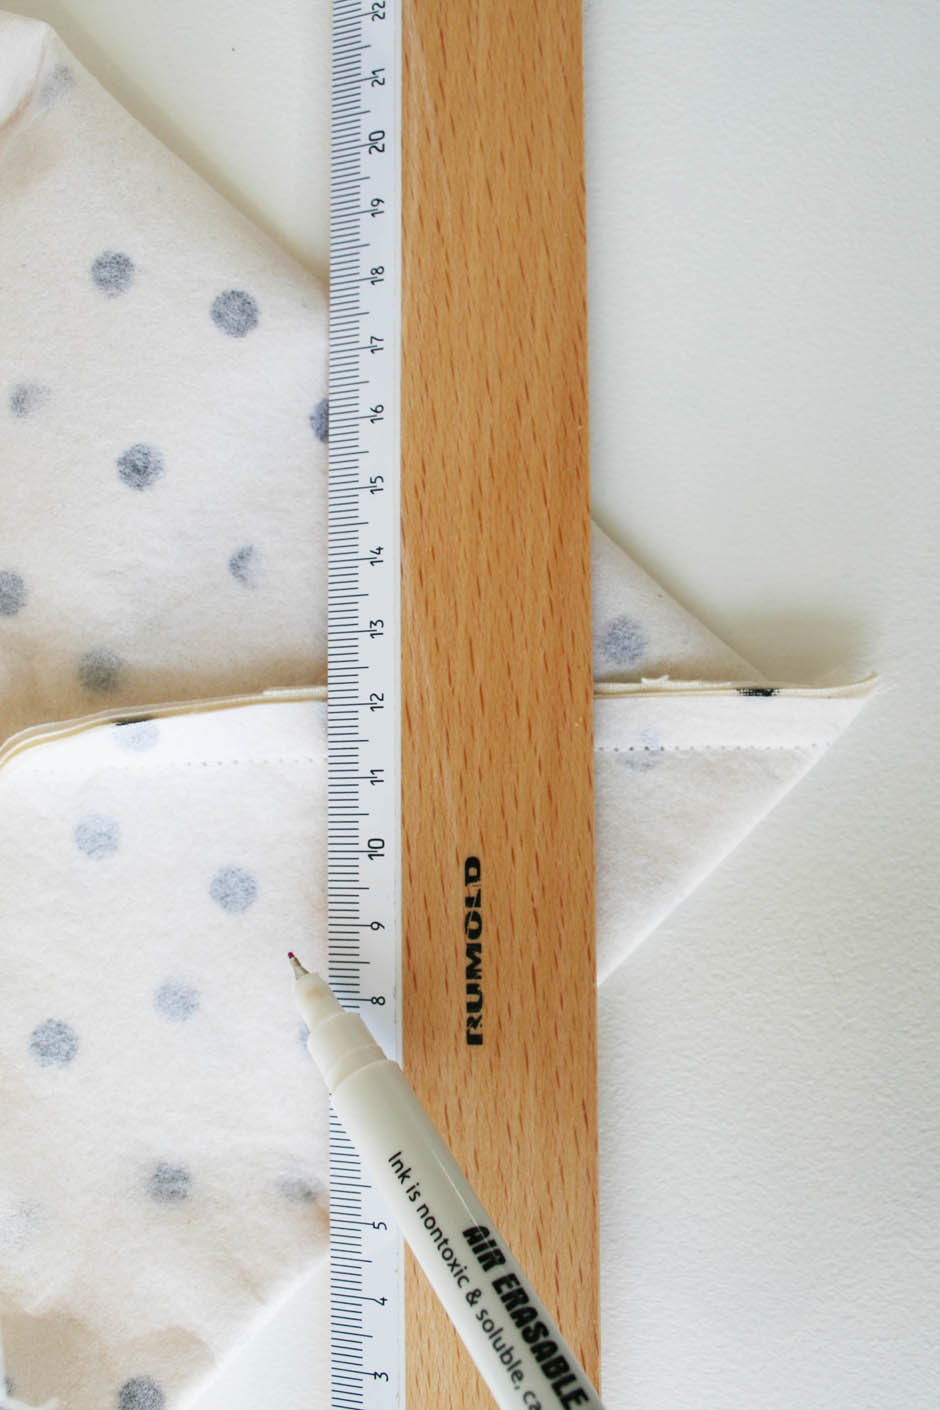
Step 4a – Make boxed corners. Measure 7cm from the corner seam (don’t measure from the edge of the fabric) in both directions.

Step 4b -Pull out the sides of the bucket and line the marks up.

Step 4c – Draw a line across the corner and sew along the line (I do a double row of stitching to strengthen).

Step 4d – Cut off corner and repeat on the other side of the bucket. Press seams out and turn the bucket right sides out.

How to make fabric buckets for storing craft materials, toys or stationery | Simple sewing project | Hand printing fabric tutorial | Apartment Apothecary

Step 5 – Place the two pieces of lining fabric right sides together and sew the two sides (40cm) and bottom (30cm), but this time leave a 10cm gap in the middle of the bottom pieces.

How to make fabric buckets for storing craft materials, toys or stationery | Simple sewing project | Hand printing fabric tutorial | Apartment Apothecary

Step 6 – Make boxed corners by repeating step 4. Press seams out but don’t turn the lining rights sides out.

Step 7 – Place the calico outer inside the lining i.e. the right side of the calico outer should be next to the right side of the lining. Make sure you line up the seams and boxed corners. You also need to line up the top edges of the lining and the calico bucket.

How to make fabric buckets for storing craft materials, toys or stationery | Simple sewing project | Hand printing fabric tutorial | Apartment Apothecary

Step 8 – Sew the top edges of the lining and the outer bucket. Cut away any seam allowance.

How to make fabric buckets for storing craft materials, toys or stationery | Simple sewing project | Hand printing fabric tutorial | Apartment Apothecary

Step 9 -Gently pull the outer bucket through the 10cm gap in the lining.

How to make fabric buckets for storing craft materials, toys or stationery | Simple sewing project | Hand printing fabric tutorial | Apartment Apothecary

Step 10 -Top stitch the 10 cm gap closed.

How to make fabric buckets for storing craft materials, toys or stationery | Simple sewing project | Hand printing fabric tutorial | Apartment Apothecary

Step 11 – Press the top edge of the bucket and topstitch all the way round. Turn over as much or as little of the top of the bucket as you want to and the buckets are fully reversible if you fancy a change.

How to make fabric buckets for storing craft materials, toys or stationery | Simple sewing project | Hand printing fabric tutorial | Apartment Apothecary

How to make fabric buckets for storing craft materials, toys or stationery | Simple sewing project | Hand printing fabric tutorial | Apartment Apothecary

How to make fabric buckets for storing craft materials, toys or stationery | Simple sewing project | Hand printing fabric tutorial | Apartment Apothecary

How to make fabric buckets for storing craft materials, toys or stationery | Simple sewing project | Hand printing fabric tutorial | Apartment Apothecary

If you do make them I’d love to see a pic! I’m definitely going to do more fabric printing – it’s quite addictive once you start.

Katy x


Vintage beach hut

I have a new obsession. I am DESPERATE for my own beach hut so I can decorate it and then laze around in and around it for weeks on end every summer. Bliss.

We went to Southwold beach last week for a fleeting visit on our way home from a forest cabin break in Norfolk. Southwold is so traditionally English and has such a sweet, unspoilt promenade and beach front lined with colourful beach huts. As we walked down the promenade I have to be honest that I was far more interested in subtly glancing into every hut that we passed to check out the decor! I began imagining what my dream hut would look like inside, outside and what it would be called.

When I came home I did a quick google and there are surprisingly few images of beach hut interiors. That was until I came across the dreamiest, vintage interior of a hut belonging to artists Claire Fletcher and Peter Quinnell that is located in St. Leonard’s.  Oh. My. Word.

Photographs taken by: Jake Fitzjones

Vintage beach hut www.apartmentapothecary.com

Vintage beach hut www.apartmentapothecary.com

Vintage beach hut www.apartmentapothecary.com

Vintage beach hut www.apartmentapothecary.com

Vintage beach hut www.apartmentapothecary.com

I’m in love. I need this in my life.

Katy x


Weekend inspiration – at{mine}

The main reason I love blogging comes down to the fact that I love looking in other people’s homes. Just love it.

I’m always the one peering through front windows, asking for a tour of the house when I go to a new friend’s home, knocking on neighbours’ doors hoping to get a glimpse of their interior. When I’m feeling really brave I even admit to the fact that my guilty pleasure is perusing Rightmove, just to check out the decor (don’t judge me!) and house hunting was a dream come true for me. There is something so much more alluring and interesting about real homes compared to glossy magazine homes.

So, when my lovely friend, Sarah-Lou, suggested I join at{mine}, an online community for home and design lovers to share their real homes, I was a little hesitant, fearful it would be another site that would sap my time; this might be the point at which my interest tips over into obsession. However, I took the risk, have loved getting to know fellow founder members’ homes and have even joined forces with the lovely Ia and Helena, the partnership behind at{mine}, on our most recent Styling the Seasons event. There’s even a Styling the Seasons category on the site now, which makes my heart sing!

Until now at{mine} has been beta members only but very excitingly it will be launched to the public next week. I have a special invitation code if you would like to become a member and share pictures of your own home (expect me to stalk it!) so you can sign up HERE using the code StylingSpringAtMine.

You can find me and pictures of my home at{Katy Orme} and I will see you at{yours}!

at{mine} launch | Apartment Apothecary

Happy weekend everyone. Funnily enough, I’m off to tour some real homes today (no, seriously).

Katy x

P.S. Real homes have dogs on the bed, right?!

Otto captured by katharinepeachey.co.uk | Apartment Apothecary

Beautiful capture of Otto by Katharine Peachey.