Reasons to stay in bed

I have spent the last eleven years doing a job that required me to be at my desk by 8.30am at the absolute latest, which often meant I was up at 6am and out of the door by 7am. To me, my bed was for sleeping, not for enjoying, as  I just never got the chance. Yes, there were the weekends, but I was so strung out by that point I was never, ever able to sleep-in or relax.

Since leaving my teaching job, I have reclaimed the mornings as my own. I never set an alarm (I can feel the daggers from my ex-collegaues as I type this!) and I spend at least an hour in bed every morning checking social media and browsing other blogs, drinking tea. My bed has become a place to relax for the first time. Therefore, I have made some changes to my bedroom to make it more conducive to relaxation, rather than somewhere I hurriedly put my clothes on, whilst scrabbling in the dark to make sure I can leave the house by 7am and not wake Jules.

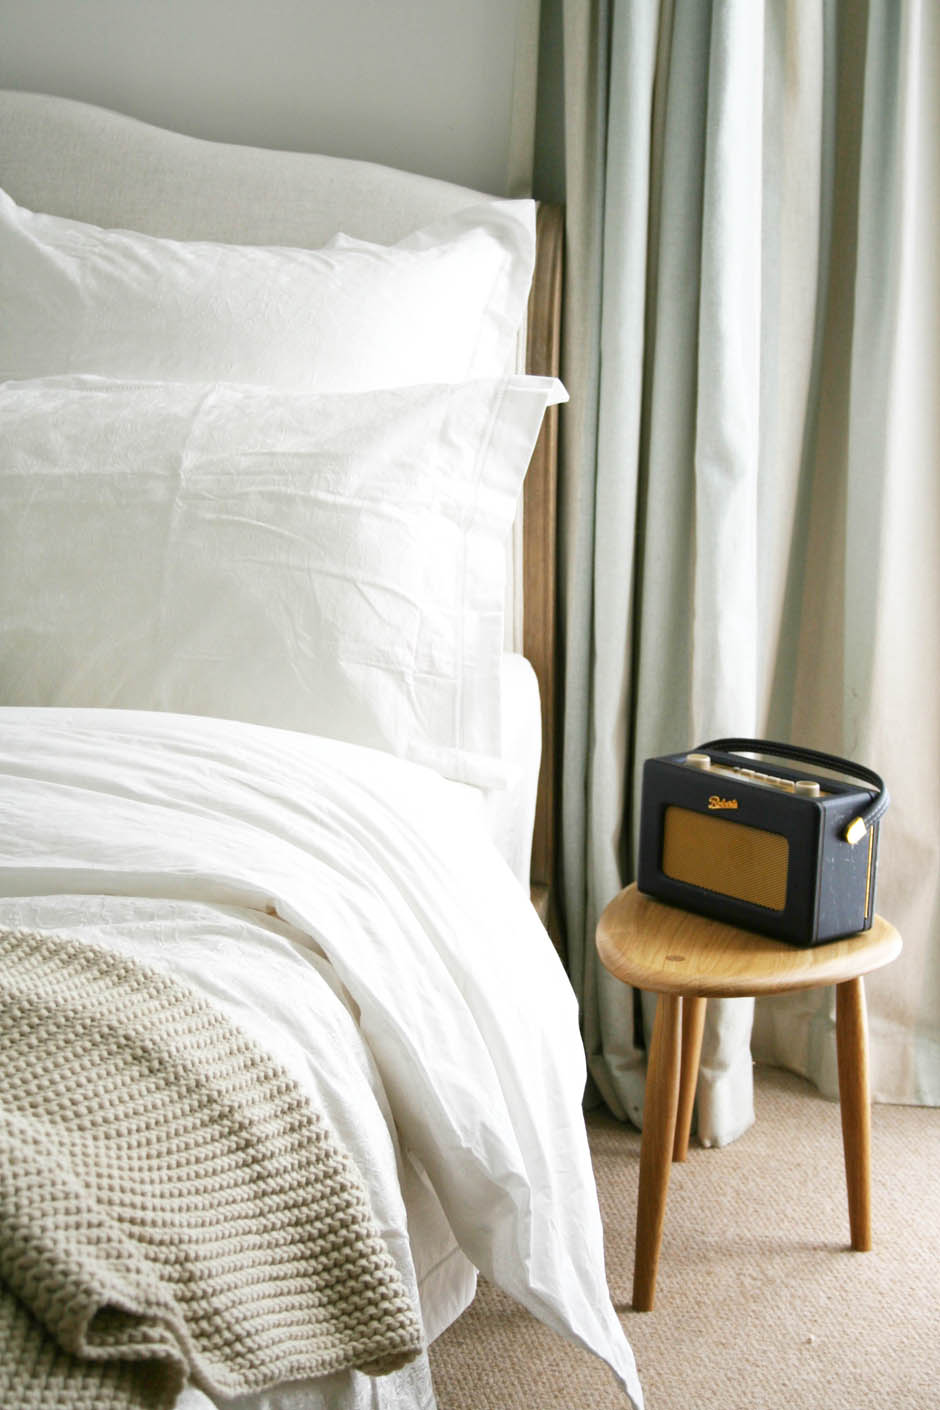
First and foremost, I have beautiful new bedlinen from Christy. For anyone, wanting to make one change to their room to help lift it, I would always, always advise a new set of bedlinen. But it has to be good bedlinen; it is one of those things that I would never scrimp on. Pure, crisp cotton, soft pillows and a scrumptious duvet. This new set is called Chantilly I always go for white bedlinen as it’s fresh and light and you can add colour with a throw and cushions if you want to, so it’s very easy to change your scheme without having to buy more. The delicate embroidery is so pretty, but subtle enough not to alienate Jules. This week I went to bed an hour early to enjoy it (and I may have had an afternoon nap or two!).

Bedroom updates | Apartment Apothecary

Bedroom updates | Apartment Apothecary

I have added this soft, snuggly Oslo blanket, also by Christy. Extra layers, especially at this time of year, add a feeling of cosiness and comfort that make the mornings so much more enjoyable. I also now take this blanket around the house with me when it’s cold – it’s on my lap whilst I work and I have it on the sofa in the evenings. It really is the cosiest blanket I have ever owned. Cushions and the large large square pillows are a must for sitting up in bed, too.

Bedroom updates | Apartment Apothecary

The radio is my new best friend. As soon as I wake I switch it on so I can catch up on the news and I love the dulcet tones of Radio 4 in the morning – yes, I did just say that, I must be 102 years old!

Bedroom updates | Apartment Apothecary

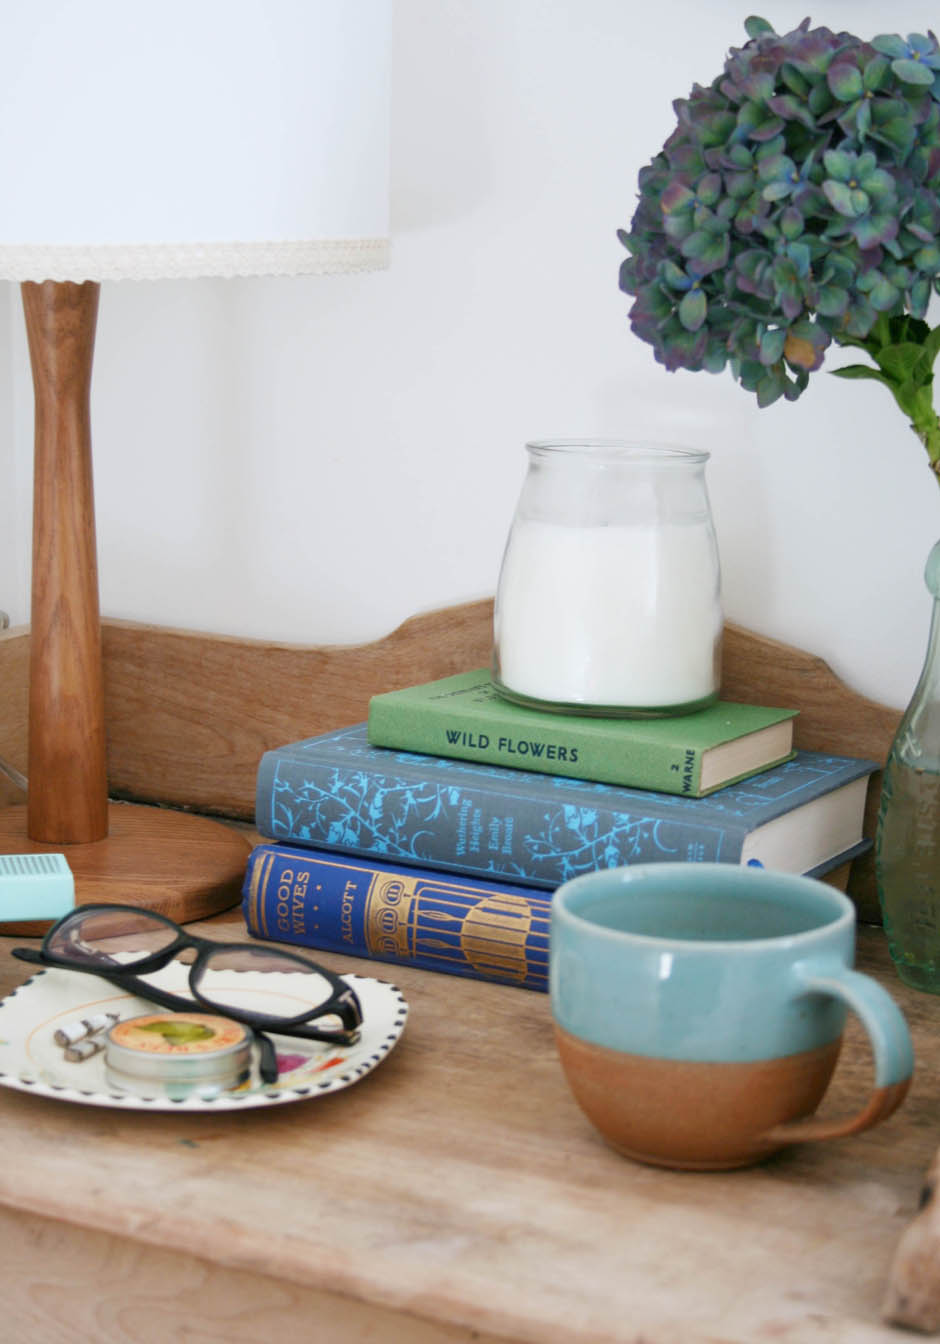
I’ve updated a plain lampshade with a length of lace tape, which took about two minutes but it now looks prettier and ties in perfectly with my new bedlinen. You MUST have a good bedside lamp – there is surely nothing worse than a blaring overhead light.

Bedroom updates | Apartment Apothecary

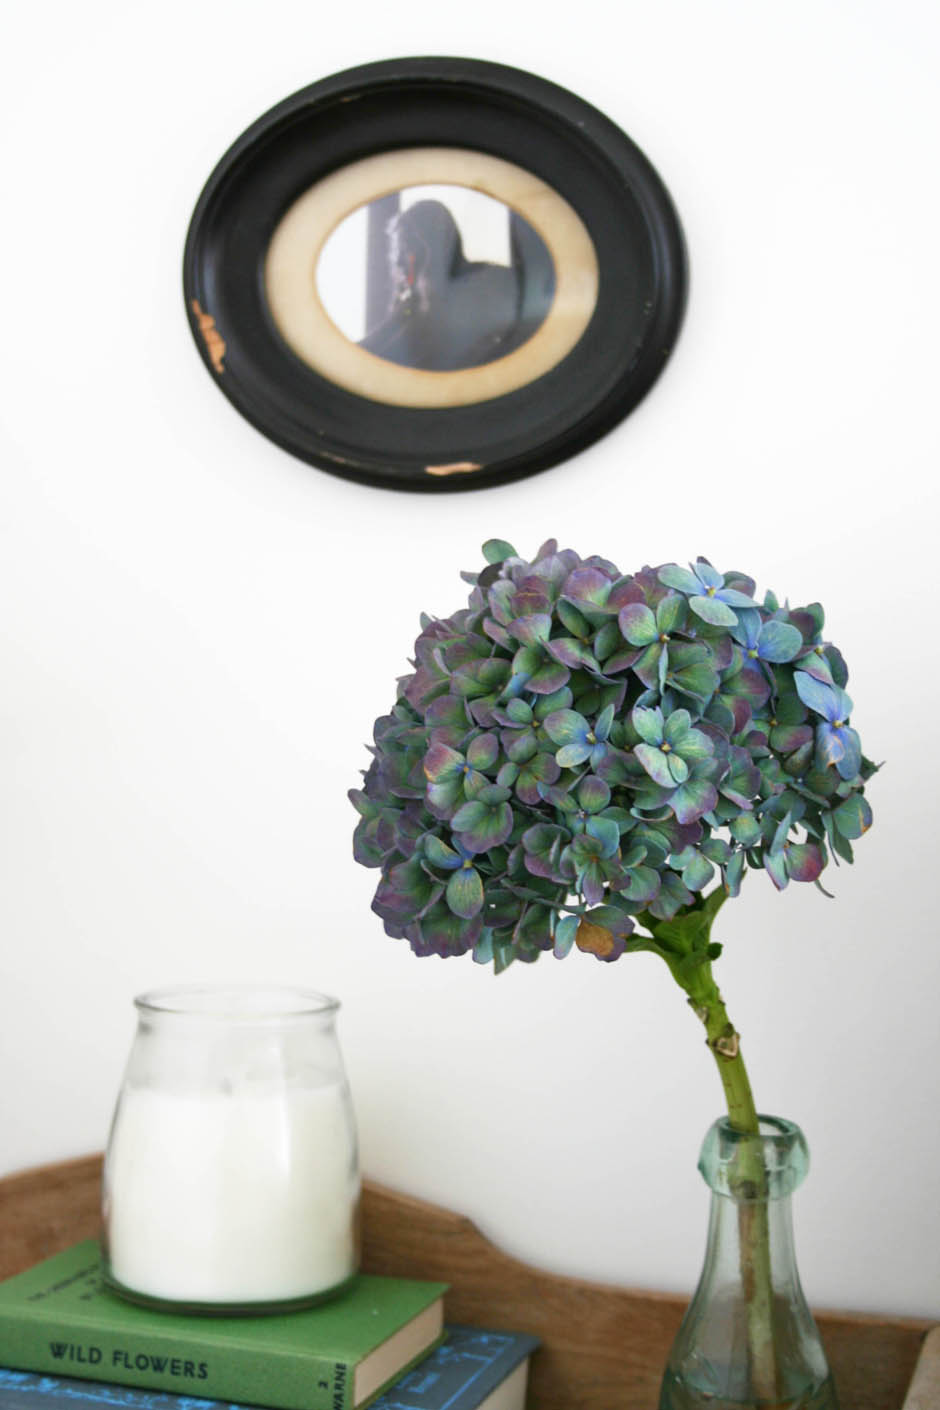
As you may have seen on this month’s Styling the Seasons post, I started updating my bedroom by styling my bedside table to make it cosier, including a candle and flowers. It is so heavenly lighting that candle in the morning as soon as I wake because it smells delicious and is very calming. Having flowers also makes the space that much more special although sadly the blue of this Hydrangea that has lasted for a month is now starting to fade.

Bedroom updates | Apartment Apothecary

Bedroom updates | Apartment Apothecary

So, those are my reasons for staying in bed, probably longer than I should. If you need me, you know where to find me!

Katy x

Disclosure: This post was written in collaboration with Christy but the views and opinions are my own.


Ask Apartment Apothecary – Instagram photo displays

Today’s AAA is for Lorna, who writes the lovely blog, Lorna Rachel. She wants to find different ways of displaying her Instagram photos. There are lots of DIY and crafty ways of displaying your IG shots, but Lorna wants something a bit smarter and more sophisticated; something with a bit more longevity. Here is what I have found…

1. Huge frame

I really love this idea. I used to make collages of my favourite photographs, which always grabbed lots of attention and encouraged lots of reminiscing. However, they don’t necessarily look particularly sophisticated. Having said that, the option below, with it’s clean lines and simple frame, looks brilliant.

2. Collection of individual frames

You can buy relatively cheap frames and mattes like the ones below. Add your Instagram shots and hang a few together and it very quickly becomes a design statement, with relatively little effort.

Ask Apartment Apothecary | Instagram displays

Image: @ilonajoy Instagram account

3. Enlarge prints

By enlarging your photos, when you get them printed, they become more like pieces of art. This display looks beautiful.

4. Collages

Choose a theme or a colour and frame similar Instagram shots together. You could even choose twelve photos to represent a year in your life.

5. Calendar

I know that photo calendars can be really cheesy but I think this one, which you could make really easily, would be a lovely thing to hang in your home – not tacky at all!

Ask Apartment Apothecary | Instagram displays

Image: Readwrite

Do you ever print out your photos or is it something you never get round to? I hope some of these ideas help, Lorna. I feel inspired to get some photos printed!

Don’t forget, if you have a design dilemma or interiors related question or problem, give me a shout and I will try to help you solve it. Either post the question on my facebook page, email me katy@18.200.196.112 or leave a comment below.

Katy x


Styling the Seasons – November

I’m actually a bit in shock that today is November. It seems like yesterday that I wrote my first Styling the Seasons post in September, which was the complete opposite to this month’s styled surface. If you haven’t joined in yet, but would like to challenge yourself to give styling a go (it can be much harder than it looks!) Charlotte has written such a brilliant post over at Lotts and Lots with some tips.

And so to this month. For me, November is all about hibernation, cosying down, watching far too much dreadful TV and enjoying the long evenings. I have chosen to style my bedside table as it is a surface I often ignore and it is much more functional than anything else. However, it is the last surface I see when I go to bed at night and the first I see when I wake up in the morning and since styling it I have really noticed a difference. I have tried to make it ‘cosier’ by adding more ‘stuff’, in a restrained way because I do hate clutter. November is all about warmth, tea, books, blankets and candles burning non-stop (I light them as soon as I wake up). I have tried to inject a bit of colour in to the styling as I always associate November with fireworks, and Bonfire Night is always something we celebrate as it is my sister’s birthday. Aqua and turquoise are my favourite colours so I went on a hunt around my house to collect a group of items of that colour.

Styling the Seasons - November | Apartment Apothecary

IMG_3329

I was given this blue Hydrangea three weeks ago for my birthday. I can not get over how beautiful it is and still is, weeks later.

IMG_3350

The lovely cup is from Decorator’s Notebook and the candle is from West Elm – Geranium and Ivy.

IMG_3378

I love this vintage Burleigh plate and the flowers remind me of fireworks, which is always a night we celebrate because it is my sister’s birthday. I’m also big into match boxes (I know that sounds weird) and when I saw these Hay matches I had to have them.

Styling the Seasons - November | Apartment Apothecary photographed by Katharine Peachey

Photograph by Katharine Peachey

What does November mean to you? Charlotte and I would love to know and see your styled surfaces. It is such a lovely thing to stop, reflect and re-style a surface in your home, clearing what was a dumping ground – I promise it will make you smile every time you walk by or sit and look at it so please do join in! Tag me and Lotts and Lots and use the hashtag #StylingTheSeasons – either write a blog post or post on Facebook, Instagram or Twitter.

Happy November styling everybody!

Katy x

P.S. Charlotte and I are particularly excited about this month as we have invited the bloggers that we reached out to in August to help us launch Styling the Seasons in September. They all did such wonderful blog posts about it, which encouraged so many others to get involved. To say thank you, we have organised a craft party at Liberty next week  so watch out for the photos of the lovely makes. These are the invites we sent out for the event. Charlotte suggested the books, which work perfectly as they are great props for styling and most are connected to nature and the seasons. I made the little tags and packed them all off…


October – A review

Another month has been and gone with such speed, which reminds me of one of the reasons Charlotte and I started Styling the Seasons. It’s a chance to stop for a moment, no matter how short, and reflect on the change of seasons around us and think about what the month means to us. It has been so wonderful to see all of your different interpretations of October but also the commonalities; I have so enjoyed seeing you collect leaves, pick pumpkins and decorate conkers. There has been so much beautiful nature in so many of your shots and blog posts and watching your children get involved has been really special too. Thanks to all of you who have posted a photo on Instagram, Twitter, Facebook or written a beautiful blog post. Charlotte and I spoke on the phone the other day and gushed about you all and how much you have inspired us! One of the nicest things this month has been ‘meeting’ new people who have shared their posts or shots, which was another reason for starting this blog series. We have discovered such stunning Instagram accounts and wonderful blogs and even a few of the wonderful images were featured on the gorgeous Folkings. Here are links to all the blog posts this month and search the #stylingtheseasons hashtag to see all of the images…

Littlegreenshed / Lapin Blu  / Hannah in the House / The Ordinary Lovely / The Villa at Mount Pleasant / Cate St. Hill / Freckled Fennell / Love Lemon / The Planned Adventure  / Growing Spaces / The Lovely Drawer / Diying To Make It / Made By Molu  / A Quiet Style / Really Pretty Useful / Papermash / Makelight / Celebrate Creation / Daisy Fay / Wild and Grizzly / Geoffrey and Grace / Living in London / Under the plum blossom treeKatharine Peachey / Lotts and Lots / Apartment Apothecary

To pick a favourite post for October is very difficult indeed but there were a few that stood out for various reasons.

Styling the Seasons - October Review | Really Pretty Useful

I was so inspired by Rebecca’s seasonal table centrepiece. I love everything about it! See the full post at Really Pretty Useful.

Styling the Seasons - October Review | Freckled Fennell

I was blown away by the beauty of the flowers in Sarah’s blog post. The combination of the wild flowers and the antique pine drawers is just gorgeous. See the full post at Freckled Fennell.

Styling the Seasons - October Review | Papermash

What is not to love about the glittery conkers that Lynne created? It’s such a beautiful example of using nature to style a surface. See the full post at Papermash.

Styling the Seasons - October Review | Wild and Grizzly

Lori snuck this in just yesterday but I fell in love with it immediately. The fact that she has included hand printed tea towels and homemade autumn animal biscuits tipped it for me! See the full post at Wild and Grizzly.

Styling the Seasons - October Review | Makelight

Emily’s styled mantelpiece is so creative, colourful and bursts with joy. I also love that her children helped her along the way. See the full post at Makelight.

Thank you again to everyone who has styled and shared. I hope Styling the Seasons continues to give you inspiration throughout November and we really look forward to seeing more corners of your homes and finding out what next month means to you.

Katy x


How to make a dried Hydrangea wreath

The lovely Tamsyn, who blogs over at The Villa on Mount Pleasantvery kindly wrote and photographed this guest blog post last year and I just had to share it again in case you missed it the first time round. This is the perfect time to be drying Hydrangeas and Tamsyn’s dried wreath is a must. I followed the tutorial myself last year to make one for my mother-in-law and it was much easier than I expected and the results are beautiful. Over to you, Tamsyn…

Hello everyone! My name is Tamsyn and I blog over at The Villa on Mount Pleasant.  I was so delighted that Katy asked me to write a guest post for Apartment Apothecary, as her blog is such an inspiration to me! Here’s my tutorial for making a hydrangea wreath…

Hydrangeas can be bought cheaply enough from markets or car boot fairs, and it’s worth getting a couple to plant out in the garden, as the flowers turn beautiful faded colours in September, and look fantastic dried and placed in big zinc florist buckets.  If you don’t have any dried hydrangea heads, you could use ivy, dried roses, berries, pine cones, seed heads, artificial flowers – anything really!

Dried Hydrangea wreath tutorial | Made by Tamsyn Morgans | Apartment Apothecary

You will need:

A natural rattan wreath (I got mine from Hobbycraft)

Dried hydrangea heads

Thin pliable wire

Ribbon of your choice

Scissors

Dried Hydrangea wreath tutorial | Made by Tamsyn Morgans | Apartment Apothecary

Tutorial:

1. Take your dried hydrangeas, and trim the stalks right down to the flower heads.  I roughly planned out my wreath by placing the heads on the wreath, and working out where I wanted to put them according to colour and shape.

2. Cut a length of wire approximately 30cm long.  Thread it through the flower head just above the cut stalk, and then attach the head to the wreath.  Wrap the wire round the wreath and twist it together at the back to fasten it.  Don’t trim the wire yet, as you may decide you want to take it off and reposition your flower once you have more heads on.

Dried Hydrangea wreath tutorial | Made by Tamsyn Morgans | Apartment Apothecary

Dried Hydrangea wreath tutorial | Made by Tamsyn Morgans | Apartment Apothecary

3. Work your way around the wreath fastening your heads on with the wire.  As I didn’t have quite enough full heads to complete my wreath, I used smaller heads clustered together to fill the gaps.

Dried Hydrangea wreath tutorial | Made by Tamsyn Morgans | Apartment Apothecary

Dried Hydrangea wreath tutorial | Made by Tamsyn Morgans | Apartment Apothecary4. Once my wreath was covered I had some smaller gaps to fill, so I took some of my large individual petals, and twisted the top of a piece of wire approx 15cm long around the stalk.  I then threaded  the wire through from the top of the wreath through to the back, and fastened by twisting it round the rattan.  Berry sprigs would look lovely dotted around too, using this method.  At this point, I kept my wreath looking quite rustic – maybe I could have trimmed some of the heads a little to make more of a perfect circle shape, but I didn’t want  to get in a tizz about it – rustic is good!

Dried Hydrangea wreath tutorial | Made by Tamsyn Morgans | Apartment Apothecary

Dried Hydrangea wreath tutorial | Made by Tamsyn Morgans | Apartment Apothecary

5. Finally, cut a piece of ribbon, and choose where you would like the top of your wreath to be.  A wide piece of vintage lace would look lovely too.  Thread the ribbon through the rattan and tie in a knot to make a large loop.

Dried Hydrangea wreath tutorial | Made by Tamsyn Morgans | Apartment Apothecary

Thank you so much, Tamsyn (again!). Make sure you drop by Tamsyn’s blog for lots of gorgeous vintage inspiration.

Katy x