Five ways to style a picture ledge

I wrote a post last year about shallow shelves that I love because they are so versatile. At the time, a few of you got in touch to ask where you could buy them from, and I drew a blank. The only thing I could suggest was to make your own.

Well, I’ve got good news. Ikea are now selling picture ledges  and they are super cheap at £4.90. Boom!

And what’s so special about these ledges compared to a normal shelf? They are only 9cm deep so they are not imposing in the same way as a normal shelf. It also has a lip so that pictures/books/ornaments won’t slip off, which makes it perfect for pictures. Also, if you paint the ledge the same colour as your walls, you will barely notice it is there. It is 55cm long and you can put two together, if you want a longer ledge or a 115cm ledge is also available.

5 ways to use an Ikea picture ledge | Apartment Apothecary

I bought the 55cm ledge and I want to show you five different ways to use it…

1. Pictures

I love the flexibility of these ledges, especially if you are not confident about hanging prints or even plates. Simply pop them on the shelf and change them around as and when without having to deal with filling holes in your walls.

5 ways to use an Ikea picture ledge | Apartment Apothecary

2. Kitchen storage

Put the ledge in your kitchen and use it for spices, tins or kitchenalia you want to have on show.

5 ways to use an Ikea picture ledge | Apartment Apothecary

3. Toys

These shelves are perfect for children’s rooms so that they can easily access their toys, or hang them high enough for lovely displays.

5 ways to use an Ikea picture ledge | Apartment Apothecary

4. Books

Also perfect for children’s books so that they can easily choose a book at bedtime.

5 ways to style an Ikea picture ledge | Apartment Apothecary

5. Decorative

Use the ledge anywhere in your home just purely for decorative purposes to display your favourite things. Here I have used vintage bottles with single stems. It really does look pretty in ‘real life’.

5 ways to style an Ikea picture ledge | Apartment Apothecary

I’m going to have to get a few more of these.

Katy x


Adding a touch of Copenhagen with John Lewis

I instantly jumped at the chance to choose a selection of items from the new Copenhagen collection at John Lewis, with the challenge of adding a touch of Scandi style to my home.

When I re-decorated my home office recently, a lot of my inspiration came from the clean lines of Scandinavian interiors, set against a bright white canvas. This style is very different to the rest of my home but I absolutely love it’s simplicity and freshness. I have been wanting to add more black and white accessories to the room, which are so synonymous with the Copenhagen trend, so this was the perfect opportunity. The black cuts through the white background of the room and adds some definition.

My first choice from the collection is this Marimekko crockery, which is the perfect addition to my desk for stationery supplies – I always prefer to store things in cups, jugs and bowls that I love instead of hiding them in kitchen cupboards.

Marimekko mug and bowl | Apartment Apothecary

The Scandinavian String shelving that we chose for the home office has oak shelves so I immediately honed in on John Lewis’s Oak task lamp, which brings warmth to the Copenhagen trend and softens the hard edges of the black and white. You’ve got to love a good bit of flex cable too.

Copenhagen style Oak lamp | Apartment Apothecary

Another addition is the Listrado rug, which adds interest to the white floor and makes more of a design statement. I have positioned it behind my desk and it is now Otto’s favourite spot in the house – those black stripes will be completely covered in white fur very soon!

Black and white striped rug | Apartment Apothecary

Black and white striped rug | Apartment Apothecary

So totally jealous that my mum is off to the real Copenhagen this weekend. I might have to ask her to bring me home a treat or two 😉

Katy x

Disclosure: This post was written in collaboration with John Lewis but the views and opinions are my own.
 

Styling the Seasons – September

Yay! September is here and it is my favourite month of the year! It also marks the official start of our new monthly blog series, Styling the Seasons – hurrah! Too many exclamation marks!

I got back from Skopelos on Saturday night, so I am feeling relaxed, bronzed, happy and full of the promise that September holds. This month always feels like the beginning of a new year for me, unlike January, when I generally feel unhealthy, pale, hung over and overweight (a lovely combination). I am always full of energy and motivation and raring to go at this point of the year and never more than this September because I am beginning a new chapter, having given up teaching after eleven years.

All that being said, my styled surface had to represent all of my enthusiasm for new beginnings this month. So here it is…

Styling the Seasons SEPTEMBER by Apartment Apothecary

I have styled my new String shelving in my home office (the full home office makeover will be on the blog tomorrow). I have included some of the new stationery I have bought, which has become a yearly ritual since I was a child and something I always associate with September. As a child, we  often spent our summers in France and I remember that going to the hypermarche on the way back to the ferry at the end of the holiday was always a highlight as I was allowed to trawl the stationery aisles and choose my new pencil case, fountain pen and school bag (Benetton and Chipie were favourites – does anybody else remember those?) for the new school year. I have also added books and magazines, which are a constant source of inspiration, as I foresee September will be spent looking for a lot of inspiration to figure out what direction I am going to go in now that I have left teaching. The plants (I love the trays that attach to the shelving and I can water straight into them) represent how vibrant and full of motivation I always feel at this time of year, as though the slate has been wiped cleaned and I can start afresh. By the way, the two mint plants in the right hand tray not only smell delicious but are a lovely thing to have on or near your desk because you can add leaves to your water throughout the day, or the occasional iced coffee treat with fresh mint is delicious.

Styling the Seasons SEPTEMBER by Apartment Apothecary

So, there you go, that’s my September ‘shelfie’. I can not wait to see your styling and what September means to you. Hop over to Charlotte’s blog, Lotts and Lots, to see her beauteous September styling, too.

Share your photographs of your styled surface on any day this month – use Facebook, Instagram, Twitter or your blog, if you have one. Please tag me and Charlotte and use the hashtag #StylingTheSeasons. You can also search the hashtag for styling inspiration from the other wonderful bloggers and creatives who are taking part and don’t forget that Charlotte and I we will be rounding up our favourites on our blogs at the end of this month.

Happy September styling everybody!

Katy x

Styling the Seasons monthly blog series on Apartment Apothecary and Lotts and Lots

Tips for styling shelves

First and foremost, thank you so much to those of you who took the time to leave a comment on my blog feedback post or emailed me your thoughts. I was blown away by how many of you got in touch and how much thought you put into your feedback. Just amazing! I’m going to spend this month making blog plans and then in September I will start afresh, bearing in mind all that you had to say.

Things here are taking shape and I very nearly have a fully functioning home office: the shelves are up, desk is made and painted, holes in the walls filled, new pendant light hanging. My big job this week is to paint the floor and then sort and style the String shelving. When I was going on and on and on about my new String shelving, quite a few of you got in touch and asked if I had any tips for styling shelves. Now, I have to admit that I have always avoided shelves in the past for two reasons – firstly, I like to hide my mess and secondly, they can become a dumping ground.

That being said, we have invested in some wondrous shelving for the home office and I could cram them with stuff as they are deep and sturdy and I have a lot of stuff but I really want to strike a balance between function and beauty. Mission impossible? Well, here are my tips before I begin the task in hand…

1. Groups of three

I always like to group things in threes, whether it be boxes, baskets, ornaments or plants. I don’t know why that looks better than say, two or four things, it just does.

2. Triangle of colours

You don’t need to colour coordinate what’s on your shelves (I always get a bit of a shiver when I hear about colour coordinating because it makes me think of matching cushions, curtains and lampshades) but pulling together the look with a triangle of colours can look really good i.e. three similarly coloured items, placed at different points on the shelves.

3. Vary height and size of objects

If you arrange all of the tall things together and all of the round things together your shelves will look unbalanced and too curated.

Tips for styling shelves by Apartment Apothecary

Image from: @whiteloftstudio Intsagram

4. Don’t overcrowd

If you have too much to fit on your shelves, don’t just cram it all on. You will need to find somewhere else to store it or get rid of it. Overstuffed shelves are not functional, most importantly, and you can’t fully appreciate the beautiful things on them. On the open kitchen shelves below, they have managed to fit a lot on but everything is accessible, which makes it functional too.

Tips for styling shelves by Apartment Apartment Apothecary

5. Add pictures, prints, mirror or a lamp

By doing this, it adds more interest to the shelves and makes them feel like part of the room, rather than just a storage solution.

Tips for styling shelves by Apartment Apothecary

Image from: Decordots

6. Nothing should touch

When I say nothing should touch, I mean that two items should not rub shoulders; they either need to over lap or not touch at all. Again, I’m not sure why items that just touch look odd, but they do. If you look at the shelves below, the top shelf has a row of items that are just touching. However, on the middle and bottom shelves the items are overlapping, which looks so much more interesting and organic.

Tips for styling shelves by Apartment Apothecary

Image from: Fine Little Day

7. Add plants

This lightens, brightens and lifts shelves. I love how plants have been attached to this pegboard – I might have to steal this idea!

Tips for styling shelves by Apartment Apothecary

Image: Home of Kim Victoria Wearne and Stuart Beer on The Design Files

8. Don’t make it top or bottom heavy

Don’t place all the large items at the bottom of the shelves and all the small items at the top as this will make the shelves look unbalanced.

9. Repurpose containers to store items

Add interest and beauty by using vintage tins, jars or jugs to store items.

Tips for styling shelves by Apartment Apothecary

Image from: Sania Pell

10. Put lots of little things into storage boxes or baskets

If you have a lot of small things that need storing put them into boxes or baskets that can be put in the shelves; this will make the shelves easier to clean and less fussy looking.

Tips for styling shelves by Apartment Apothecary

Image from: Husligheter

11. Add something unexpected

This will draw the eye and set your shelves apart from everybody else’s Billy bookcase.

Hope this helps some of you. I’m going to try my best to use some of these ideas on my own shelves, which I’ll show you all in September.

Katy x


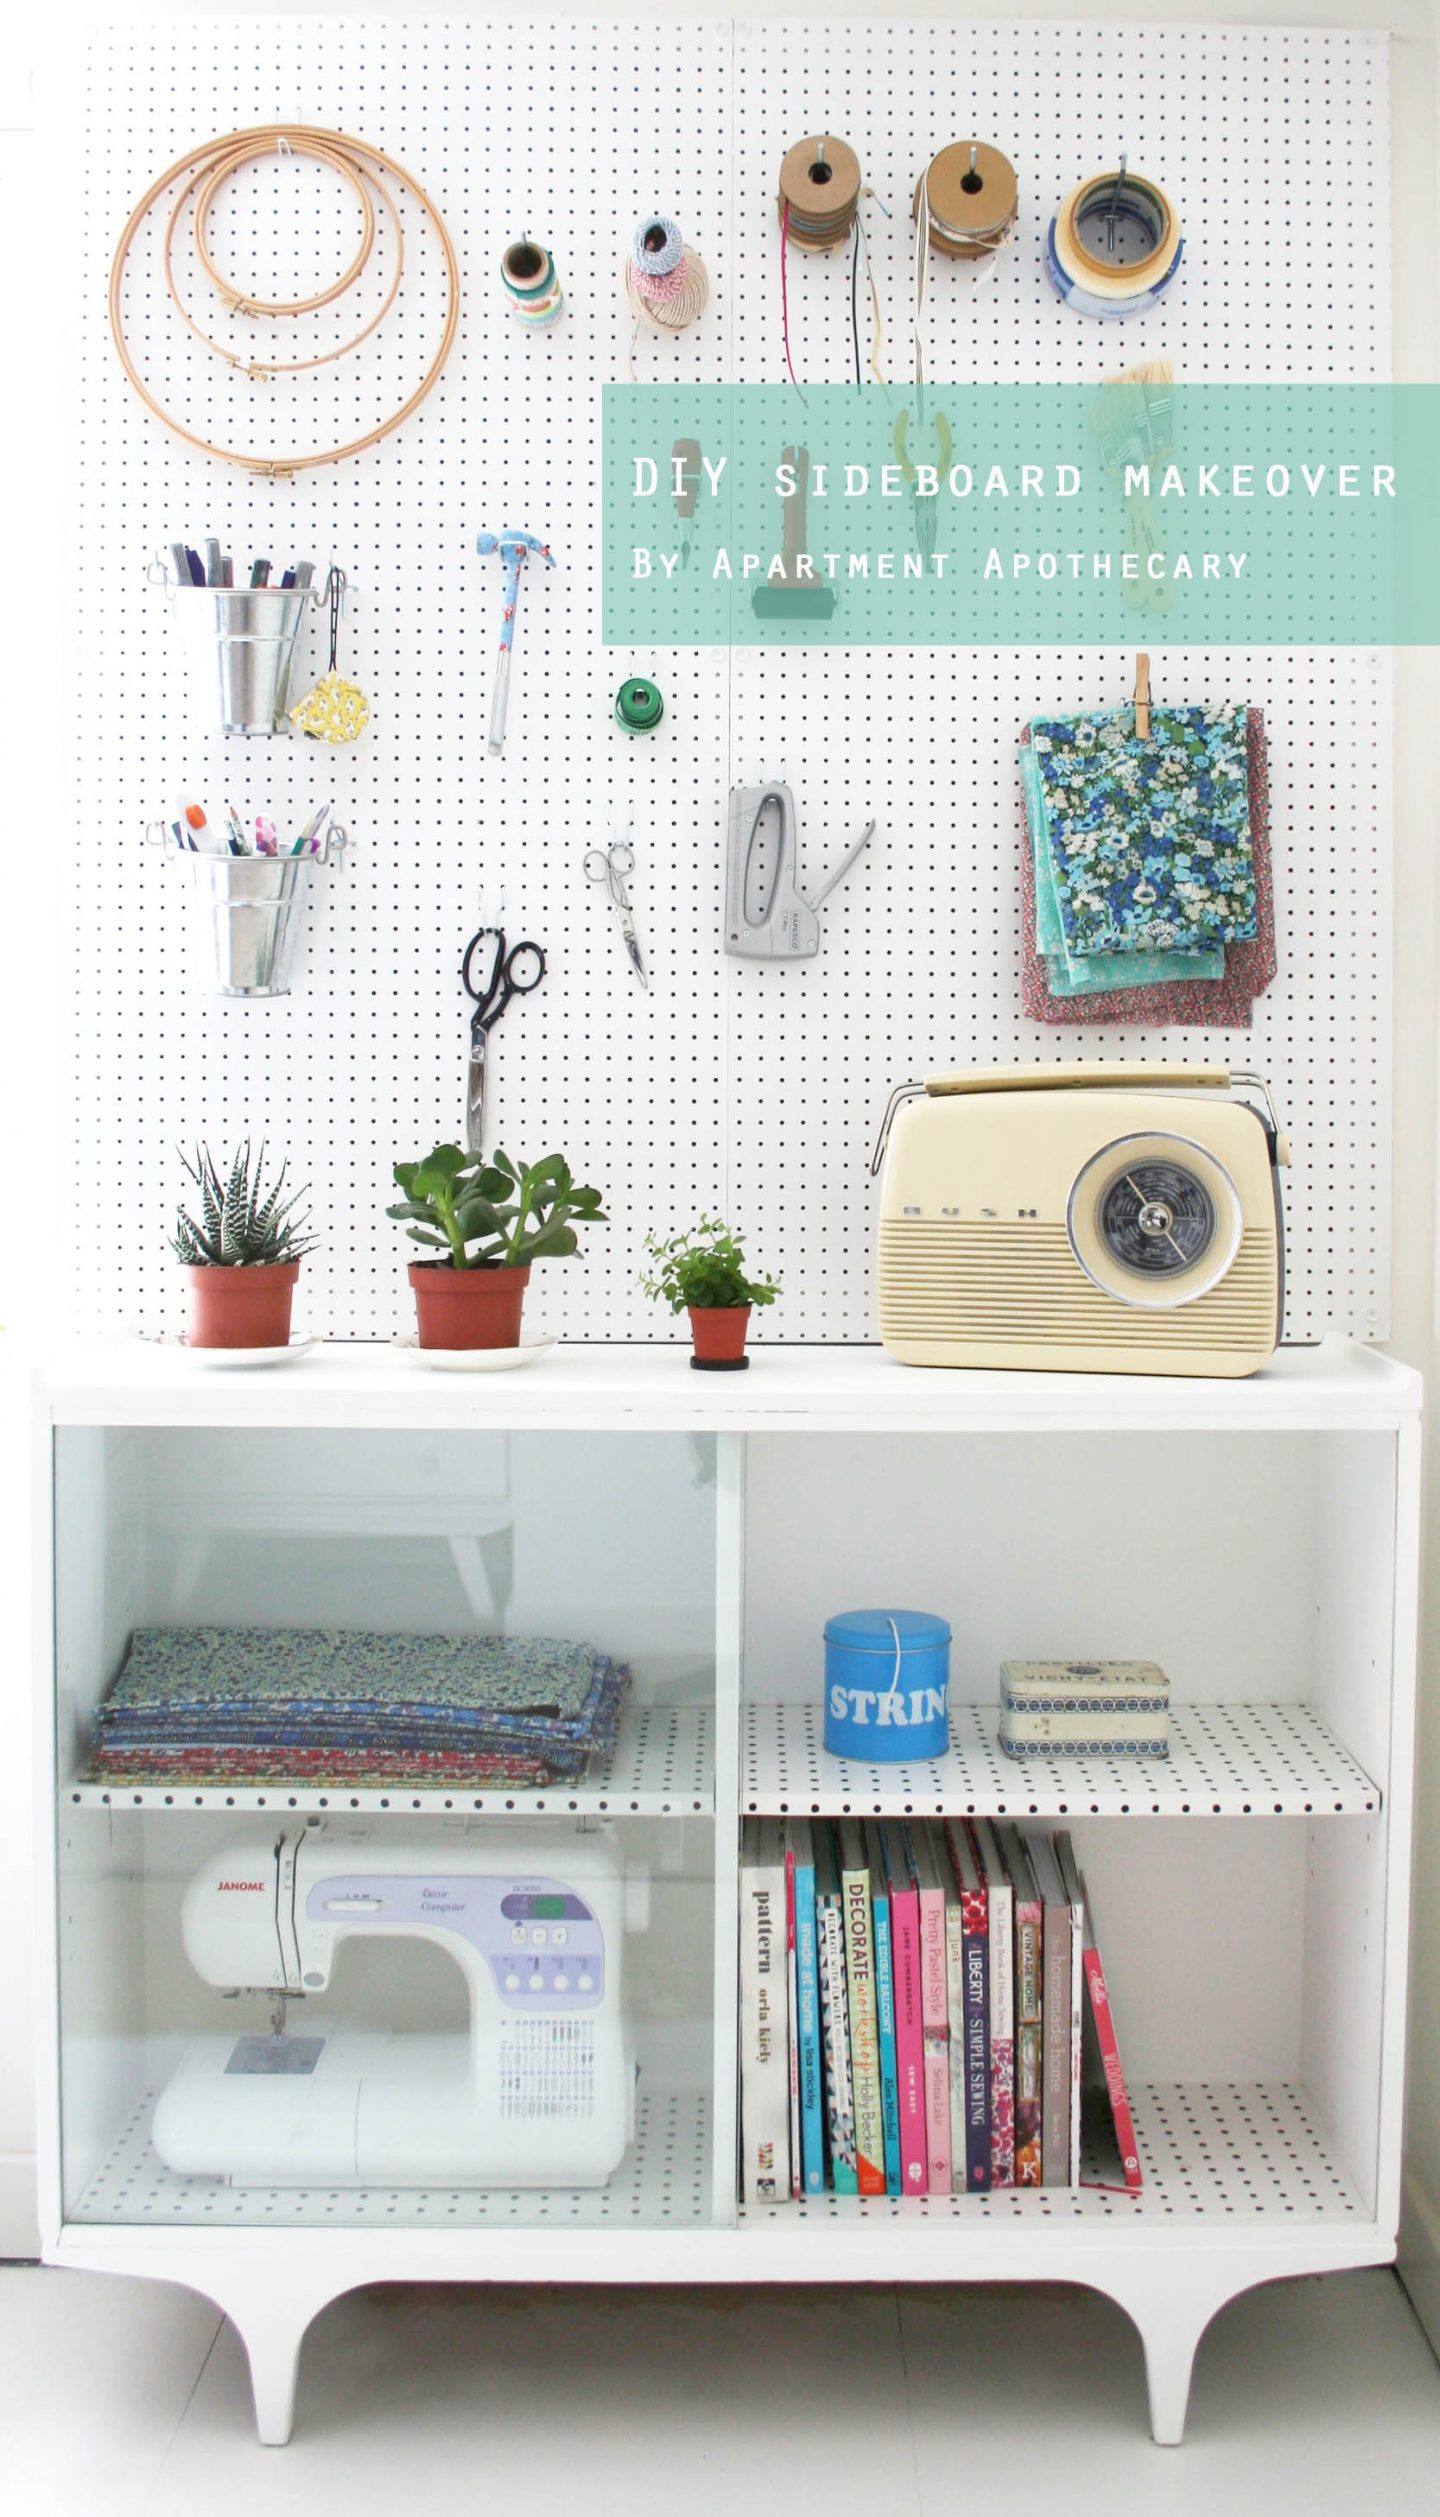
Furniture makeover challenge

As you may have seen from my previous post I have been kindly asked by Direct Blinds to join in with their ‘Renovation Sensation’ competition. They gave me £100 to find, buy and renovate a piece of furniture of my choice – the perfect competition!

Furniture makeover | Apartment Apothecary

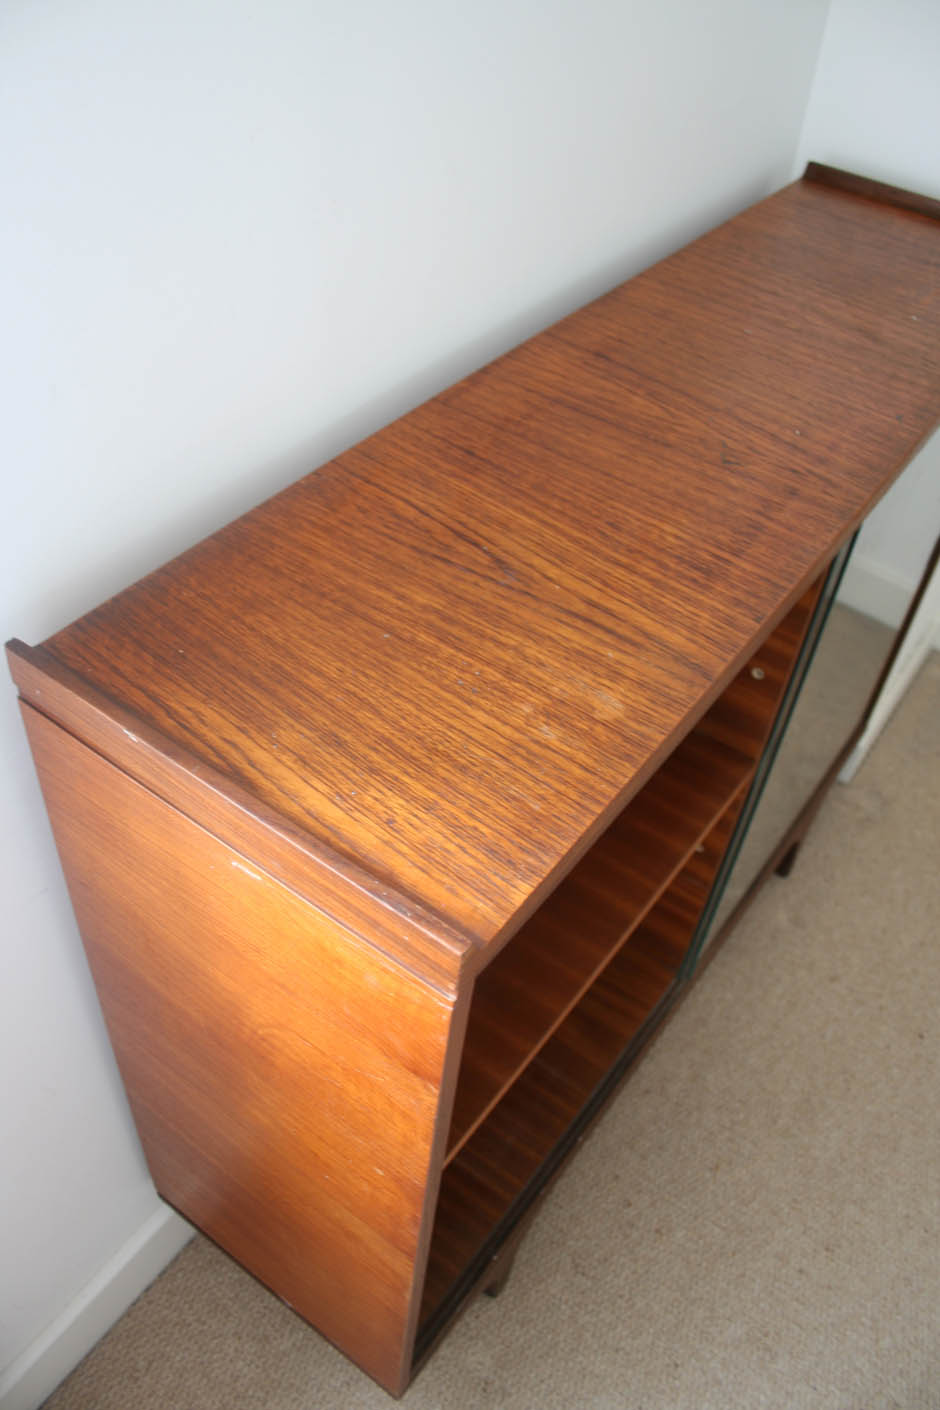
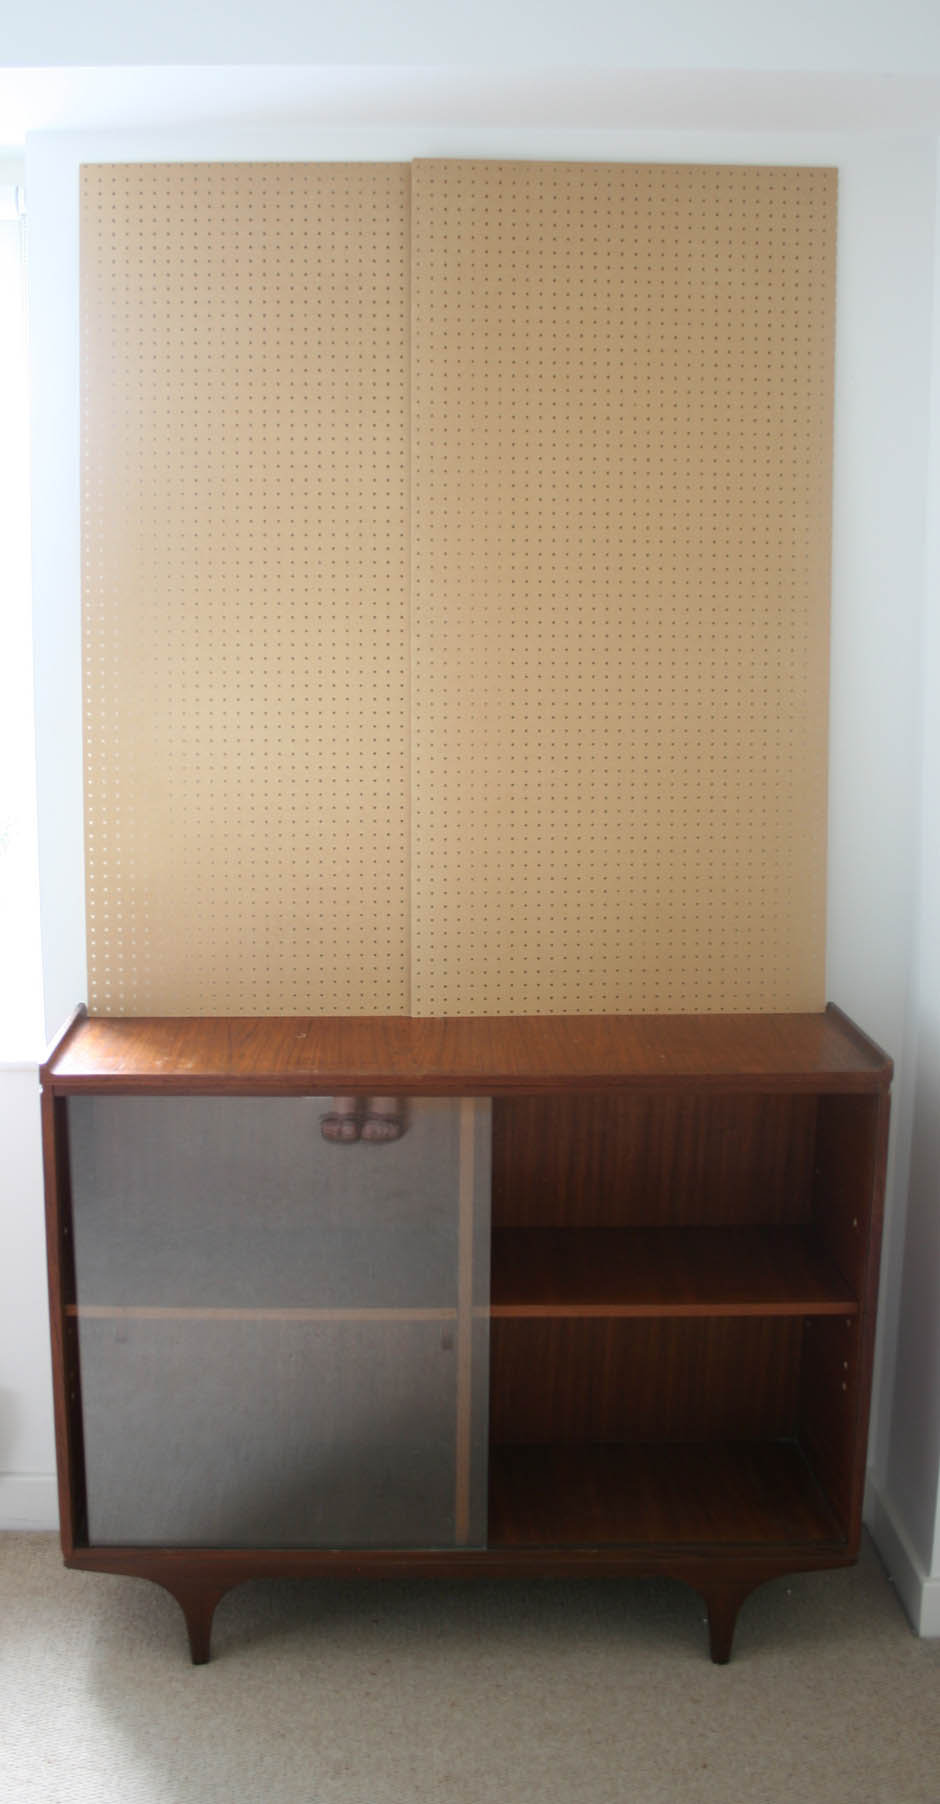
I chose to buy a cabinet from eBay that I need for my new home office. I have taken a lot of inspiration from modern Scandinavian interiors so I want the room to be light, bright and white with vintage touches here and there. The cabinet I bought is a great shape and I love the glass doors but it has a very dark, orangey veneer that is not so pleasant – definitely not the lovely teak of a mid-century cabinet. I tested sanding a patch but it is made of some sort of composite wood so no beautiful grain or colour to reveal.  Therefore, my first task was to brighten it so it doesn’t absorb all of the light from the room. I then tried to give it a bit of character and add some more storage to the top for all my craft supplies. Here’s how I did it…

Furniture makeover | Apartment Apothecary

Furniture makeover | Apartment Apothecary

Renovation

What I used (anything with a price next to it I bought for this competition with the £100 budget):

Cabinet £30

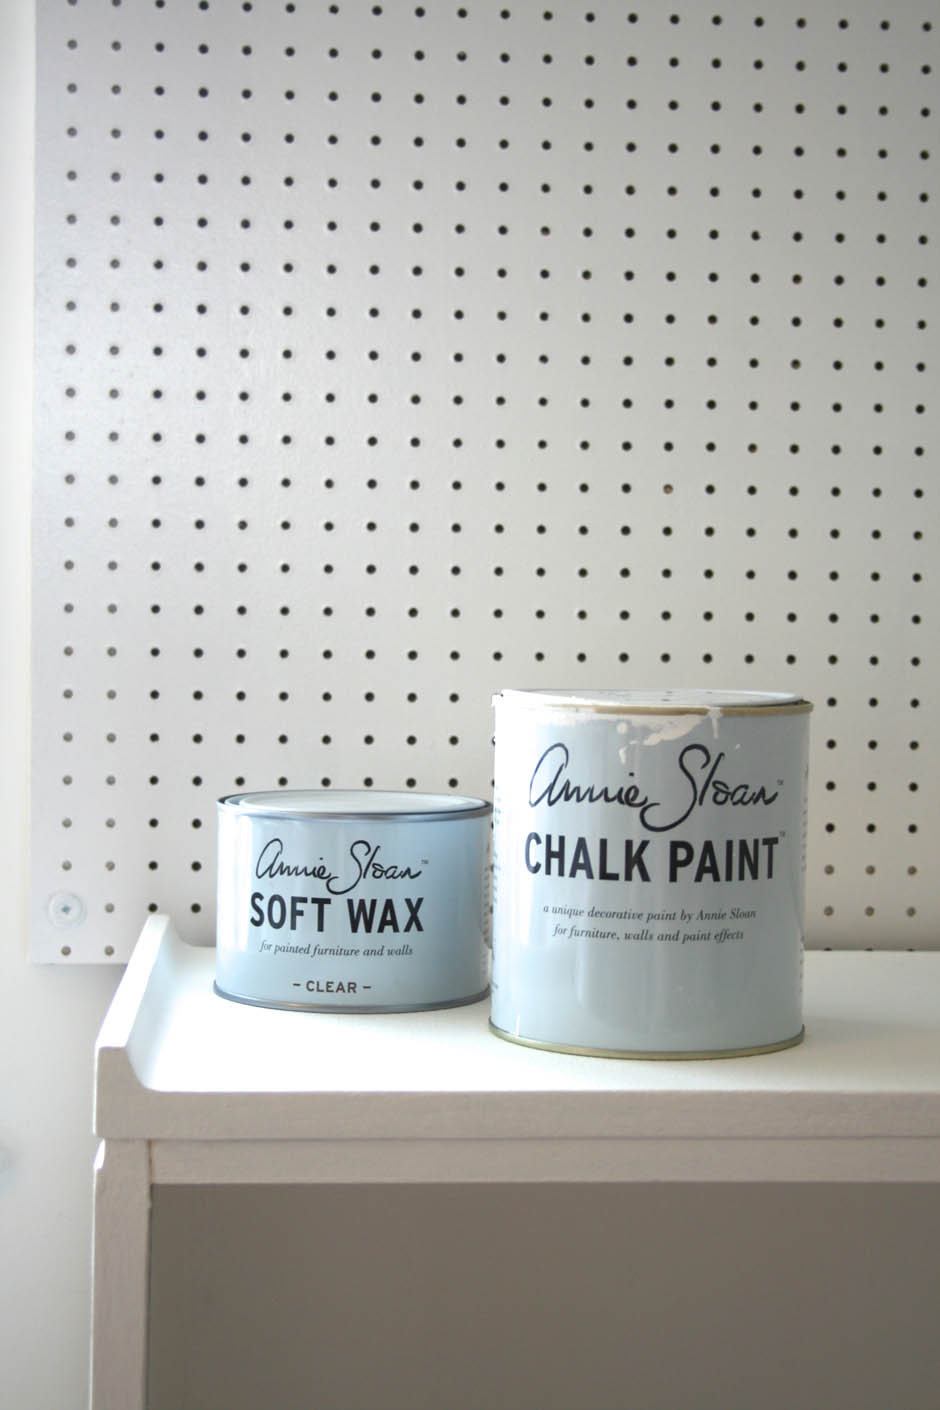
1 litre of Annie Sloan pure chalk paint £18.95

Annie Sloan clear wax

Two sheets of 3.5cm pegboard (60 x 120cm with 1.8cm hole centres) £8 each

Pegboard hooks £13.79

Batons, screws and drill to mount the pegboard

Mini Moderns Snow Peggy wallpaper remnants

PVA glue

Clear varnish

Paint brushes

Clean rag

Scissors

TOTAL: £78.74

Step 1:

I mounted two sheets of pegboard above the cabinet to add extra storage for my craft supplies.

Furniture makeover | Apartment Apothecary

Step 2:

I used pure chalk paint for the cabinet as you can apply this paint straight onto the veneer with no need to sand! Sometimes, with varnished or veneered wood the stain can bleed through the chalk paint so you need to do a tester patch first. If it does come through do a base coat of Zinsser stain blocker. I then used the clear soft wax to add some extra protection to the cabinet. I used eggshell on the pegboard as it needs to be really strong to withstand wear and tear.

Furniture makeover | Apartment Apothecary

Step 3:

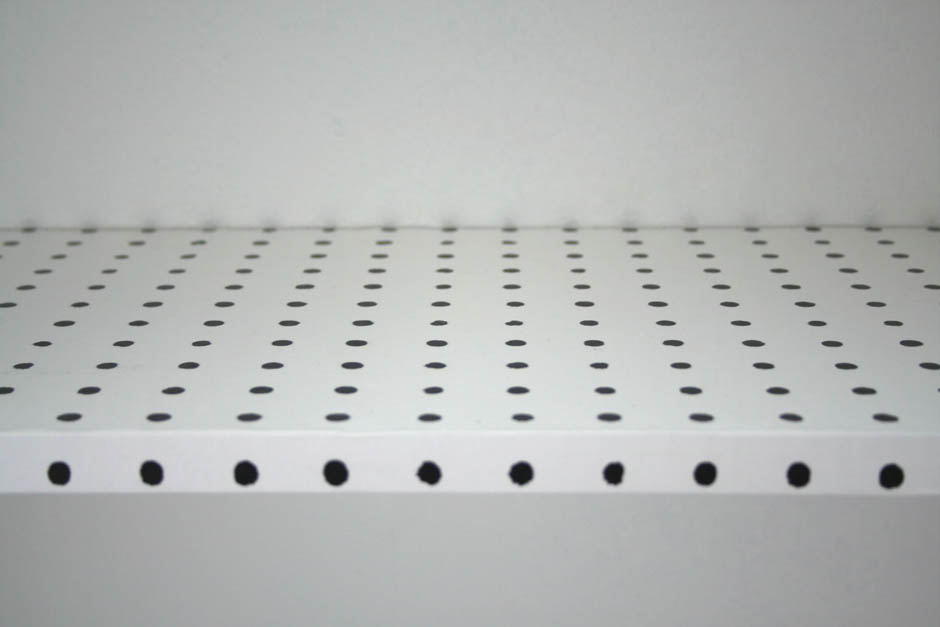
I then used Mini Moderns wallpaper remnants to line the shelves of the cabinet and the pattern reflects the pegboard wall. I spread a very thin even layer of PVA glue over the shelf and laid the paper over it very carefully to ensure I didn’t trap too much air. If you don’t have wallpaper you could also use wrapping paper but use a very small amount of glue as otherwise it will wrinkle.

Furniture makeover | Apartment Apothecary

Step 4:

I put the wallpapered shelves into place and then varnished the paper to make it hard wearing and to avoid scuffing.

Furniture makeover | Apartment Apothecary

Furniture makeover | Apartment Apothecary

After…

Furniture makeover | Apartment Apothecary

Furniture makeover | Apartment Apothecary

Furniture makeover | Apartment Apothecary

Furniture makeover | Apartment Apothecary

So, I have finished the first corner of my new home office – better start stuffing that cabinet with all my craft supplies and finishing off the floor! Thank you to Direct Blinds and fingers crossed that I win this brilliant competition.

Katy x