I am very excited to announce my first contribution to a magazine! I was asked by Anna, the new Editor of Homemade With Love magazine, to contribute my cotton reel holder tutorial and I have spent all of October as the ‘Guest Pinner’ for the magazine. For those of you who aren’t ‘pinners’ this means I have been finding images and tutorials of exciting handmade, craft and DIY home projects for the magazine’s Pinterest account. For those of you who are familiar with Pinterest, you will know this was just an excuse for me to spend more time pinning!
Now the month is over, I wanted to share some of the 100 home projects I have discovered in the process. The only problem is, I can’t decide which project to do first…

Mason jar lights by in.gredients.

Spray painted gold mugs by Garland of Grace.

Crocheted hangers by Dottie Angel.

Liberty print blankets on Purl Bee.

Handmade clay pots by Claire of Fellow Fellow for Say Yes to Hoboken blog.
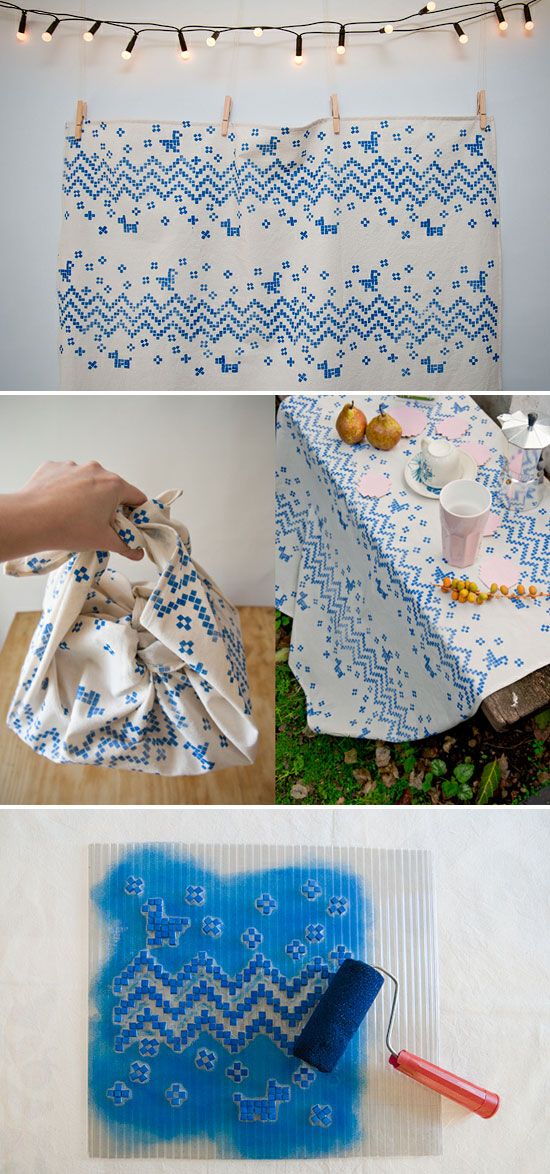
Hand printing on fabric by Karen Barbe.

Decoupage bowl on the Liberty Craft blog.

Vintage yardstick hooks by Better Homes and Gardens.

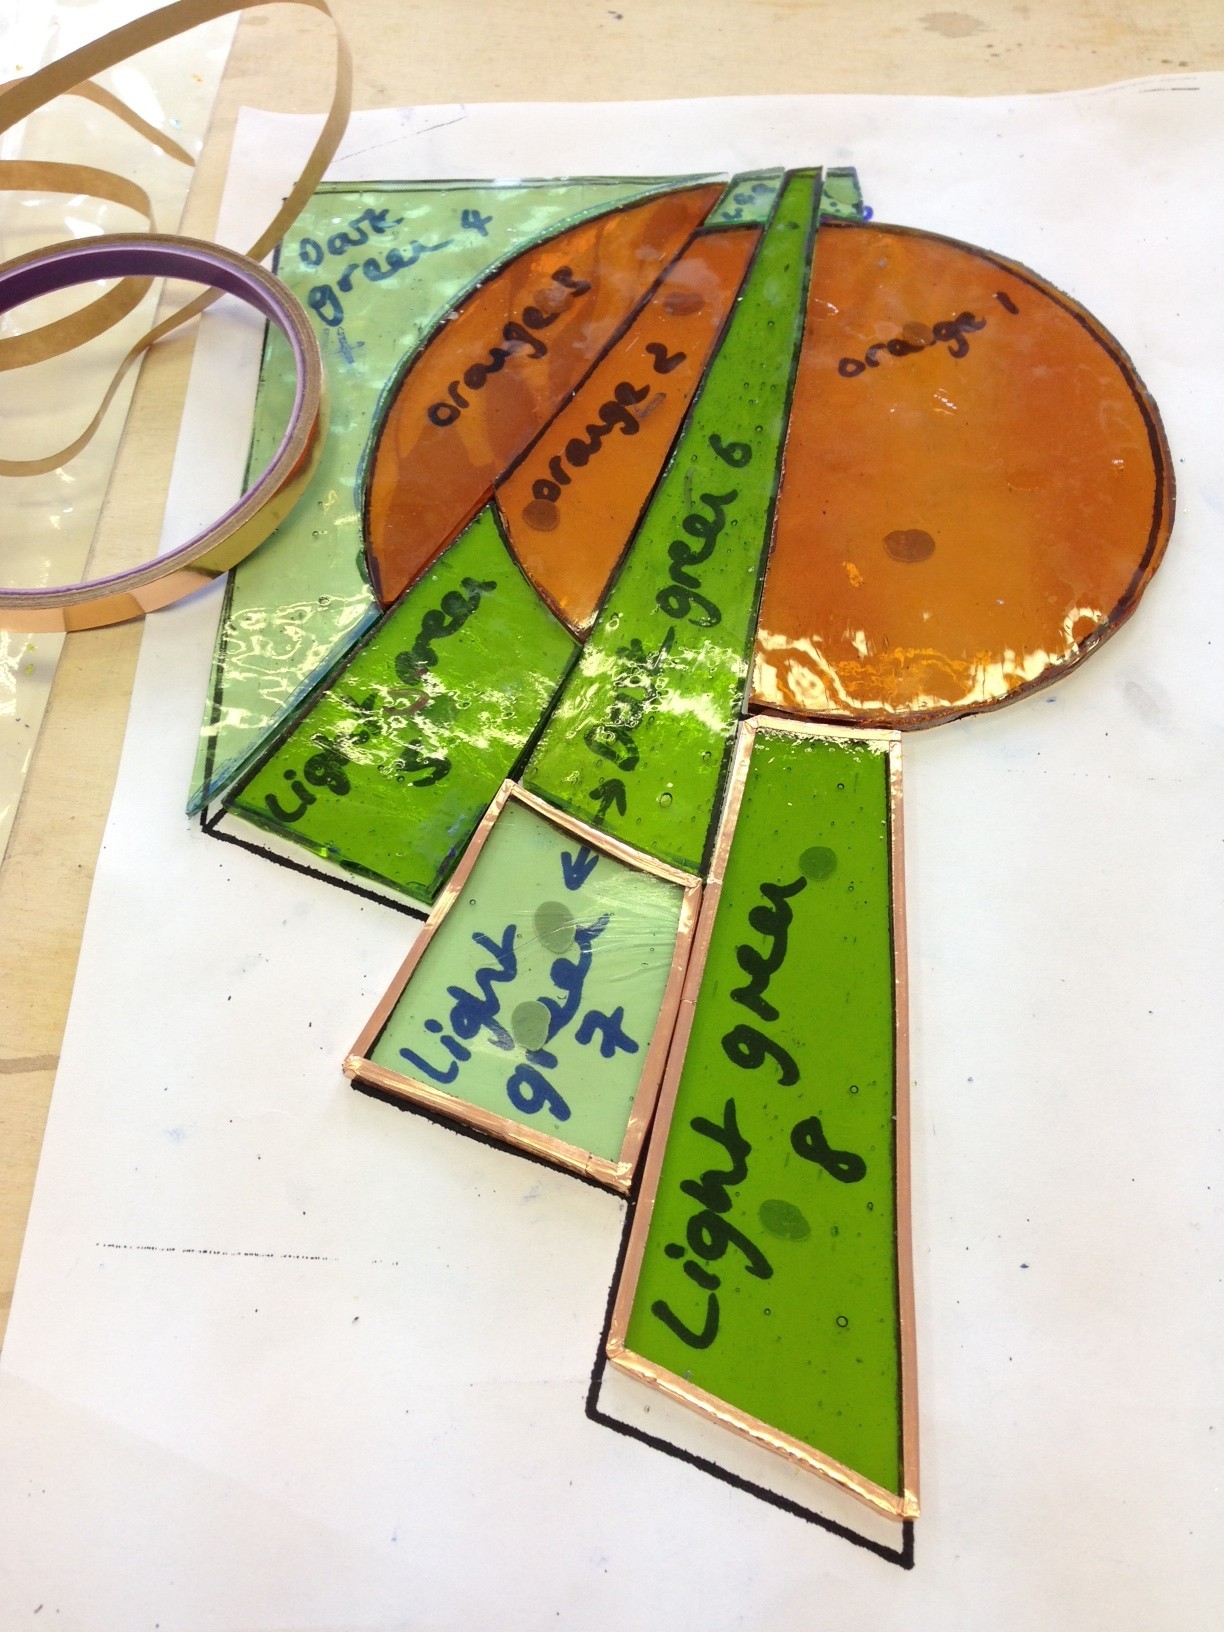
Copper foiled mirror by Byf Ryd.

Toy boxes with castors by This Little Street.
Get crafting people! Homemade all the way.
Katy x
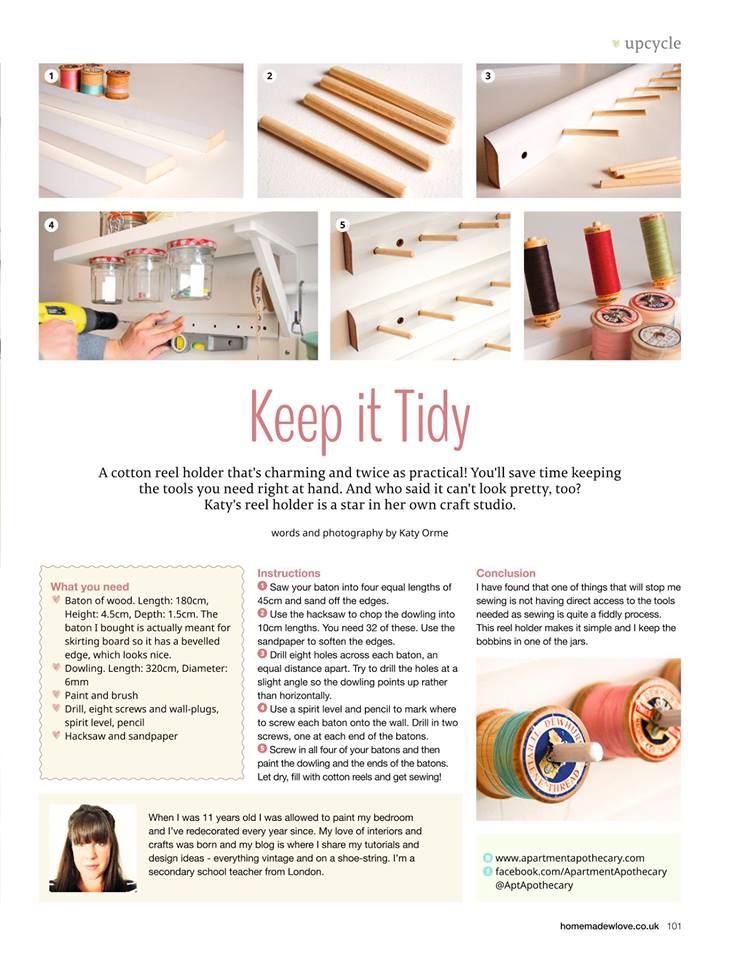
P.S Here’s a sneak peek of my article…