Friday faves

This week has been mostly about clearing to-do lists and completing a couple of craft shoots. I have realised that as my blog has grown I’ve become a bit time poor and as a result I have dropped lots of my crafty DIY tutorials, which I really miss. Therefore, I did a big trawl through some of my favourite blogs this week and made a list of projects I would like to complete over the next couple of months, which make up this week’s Friday Faves…

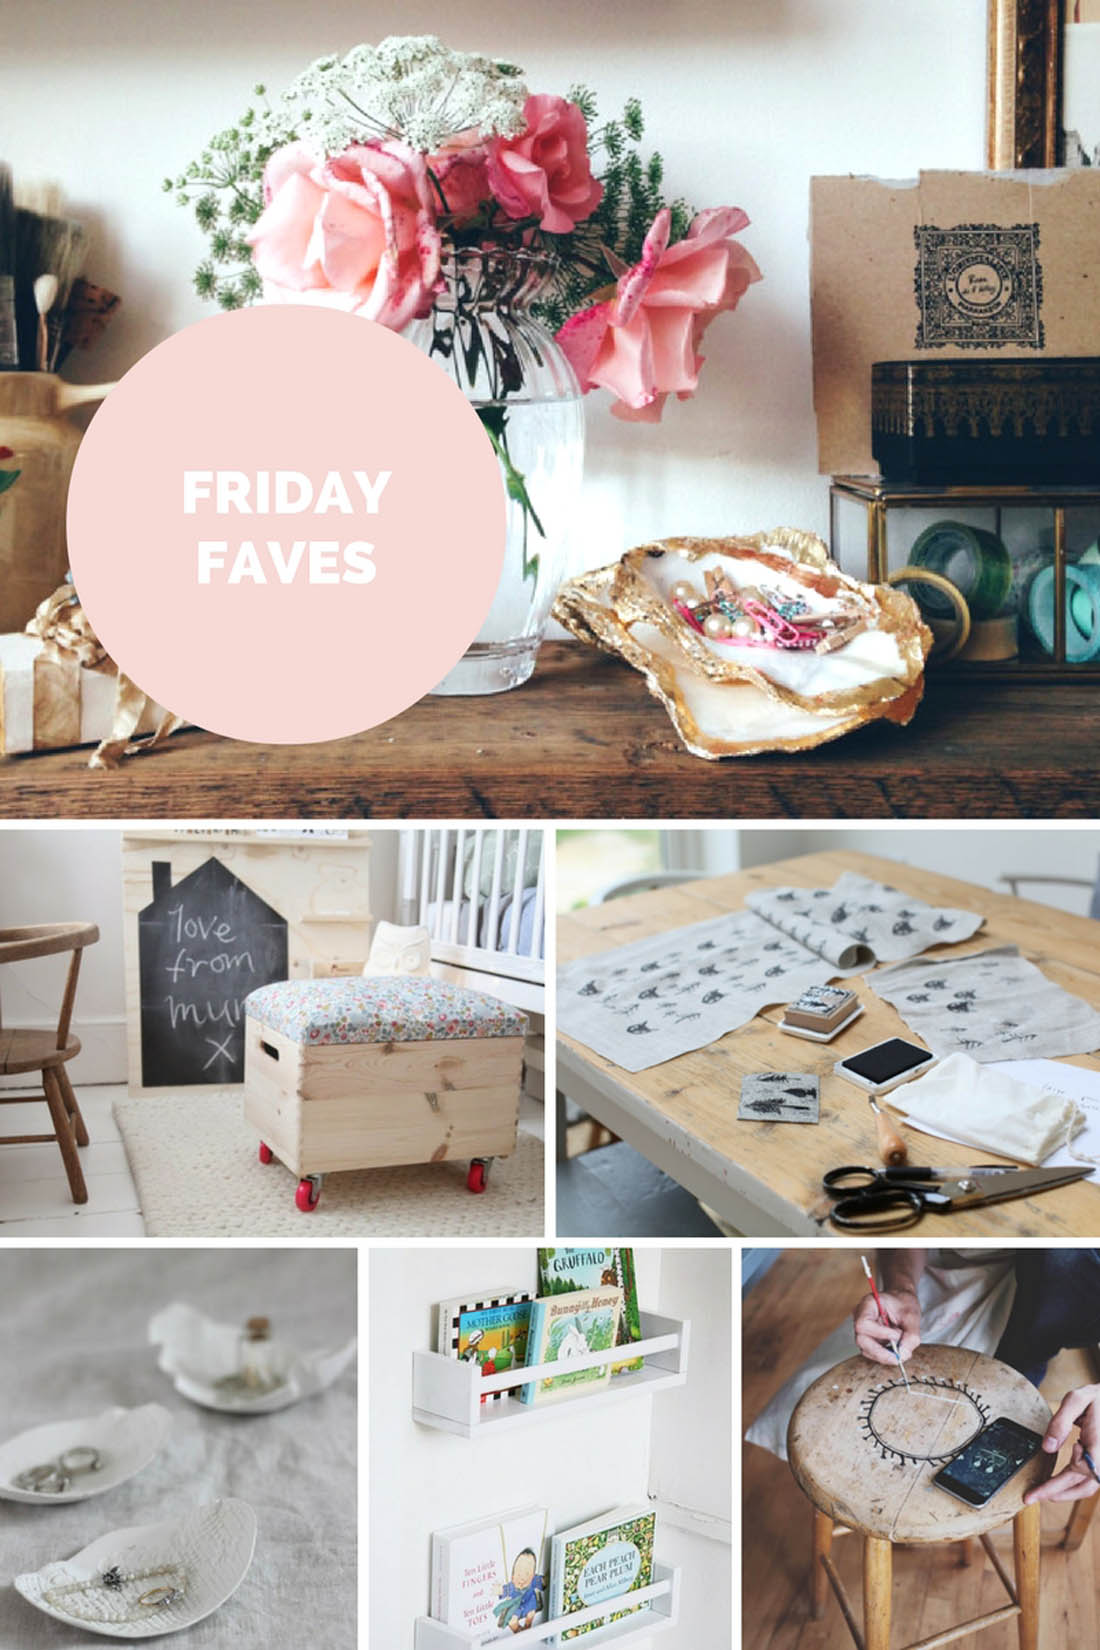
Six DIY craft projects to try including hand printing fabric, air dry clay bowls, using Ikea spice racks as book shelves, waiting furniture with folk designs and making a toy box | Apartment Apothecary

I’ve always loved Jeska’s crafty ideas for Lobster & Swan and I’d really like to make some gilded sea shells for the autumn/winter table as salt and pepper pinch pots (top image) and the air dry clay trinket dishes made by Heather (bottom left) would make the most perfect presents. I’m thinking of things I can make for the nursery before the Christmas madness begins and I love Artemis’s projects that she makes for her daughter over at Junkaholique. I would love to try my hand at making a crate with a padded lid and castors to store toys or blankets (middle left). I’m also inspired to do a bit of fabric printing to make some unique cushions to sit on the day bed that we will have in the nursery (middle right). I definitely want to get a few Ikea spice racks to mount in creative ways to add a bit more storage to the room. We have a child’s chair that we currently use as a step stool but needs a bit of decoration and I spotted on Poppytalk this week the idea of adding folk designs so I might give that a go (bottom right).

Hopefully, you guys might find a bit of inspo here, too, and I hope you have all had a good week.

Katy x

How to sew a baby play mat

One of my best friends lives over in Australia and she has just had her first baby so I wanted to make a gift to send over to them (although it’s taken me forever to get it sorted – sorry, Milly!). I decided to follow a pattern I have used before to make a play mat/blanket/quilt – it’s kind of a multi-functional item. I’ve made a couple of these for other friends who seemed to like it and find it useful so hopefully this will go down well. You can also use this tutorial to make a larger blanket for yourself either for your bed or as a lap duvet for chilly autumn evenings on the sofa. I bought the fabric months and months ago before the baby arrived and I think I will need to stock up on some more as I love the black and white design.

11

Tutorial

Pop over to this tutorial that I did a couple of years ago for the full step-by-step.

For this play mat I used two pieces of fabric 110cm x 140cm (which is the equivalent to six fat quarters). For the wadding I recycled a spare double mattress protector from Ikea, which cut the cost of the project as I spent a fair bit on the fabrics. This is where I got the fabric from:

Pocho – M is for Make (a Japanese imported fabric designed by Nani Iro for Kokka Fabrics. This 100% cotton double gauze fabric is lovely and soft).

Bianco Granite Linen – Ada & Ina (a dark grey 100% linen fabric. It has been stonewashed, which makes it ultra soft).

How to make a play mat for a baby | Sewing tutorial | Sewing project | Apartment Apothecary

Full tutorial here.

Love this blush pink muslin from MORI.

I wanted to make the play mat reversible and used a dark grey linen for the underside, which I hope will hide dirt from being put on the floor…

How to make a play mat for a baby | Sewing tutorial | Sewing project | Apartment Apothecary

This is a really quick and easy sewing project and I’d quite like to make myself one for a cosy lap duvet on the sofa.

How to make a play mat for a baby | Sewing tutorial | Sewing project | Apartment Apothecary

What sewing projects are you working on right now?

Katy x

A bathroom refresh: tips for painting furniture

Have you ever seen a photograph of my bathroom? No, I didn’t think so. It’s the one room in our flat that I never let anyone photograph because it is dull as dishwater and worse it is now becoming quite rough round the edges after living here for six years. The bath panel and skirting boards have begun to swell with water, the white walls are scuffed and marked and there isn’t anything ‘nice’ in there – you know, no fancy bottles, candles, plants or fluffy towels. It needs a bit of a refresh, nothing major as we don’t have the time or money for that right now, but a few quick additions/changes that I can make with relatively little effort.

The first thing I have decided to do is paint a little cabinet I have on the wall in the bathroom. I’ll be honest with you that I pretty much hate painting furniture as it can be a real faff but I have discovered a great chalk paint from Ronseal that solves this issue. No primer is needed, just two coats of paint and no wax is necessary either and it is super quick drying too (that is very important for me as I am SO impatient when it comes to painting – you’ll often find me hanging shelves or shifting drawers back into place even though the paint is still wet!). The paint also resists knocks and scuffs, which is perfect for my bathroom cabinet as it gets a lot of wear and tear. I chose the duck egg blue to help add a bit of subtle colour to the room.

So, here are my tips for painting wooden furniture and I will be back another time with pics of my bathroom ‘refresh’ if I feel brave enough 😉

Tips for painting wooden furniture |Vintage bathroom cabinet | Apartment Apothecary

Cabinet painted in Ronseal’s Chalky Furniture Paint in duck egg blue.

Tips for painting wooden furniture |Vintage bathroom cabinet | Apartment Apothecary

I’ll show you what it looks like when it is back in the bathroom when I have made a few more changes to that room.

Tips for painting furniture

The cabinet is quite old (I bought it ten years ago from an antiques shop) but the pine isn’t a lovely aged colour, it is actually quite bright orange and it kind of stands out like a sore thumb in the bathroom. Therefore, I decided it would be an ideal candidate for a bit of an update. The wood is in a good condition with a few dents and knots here and there but I don’t want to make it look like new so I don’t bother with filling any of them. I give it a really light sand and then hoover it well so there is no dust or dirt and then I am ready to paint…

Tips for painting wooden furniture | Apartment Apothecary

1 – Spend time taping off where you do and don’t want to paint

I like to use blue decorators’ tape as it adheres really well compared to normal masking tape. For this particular piece I spent time taping off the mirror so that I could get a really crisp finish and it saved me loads of time as I didn’t have to faff around trying not to get paint on the mirror.

2 – Only paint the outside

I never paint inside a piece of furniture. The main reason for this is that a couple of layers of paint can mess up how well a cupboard door closes or a drawer slides in and out – often the paint can make these things ‘stick’. Therefore, I only paint a couple of inches of the inside of a drawer, just so you don’t see any raw wood from the outside (see the outcome of this in the finished photograph above).

3 – Use the right sized brush for the job

I am famous for using a massive brush on the teeniest tiniest project or vice versa just because I’ve used the first brush I find. However, if you choose the right sized brush it will save you so much time and have a really noticeable effect on the finish.

Ronseal’s Chalky Furniture Paint is really easy to apply as it’s water based and it only requires just two coats – no primer or wax. It also drys really quickly and has no smell so it’s a great product to use at home for a quick project.

4 – Apply thin layers of paint

The first layer of paint (as you can see above) should be thin and you should still be able to see the grain of the wood. Don’t lather on huge amounts of paint as it will pool and drip – have faith that the second coat of paint will provide all the coverage you will need.

5 – Work with the grain

Try to apply the paint in the same direction, working with the grain of the wood. This will help create a good finish.

6 – Be patient

Make sure you follow the paint instructions and let the paint dry thoroughly between layers. Also, don’t remove the tape until the next day if you have the patience (I took mine off after a couple of hours though – I can’t help myself!).

What do you think? I hope you agree the cabinet looks better painted than it did before. Back soon with a few more bathroom updates.

Katy x

*This post was written in collaboration with Ronseal.
 

How to make a tufted cushion

I have a new beauteous chair that is desperate for a new cushion but the one I want is £60 and too big for the chair so instead I have tried to make my own.


I bought one blush pink linen pillowcase that I cut up to make a set of napkins and I had one half of the case left, which was the perfect size for a small cushion (the case only cost £12 so to get napkins and a cushion out of it is pretty good value). With a self covered button I knew I could make it look as good as one of these amazing HAY cushions that I wanted originally.

How to make a tufted cushion | Cushion tutorial | Blush pink linen cushion | Apartment Apothecary


You will need:

Linen fabric (size dependent on how big you want your cushion to be)

Stuffing 250g for a cushion that measures 30 x 20cm

Co-ordinating thread and embroidery floss

Fine needle and large needle

Self cover buttons 22mm

Fabric scissors

How to make a tufted cushion | Cushion tutorial | Blush pink linen cushion | Apartment Apothecary

Method:

1. Make your self cover button following these instructions from one of my previous sewing tutorials.

2. Cut out two pieces of identical sized fabric and lay them right sides together. Sew all the way round the case leaving a 10cm gap to stuff the cushion (the cover will not be removable).

How to make a tufted cushion | Cushion tutorial | Blush pink linen cushion | Apartment Apothecary

3. Cut away the corners of the case and trim off excess seam allowance.

4. Turn the cover inside out, iron and mark the centre point on both side of the case.

5. Stuff the cushion as evenly as possible.

6. Turn the raw edge of the gap in and whip stitch it closed by hand.

7. Thread a large needle with the embroidery floss. Pass the needle and thread through the marked centre point on the back of the cushion all the way through the stuffing and come out through the marked centre point on the front of the cushion. Thread on the button at this point and then pass the needle back through the centre of the cushion (a few millimetres from where you came out the first time) and take it out of the back of the cushion.

How to make a tufted cushion | Cushion tutorial | Blush pink linen cushion | Apartment Apothecary

8. You should have two tails of thread poking out of the back of the cushion now with the button at the front. Pull the two tails as tightly as possible to create the tufted look and tie the tails together in a triple knot. Cut off the excess thread.

How to make a tufted cushion | Cushion tutorial | Blush pink linen cushion | Apartment Apothecary

All done! So easy and so much cheaper than the original and I love it.

1 title


If you are looking for some lovely home craft projects as we head into the warmer months of the year there is a brilliant new craft mag that is on sale until May 13th that you need to check out. A few of my lovely blogger pals have projects in the magazine and there is loads of inspiration to be had. You can buy the magazine here.

How to make a tufted cushion | Cushion tutorial | Blush pink linen cushion | Apartment Apothecary

How to make a tufted cushion | Cushion tutorial | Blush pink linen cushion | Apartment Apothecary

Have you got any home craft projects planned?

Katy x


DIY pegboard

Last week a TV crew came in to film my pegboard for a new show about decluttering and storage (I’ll let you know when it airs in a couple of months). Whenever I post a pic of my pegboard on my instagram feed I always get people asking me where I bought it from, which has made me realise that I’ve never actually written a post about it, it was just included in my home office makeover reveal post. So, I thought it would be useful to have a dedicated post that I can direct people to.

DIY pegboard | how to mount your own pegboard | Apartment Apothecary

There are now lots of lovely companies that sell swish pegboards but they cost a lot and when I made mine about three years ago no one was really selling them; it seemed to be a much more ‘American garage’ type thing. Therefore, I sourced mine from Amazon after trawling around elsewhere for ages and I found this seller who offers sheets of 120 x 60cm pegboard for £10 (they were only £8 when I bought them) so I bought two to make a 120cm square, which fit perfectly next to the window in my office above a slim sideboard where I keep my sewing stuff.

I painted the sheets in white satin paint because they need to withstand a fair bit of wear and tear and then I had to mount them.

DIY pegboard | how to mount your own pegboard | Apartment Apothecary

I couldn’t resist some fresh flowers for the TV crew but they were very quickly pushed aside in favour of lights and rigging – ha!

DIY pegboard | how to mount your own pegboard | Apartment Apothecary

To mount:

The board needs to sit roughly 2cm away from the wall so that there is space between the wall and the board for the pegs. Therefore, you need to screw in vertical batons of wood on the left and right side of your board (and in the middle if you have two like me).

Very simply, screw the board to the batons at the top, middle and bottom, using washers to keep it secure.

DIY pegboard | how to mount your own pegboard | Apartment Apothecary


I bought a variety of pegs for my board from this Etsy seller, which are perfect for the types of things I store.

DIY pegboard | how to mount your own pegboard | Apartment Apothecary

Hope that helps for anyone thinking about setting up their own pegboard whether it be in a workspace, kitchen, the inside of a storage cupboard or even a playroom.

Do you have any good storage ideas in your home?

Katy x