DIY feather baubles and my Christmas tree

I have just put my Christmas tree up and I still have glittery fingers from making my one handmade bauble of the year that I always gift to my sister (it’s our little tradition). I love having a mix of old and new in my home and the same goes for the tree; some new, some old and some handmade.

This year we have a beautiful ‘tree’ from Houseology that is perfect for our flat and I love how simple it is. It has LED tips and it looks so, so pretty when it is lit at night. Soooo pretty!

So, here is my little tree and my homemade feather bauble (a stupidly easy tutorial below – it honestly took me five mins to make it) along with a set of new baubles that fit with the Scandi/vintage vibe that you know that I love.

LED Christmas tree from Houseology | Apartment Apothecary

Snow LED Light Branch from Houseology

A good dose of brown paper packages tied up with string (and a few sprigs of Eucalyptus for good measure).
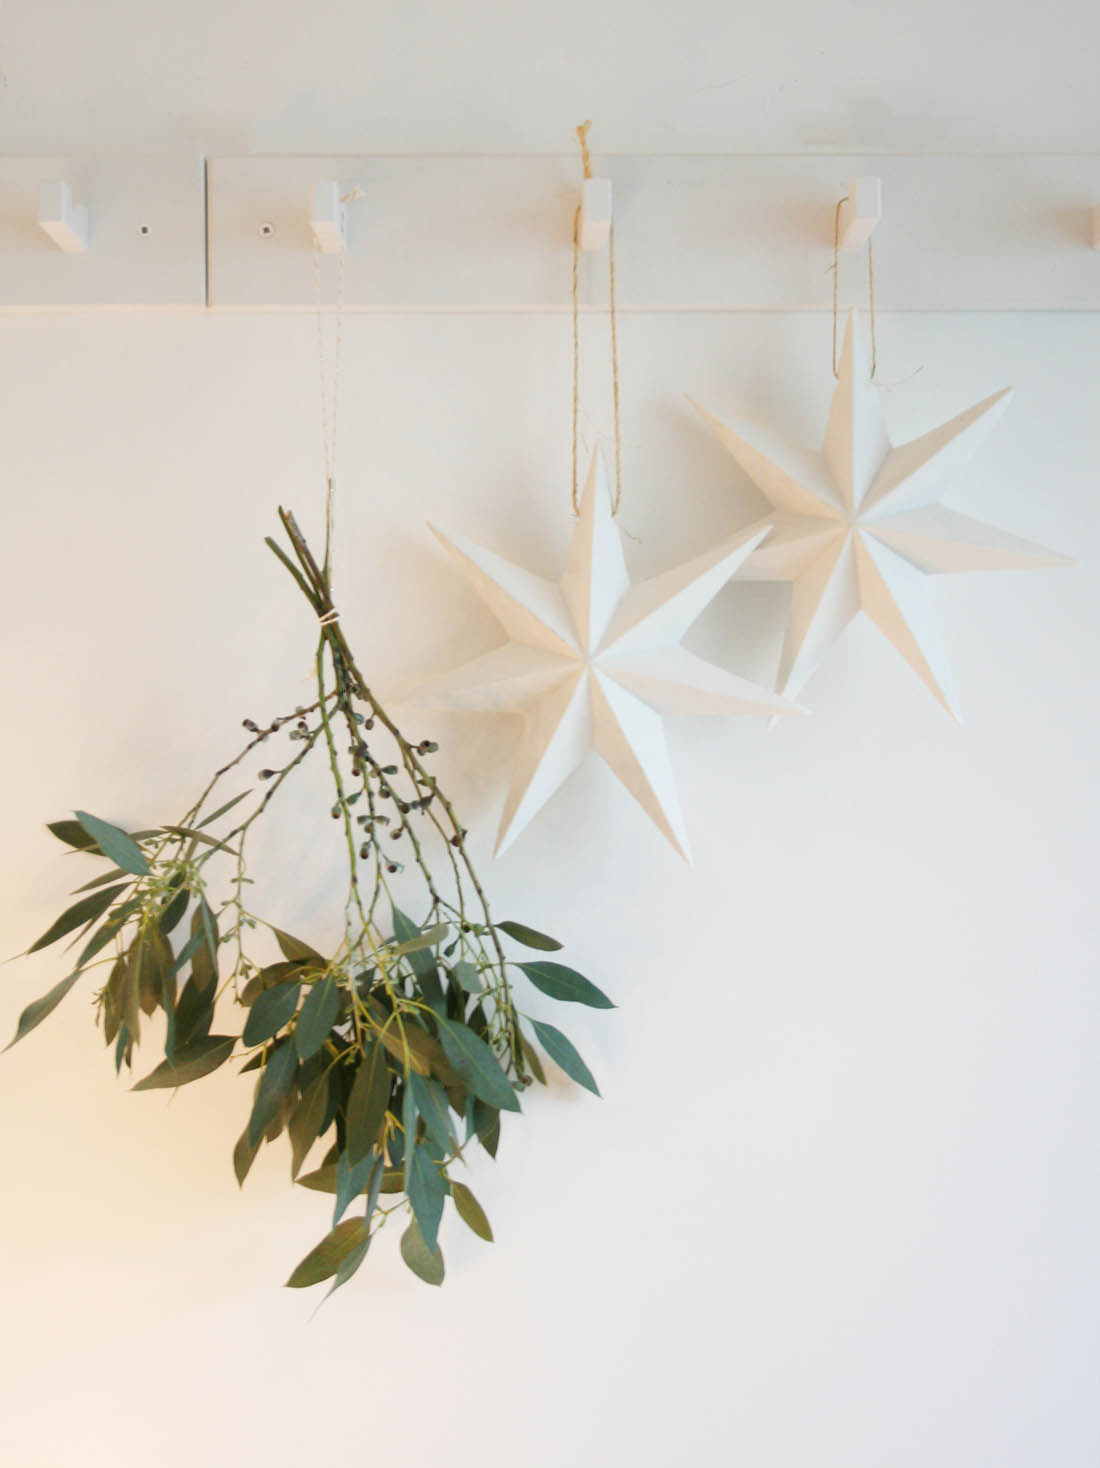
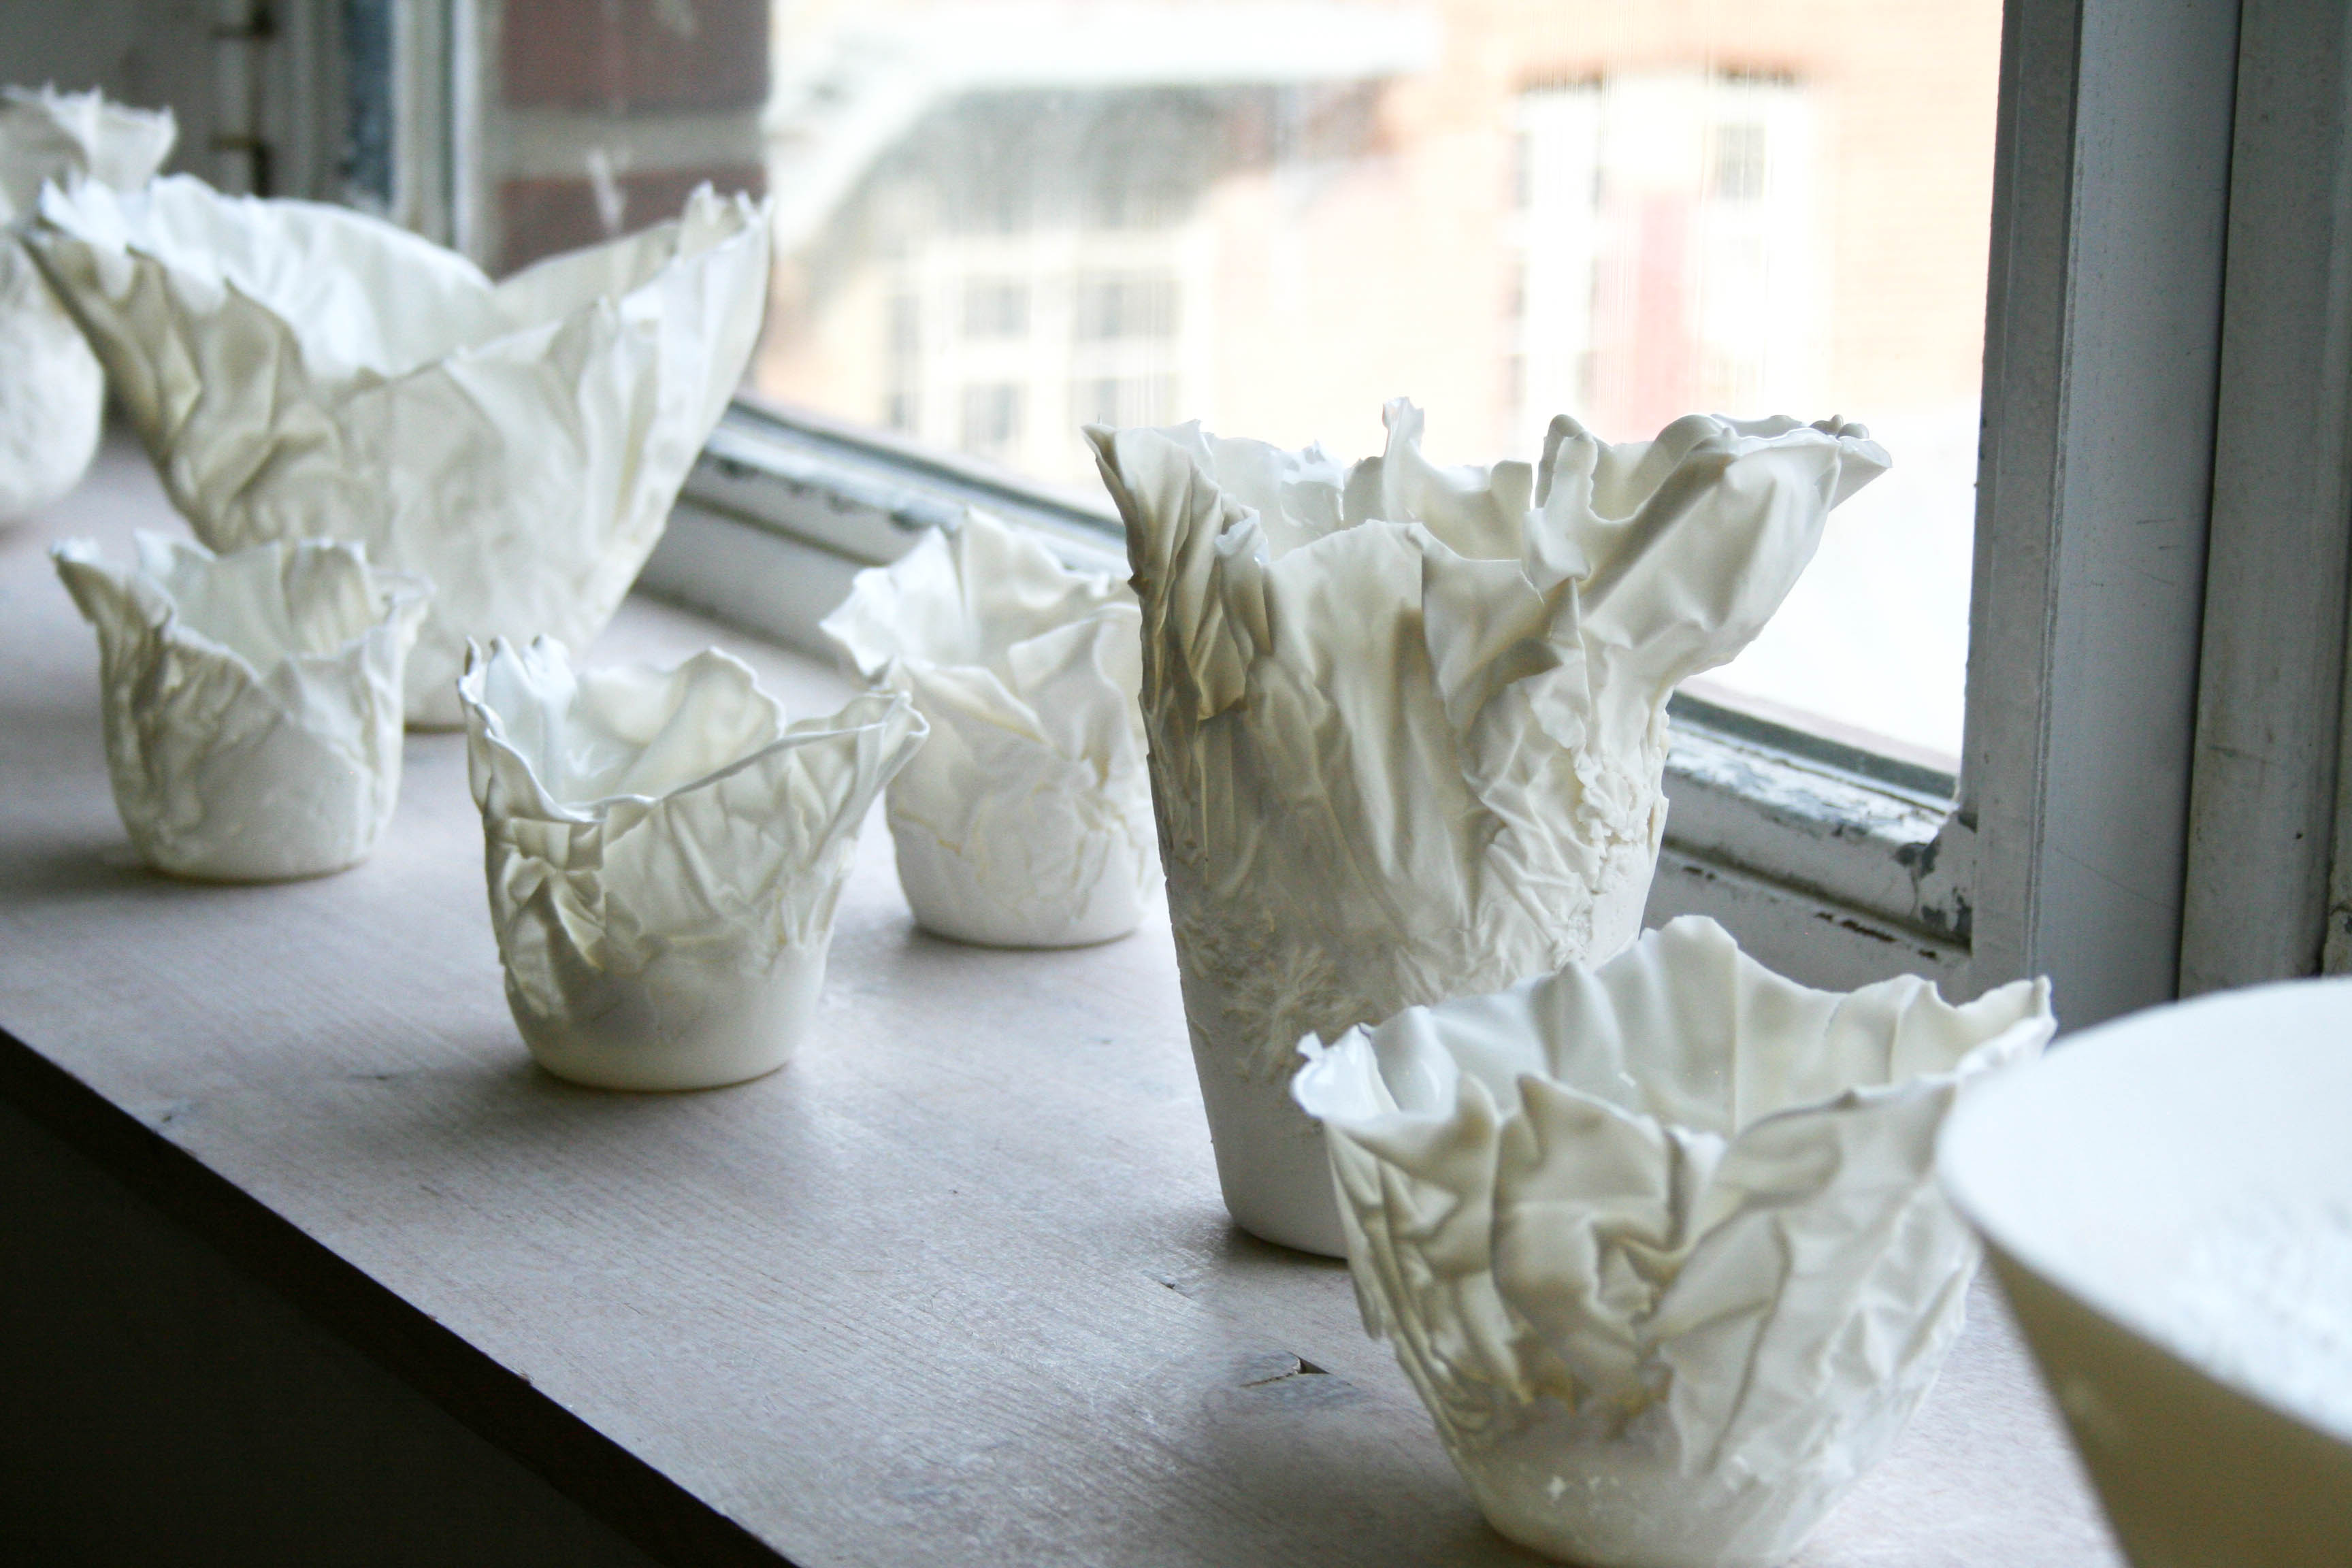
IMG_3210 copy

I was spoilt for choice when selecting a new collection of baubles from Houseology. I decided to stick with white and gold and mix the Scandi wooden hanging tall heart decorations and the large wooden star hanging decoration with the more vintage looking harlequin ball baubles.

LED Christmas tree from Houseology | Apartment Apothecary

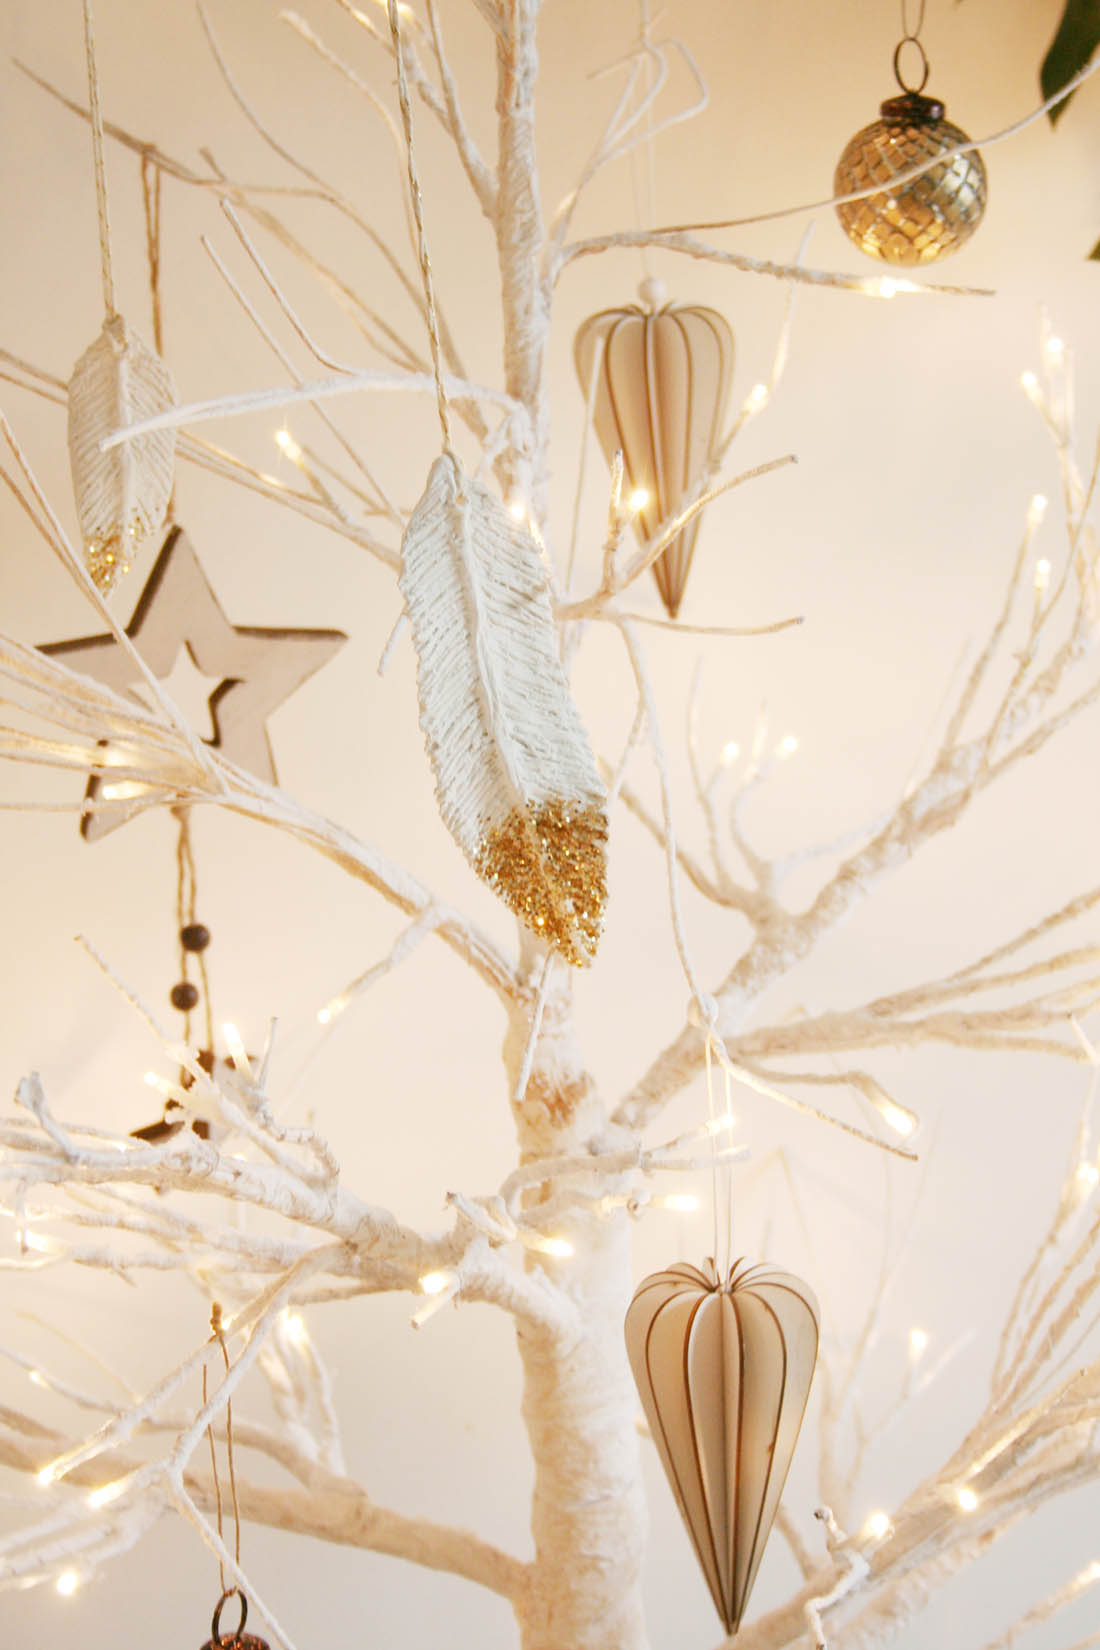
My handmade feather bauble (tutorial below). When Jules found me a pure white swan feather in the park a couple of months ago I scoured the park looking for more but with no luck. Therefore, I tried to make my own using air dry clay (Jules says it looks more like a leaf, but I hope you think it looks like a feather!).

LED Christmas tree from Houseology | Apartment Apothecary

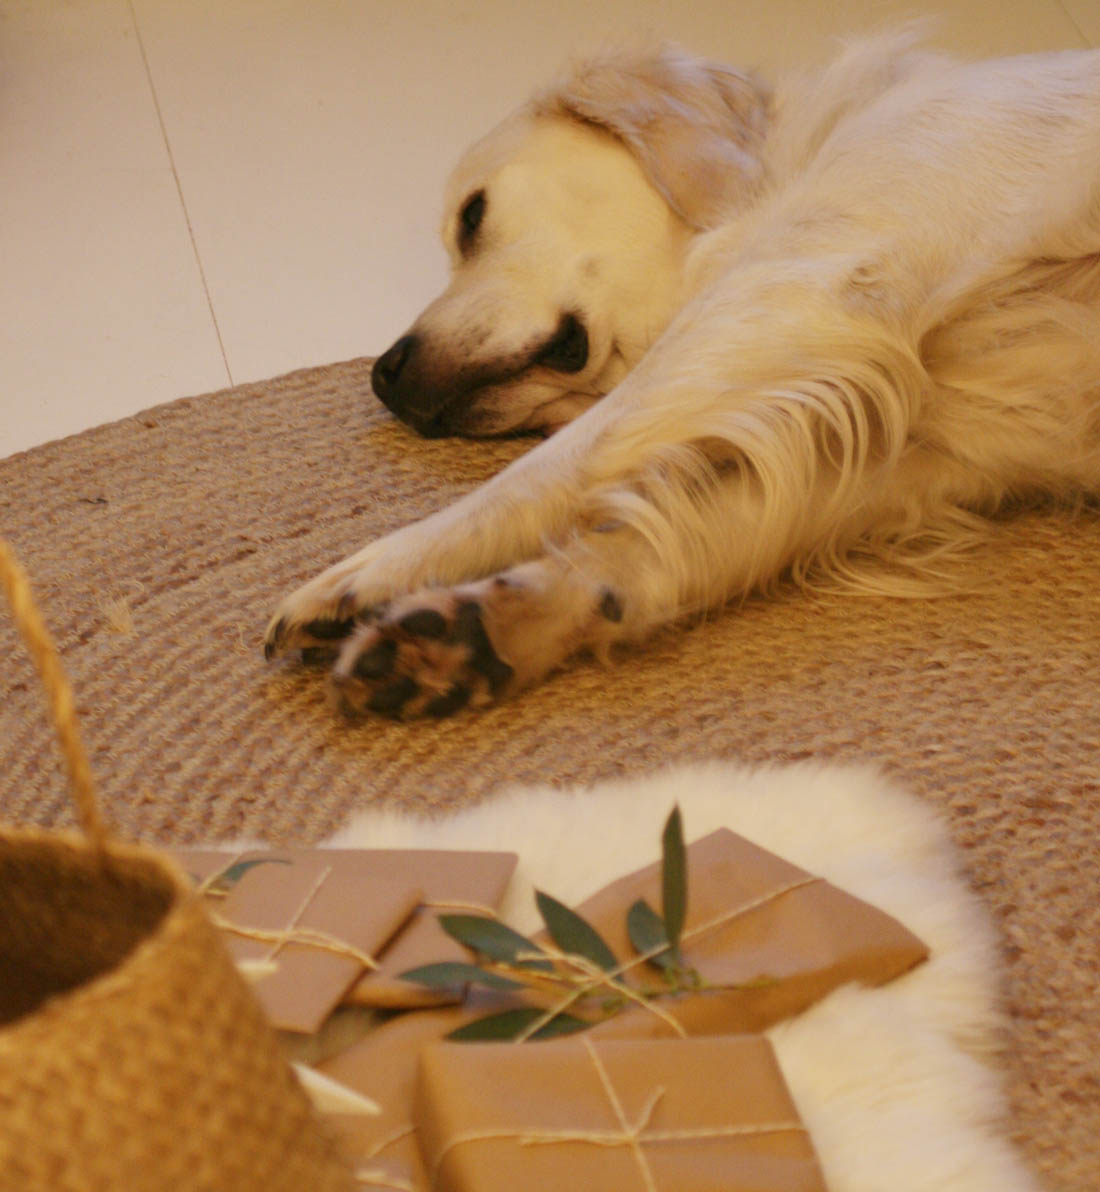
And this little munchkin eyeing up the presents.

If you would like to make some of my gold-tipped feather baubles here is a little tutorial for you…

You will need:

Air dry clay

– Rolling pin

– Wooden board

– Knife

– Tooth pick

– Paint, brush, glue and glitter to decorate if you want to

– Twine to string it up for the tree

Handmade feather bauble tutorial | Air dry clay project | Homemade Christmas tree decoration | Apartment Apothecary

Step by step:

1. Take a small piece of clay in your hands and roll it into a largish sausage shape in your hands (make sure it is as fat as a large sausage).

Handmade feather bauble tutorial | Air dry clay project | Homemade Christmas tree decoration | Apartment Apothecary

2. Roll out the sausage shape so it is about 5mm thick. Using a knife cut out a feather shape.

Handmade feather bauble tutorial | Air dry clay project | Homemade Christmas tree decoration | Apartment Apothecary

3. Use both forefingers to mould a spine down the centre of the feather. Don’t worry about squishing out the shape of the feather as you do this or leaving finger prints.

Handmade feather bauble tutorial | Air dry clay project | Homemade Christmas tree decoration | Apartment Apothecary

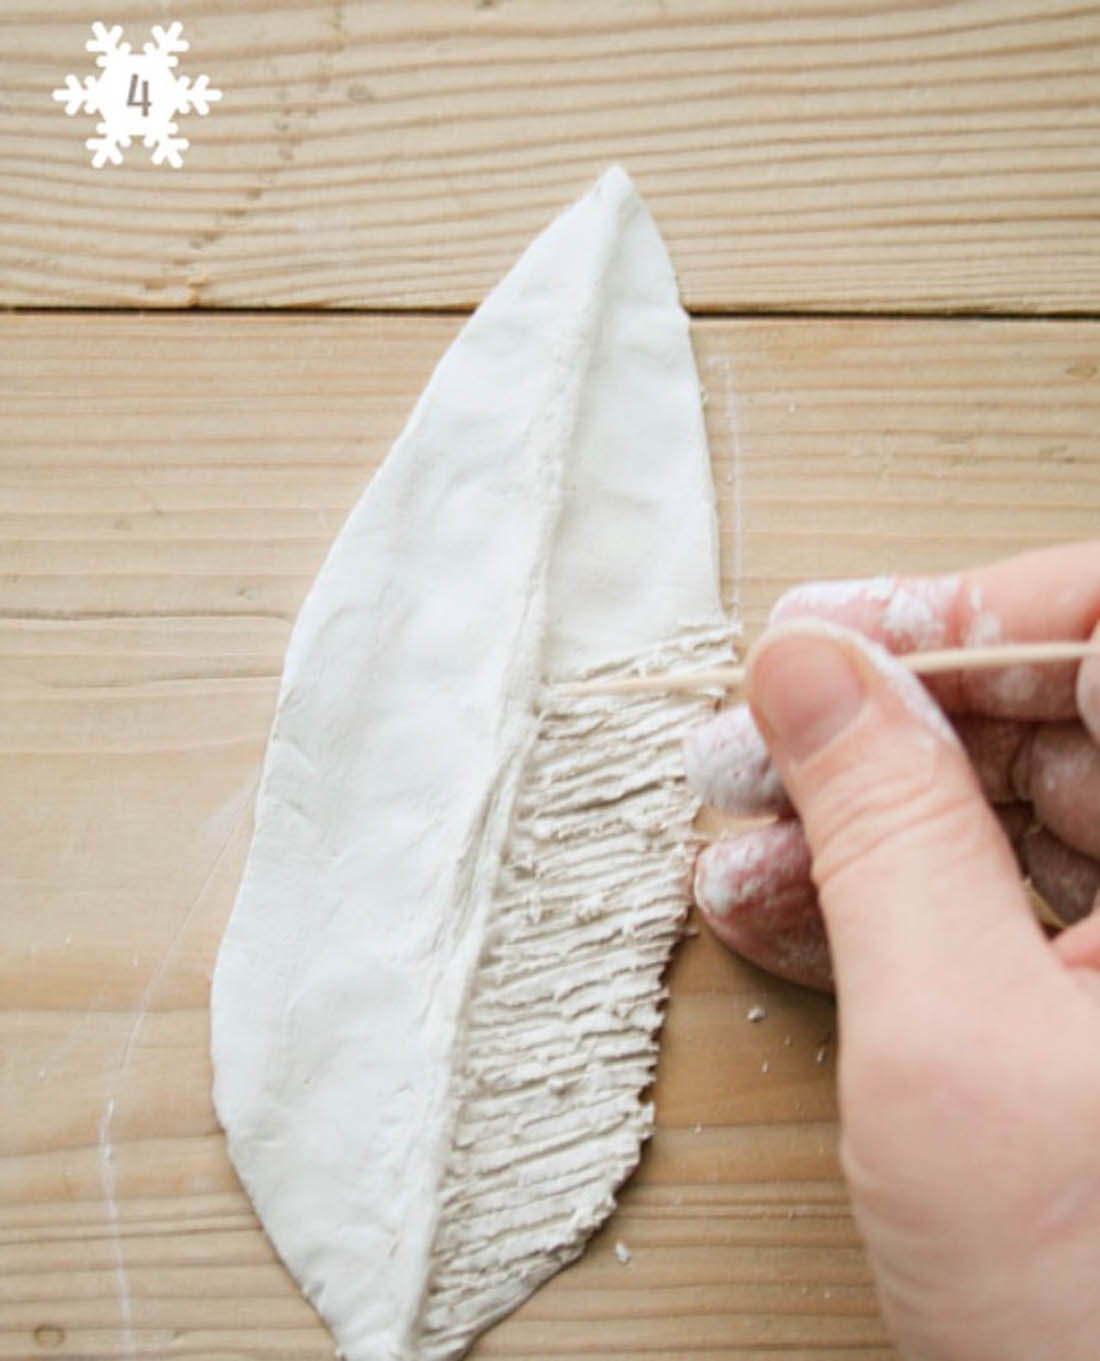
4. Use a toothpick to score lines from the spine tot eh outer edge of the feather at a 45 degree angle. Don’t worry about keeping it neat or blurring the outer edge – a bit of texture will make it look better and more feather like than leaf like.

Handmade feather bauble tutorial | Air dry clay project | Homemade Christmas tree decoration | Apartment Apothecary

5. Once you have scored down both sides use the tooth pick to create a hole for the twine.

Handmade feather bauble tutorial | Air dry clay project | Homemade Christmas tree decoration | Apartment Apothecary

6. Before you leave it to dry overnight, gently manipulate the feather to curl it slightly so it gains the shape of a real feather.

Handmade feather bauble tutorial | Air dry clay project | Homemade Christmas tree decoration | Apartment Apothecary

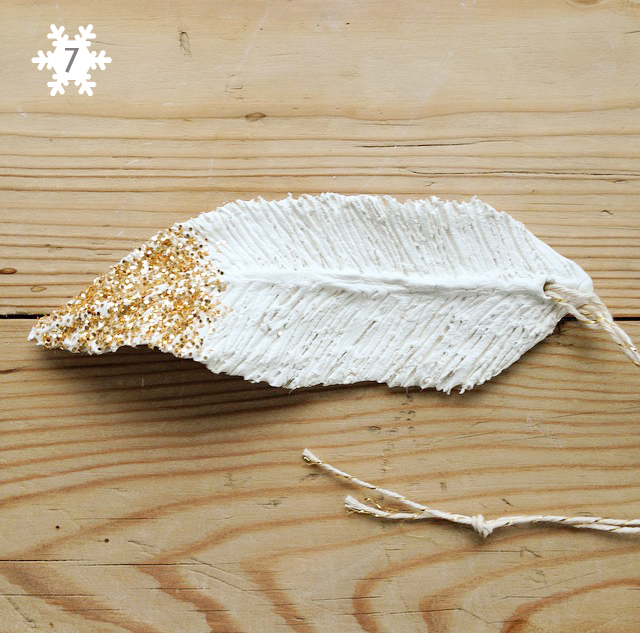
7. Once the clay has dried overnight, gently rub over the little bits and pieces with your fingers to smooth the surface of the feather. Paint your feather and/or add glitter using PVA glue and then string it up ready for the tree!

Handmade feather bauble tutorial | Air dry clay project | Homemade Christmas tree decoration | Apartment Apothecary

Happy tree decorating everyone!

Katy


*This post was written in collaboration with Houseology.

Homemade Christmas gifts: nutella and gingerbread syrup

The sheer volume of gifts that need to be bought and wrapped is what feels quite overwhelming about Christmas to me. However, last year I overcame this problem by making my ‘Christmas in a Jar‘ gifts – a massive stack of inexpensive, thoughtful and quick to make presents that didn’t need to be wrapped. They were perfect for colleagues, neighbours and friends and saved me heaps of money.

This year I wanted to do the same sort of thing and have decided to make homemade nutella and gingerbread syrup, both of which are super easy to make and don’t cost too much. They are also a little bit different and I hope will be appreciated!

Nutella

I have been inspired by Deliciously Ella‘s recipe for the nutella, so it has no refined sugar in it, but I’ve taken a few short cuts here and there. Here’s how I made it…

To make one 125ml kilner jar (I bought a set of 12 from here for £20)

– 1/2 cup of smooth hazelnut butter (Ella roasts and blends the hazelnuts herself but buying the butter ready made is actually cheaper and far less hassle!)

– 1/3 cup of maple syrup

– 1/3 cup raw cocoa powder

Mix all three ingredients in a bowl until blended completely to a smooth paste and that is it! Spoon into your jar and add a pretty label. You do need to eat it pretty quickly as there are no preservatives or nasties in it so maybe mention that on the label – Ella recommends thee days.

Homemade Christmas gifts | Nutella recipe | Gingerbread syrup recipe | Apartment Apothecary

Homemade Christmas gifts | Nutella recipe | Gingerbread syrup recipe | Apartment Apothecary

Gingerbread syrup

I was inspired to make this for the first time last year after seeing the recipe over on Laura’s gorgeous blog Circle of Pine Trees. I gave Jules a bottle and he actually said it was his favourite present last year as he is obsessed with coffee and thought it was delicious.

Pop over to Lauras blog for the recipe; the ingredients are pretty simple, as you can see in the picture below.

Homemade Christmas gifts | Nutella recipe | Gingerbread syrup recipe | Apartment Apothecary

Jules has it in his coffee and begged me to make him more when his bottle ran out.

Homemade Christmas gifts | Nutella recipe | Gingerbread syrup recipe | Apartment Apothecary

I used a Dymo label maker and nice swing top bottles (you can buy these in supermarkets, Ikea or department stores or buy individual drinks in them and then just keep the bottle – that can actually be cheaper!) to make the present extra special.

Homemade Christmas gifts | Nutella recipe | Gingerbread syrup recipe | Apartment Apothecary

Festive cheer and sugar and caffeine highs all round!

Homemade Christmas gifts | Nutella recipe | Gingerbread syrup recipe | Apartment Apothecary

Got any good homemade Christmas present ideas that don’t cost too much or take too much time?

Katy x

P.S. All pics taken on my iPhone because cooking (well, mixing things together) and ‘proper’ photo taking don’t work well together in my world – the camera would end up the stickiest mess you could possibly imagine!

Wreath making for cheats

I have to admit that my visions of floral makes are almost never realised; I don’t have the patience, have never practised enough and it just doesn’t come naturally. Anyhoo, I was very inspired by this wreath and basically wanted to copy it for my own front door but I knew I would need to take a few short cuts to make it anywhere near as nice.

So, I have come up with a cheater’s wreath-making how to. Basically, my mum and I went to Ikea the other day (you know, when you wake up in the morning and decide if only you had a white sink all your problems would be solved so you find yourself in Ikea that same evening – no? Just me then!) and I picked up an artificial spruce wreath. I was actually quite shocked that it cost £7.50 but then thought about it (over meatballs, naturally) and decided that to make my own would firstly cost me a fair bit as all the florists near me are very, very expensive, secondly I wouldn’t be able to make mine look as good, thirdly, I will be able to use it again and again in different guises over the years and fourthly, it looks amazingly real! One artificial wreath purchased, along with a whole basketful of other stuff I clearly didn’t need and one expensive white quartz sink – I am out of control and the fact I gave more thought to spending £7 on a wreath than I did on spending £190 on a sink I don’t need is worrying.

Back to my ‘how to’.

You will need:

– ready made wreath base (I have seen loads of real pine wreath bases available in florists, markets, even the supermarket if you don’t want a fake one).

– hardy herbs like thyme, rosemary, bay leaves (I grow all of these on my balcony)

– hardy foliage like eucalyptus or anything that will dry well (I used Myrtle, which is the small leaves with blue berries).

– small, flat succulents

floristry wire

– scissors

– ribbon for decoration or to hang it from

Wreath making for cheats | Herb and succulent wreath | How to make a wreath | Christmas wreath | Apartment Apothecary

Tutorial:

Step 1 – make small bundles of your herbs and foliage and use the wire to tightly bind them at the bottom.

Wreath making for cheats | Herb and succulent wreath | How to make a wreath | Christmas wreath | Apartment Apothecary

Step 2 – place your bundles on the ready made wreath base and simply secure with the wire by wrapping around the bottom of the bundles again and then take the wire behind the wreath and twist it together as tightly as possible. Do a little shake test to check it’s as secure as possible.

Wreath making for cheats | Herb and succulent wreath | How to make a wreath | Christmas wreath | Apartment Apothecary

Overlap the bundles to hide the wire, working your way around the wreath.

Wreath making for cheats | Herb and succulent wreath | How to make a wreath | Christmas wreath | Apartment Apothecary

Step 3 – to attach the succulents remove their roots and stick two pieces of wire through the bottom of the succulent head.

Wreath making for cheats | Herb and succulent wreath | How to make a wreath | Christmas wreath | Apartment Apothecary

Place the succulent on the wreath and then use the wire to wrap it around the wreath base to hold it in place.

Wreath making for cheats | Herb and succulent wreath | How to make a wreath | Christmas wreath | Apartment Apothecary

Step 4 – add some ribbon to the wreath ring and you’re done! Could not be easier.

Wreath making for cheats | Herb and succulent wreath | How to make a wreath | Christmas wreath | Apartment Apothecary

I love how fresh and luscious the herbs make it look and it smells flipping amazing!

Wreath making for cheats | Herb and succulent wreath | How to make a wreath | Christmas wreath | Apartment Apothecary

Honestly, this took me about fifteen minutes, if that, and next year I can reinvent it all over again as I can keep the base. Would you be able to tell it’s fake?!

Katy x

Printing with Zeena and Papermash at the Town Hall Hotel

Last week was insanely busy both during the days and the evenings; add to that not having been at home for four weekends in a row and I feel like a bit of a hectic crazy lady (and if only you could see how much laundry I need to do). However, there was one afternoon, tucked away in the folds of the mania, that was a little pocket of heaven. The gorgeous Zeena Shah and Lynne from Papermash invited a little group of us to try out one of the printing technique’s from Zeena’s brilliant new book How to Print Fabric. They had laid out the most beautiful table for us at the Town Hall Hotel‘s corner room (you know the one with all the cool lights that crops up on Instragram all the time) surrounded by gorgeous seasonal props. We spent a dreamy afternoon printing napkins, chatting, drinking tea, laughing and then styling an Autumn themed dining table together.

2

Luggage labels from Papermash.

Jeska and I styled up this table together and being the kindest person in the whole wide world, she sent me over these beautiful photographs that she took as I was hopelessly disorganised with no camera. It was totally pitch black outside by then and I quite love the tone and colours of the room that work so well with the Autumn leaves, flowers and table setting.

1

I find printing to be such a relaxing craft and we used fallen leaves as the template for lino cutting. We stamped onto linen napkins and then set the perfect November table. I’m not usually a fan of Autumn colours but our styling has inspired me to embrace them. I have made an Autumnal collection of products from some of my favourite shops (including The Future Kept that Jeska runs with her husband, Dean) that you can buy directly from my blog – beautiful golds, russets and copper…

IMG_5312

It really was a gorgeous, cosy afternoon and so great to hang out with Jeska, Teri, Lucy, Kat and Charley. Thank you so much to Zeena, Lynne and the Town Hall Hotel. Have you got an Autumnal crafts planned?

Katy x

P.S. You can buy Zeena’s book here – I would definitely recommend it if you need some craft inspiration. All photos (except the header, which I took on my iPhone) taken by Jeska of Lobster and Swan.


Blogger tour of Leipzig

I was invited to Leipzig last weekend, a city in the east of Germany, to join a small group of bloggers to explore the city and the Designers’ Open. The region of Saxony has been undergoing a process of renewal over the last twenty five years, since the fall of the Berlin Wall, and I was honoured to be asked to come and experience it for myself. Having been a history teacher for many years and knowing so much about the German Democratic Republic it was fascinating to not only see this part of Germany but to find out more about its movement and progress. It’s almost unthinkable that twenty five years ago I wouldn’t have been able to enter the city, let alone leave. However, Leipzig has always been a centre of culture, a city of books and fairs with a mix of striking architecture seeped in history – so much to see and do!

I joined Carole, a fellow blogger from London, and Mia, who lives in Leipzig and is the editor of a very successful blogzine, Alabaster Maedchen. We spent our time meeting designers, seeing their work and discovering what lies at the heart of this vibrant cultural hub.

My highlight of the trip was the tour of the Spinnerei: an old cotton factory dating back to 1884 that is now filled with exhibition space and makers’ workshops. The buildings themselves were perfect examples of industrial architecture and as the door opened on studios, workshops and pieces of art I could feel the exciting energy of this special place. The workshop of Saxony Ducks was my dream workspace and their creations in the softest wool were stunning and I couldn’t resist an advent calendar based on the tales of the Brothers Grimm from graphic designer Katja Zwirnmann. The buildings have been beautifully restored to maintain all of the character of the original cotton factory, yet allow the artists to exhibit, make, develop and inspire: such an important project and reflective of the progress and creativity of the city.

Discovering Leipzig | Simply Saxony | Designers' Open 2015 | Spinnerei

Leipzig’s Spinnerei

Discovering Leipzig | Simply Saxony | Designers' Open 2015 | Handmade ceramics

The space that captured my imagination most was Claudia Biehne’s porcelain studio. Paper-thin porcelain bowls, vases and sculptures whose beauty lay in their fragility and each so unique in its shape and form. Claudia explained the design process, which just added to how precious each creation was. I absolutely love seeing the workspace of creatives so this was such a treat.

Discovering Leipzig | Simply Saxony | Designers' Open 2015 | Handmade ceramics

Porcelain pieces by Claudi Biehne

Discovering Leipzig | Simply Saxony | Designers' Open 2015 | Spinnerei

Discovering Leipzig | Simply Saxony | Designers' Open 2015 | Spinnerei

We spent all of Friday at the Designers’ Open, a great chance to explore and talk to designers to find out more about the concepts behind their designs. The exhibition space was filled with hand made ceramics, furniture, lighting, fashion and graphic design: a stage for new trends and a market place for new designs. I found a few products, including a kitchen unit that I’m still dreaming about, that I would have snapped up there and then if I didn’t have a teeny weeny baggage allowance.

Discovering Leipzig | Simply Saxony | Designers' Open 2015 | Concrete furniture

Concrete furniture and homewares by Betoniu

Discovering Leipzig | Simply Saxony | Designers' Open 2015

I loved these lamps made of concrete and coloured twine, handmade over several days by Oliver Schilf in his living room. I’d want three of these hanging in my kitchen!

I immediately fell for these stacking bowls painted with a traditional Japanese blue. Aren’t they beautiful in their simplicity?

Discovering Leipzig | Simply Saxony | Designers' Open 2015

The clever and sleek design of these milk jugs with a small sugar bowl stacked on top is brilliant.

Discovering Leipzig | Simply Saxony | Designers' Open 2015 | Blogger tour

We saw more designers around the city at a number of design ‘spots’. The Grassimuseum in the centre of the city hosted several projects by university students and more inspiration.

We were incredibly lucky to be shown the city by the lovely Mia, Alex and Anja – there’s nothing better than a bit of insider knowledge when discovering a new place and great to get an insight into daily life in the city. They took us to see the lakes, just a ten minute bike ride from the city centre, that is a popular spot in the summer but incredibly beautiful at this time of the year with the Autumnal colours of the woods that surround the water.

Discovering Leipzig | Simply Saxony | Designers' Open 2015

It was so wonderful to spend the weekend with such great people. Mia is one of the most interesting and generous people I have met in a long time and she and her partner, Alex, looked after us so well, taking us to good restaurants (we ate so well), to must-see spots and introduced us to some other local bloggers. Mia and Alex, you must come to London soon! Claudius and Anja were both so warm and went to great lengths to make sure we had the best possible experience. It was also really great to spend time with Carole and we had so much fun together – I can’t wait to come round for dinner, Carole! We also stayed in a hotel that I would highly recommend called Arcona Living Bach 14.

This is a place on the move, an ever-changing scene rich in culture and ready to change people’s perception of this part of the world. I loved meeting such generous people, discovering new designers and absorbing as much of the city as possible; I’m pretty sure it won’t stay the same for long and I look forward to seeing what its future holds.

Katy x


*This post was written in collaboration with Simply Saxony.