DIY pegboard

Last week a TV crew came in to film my pegboard for a new show about decluttering and storage (I’ll let you know when it airs in a couple of months). Whenever I post a pic of my pegboard on my instagram feed I always get people asking me where I bought it from, which has made me realise that I’ve never actually written a post about it, it was just included in my home office makeover reveal post. So, I thought it would be useful to have a dedicated post that I can direct people to.

DIY pegboard | how to mount your own pegboard | Apartment Apothecary

There are now lots of lovely companies that sell swish pegboards but they cost a lot and when I made mine about three years ago no one was really selling them; it seemed to be a much more ‘American garage’ type thing. Therefore, I sourced mine from Amazon after trawling around elsewhere for ages and I found this seller who offers sheets of 120 x 60cm pegboard for £10 (they were only £8 when I bought them) so I bought two to make a 120cm square, which fit perfectly next to the window in my office above a slim sideboard where I keep my sewing stuff.

I painted the sheets in white satin paint because they need to withstand a fair bit of wear and tear and then I had to mount them.

DIY pegboard | how to mount your own pegboard | Apartment Apothecary

I couldn’t resist some fresh flowers for the TV crew but they were very quickly pushed aside in favour of lights and rigging – ha!

DIY pegboard | how to mount your own pegboard | Apartment Apothecary

To mount:

The board needs to sit roughly 2cm away from the wall so that there is space between the wall and the board for the pegs. Therefore, you need to screw in vertical batons of wood on the left and right side of your board (and in the middle if you have two like me).

Very simply, screw the board to the batons at the top, middle and bottom, using washers to keep it secure.

DIY pegboard | how to mount your own pegboard | Apartment Apothecary


I bought a variety of pegs for my board from this Etsy seller, which are perfect for the types of things I store.

DIY pegboard | how to mount your own pegboard | Apartment Apothecary

Hope that helps for anyone thinking about setting up their own pegboard whether it be in a workspace, kitchen, the inside of a storage cupboard or even a playroom.

Do you have any good storage ideas in your home?

Katy x


Top 10 neutral rugs

featured

Gone are the days of my beautiful kilim rug (like the one above from Anthropologie that I MUST have for our next house!) after Otto thought it was great fun to ruck it up and wear holes in it as well as his fur showing up really badly on it. Therefore, I knew I wanted a new rug when we redecorated our living room and it had to be super practical and as neutral as possible because I want the space to feel calm and tranquil. With a big dog I was looking for something that would hide his fur and the mud he traipses into the house every day after walks as well as being very robust as he loves a good wrestle and roll around on the floor. It also needed to be about 200cm x 300cm so that it would be large enough for my furniture to sit on it (did you see my guide to rug placement?). Whilst looking these were all options I came across, some fitting the brief better than others, but I thought it would be handy to share them as it’s always good to be pointed in the right direction for where to buy a good rug…

Top ten rugs | Neutral rugs | Apartment Apothecary

1. Plantation Benni Rug, Land of Rugs / 2. Colours Georgette Rug, B&Q

Top ten rugs | Neutral rugs | Apartment Apothecary

3. Frankie by Plantation Rugs, Land of Rugs / 4. Afar Shaggy Rug, La Redoute

Top ten rugs | Neutral rugs | Apartment Apothecary

5. Ferm Living Kelim Rug, Smug / 6. Andria Rug, Heal’s

Top ten rugs | Neutral rugs | Apartment Apothecary

7. Belle Rug, Land of Rugs / 8. Overod Rug, Urbanara

Top ten rugs | Neutral rugs | Apartment Apothecary

9. Colours Lollie Brown Rug, B&Q / 10. Pomezia Rug, Heal’s

Which one do you think I went for in the end?

Katy x


*This post was written in collaboration with Land of Rugs.

Perfect lighting

Lighting is one of the most important factors in making a room a welcoming and pleasant place to spend time. It was my first priority when decorating my kitchen and living room to get the lighting sorted and until it was I didn’t want to be in either of those rooms even though they were newly decorated.

When choosing lighting I focus on creating warm yellow light rather than cold white light and I far prefer up-lighting rather than downlighting or spot lighting as it is much softer and doesn’t cast unpleasant shadows. Therefore, I like ceramic or glass lamp shades as these emit the light evenly (you need to choose soft filament bulbs) and adjustable heads are perfect as you can rotate them to become up-lights. I always try to have at least three separate light sources per room.

In my sitting room I have tried to create a calm, simple and minimal interior so these lights were on my shortlist after selling a couple of my old lamps; I needed one to hang over my dining table, one to sit next to the sofa and one to clamp onto the open shelves in our kitchen because I love having soft light in the kitchen rather than harsh spot lights.

Minimalist lighting | Apartment Apothecary

and theres more

1. Original BTC Hector Ceiling Light, The White Company 2. Anglepoise Original 1227 Brass Wall Mounted Lamp, Houseology 3. Twiitter Floor lamp, Heal’s (currently 50% off)  4. Melrose Glass Hanging lamp, One.World 5. Hector Medium Dome Clip Light, Original BTC

I was really excited to find the new wall mounted Anglepoise lamp from Houseology. I really wanted a lamp next to the sofa but there isn’t room for a table or enough space for a floor lamp so the wall mounted Anglepoise is completely perfect because there is no need to mess with wiring it into the wall. It is beautifully engineered so that I can pull it over the sofa for reading or rotate it to face upwards, which illuminates the whole corner of the room in a lovely soft light. I bought both Original BTC lamps; one to hang over the dining table (I LOVE it) and one to clip on to the shelves, which emits a lovely soft light so we are all sorted now.

Do you need to improve the lighting in any of the rooms in your house?

Katy x

Adding the finishing touches to a room

You may have noticed that I’ve been a bit quiet around here the last couple of weeks as I am struggling with our current round of IVF, which is much, much longer than the previous rounds so it really feels like an endurance test. I don’t know about you but when I don’t feel well I really struggle to think of creative ideas or concentrate so I will try instead to have a practical focus on the blog this week, which might come a bit more easily.

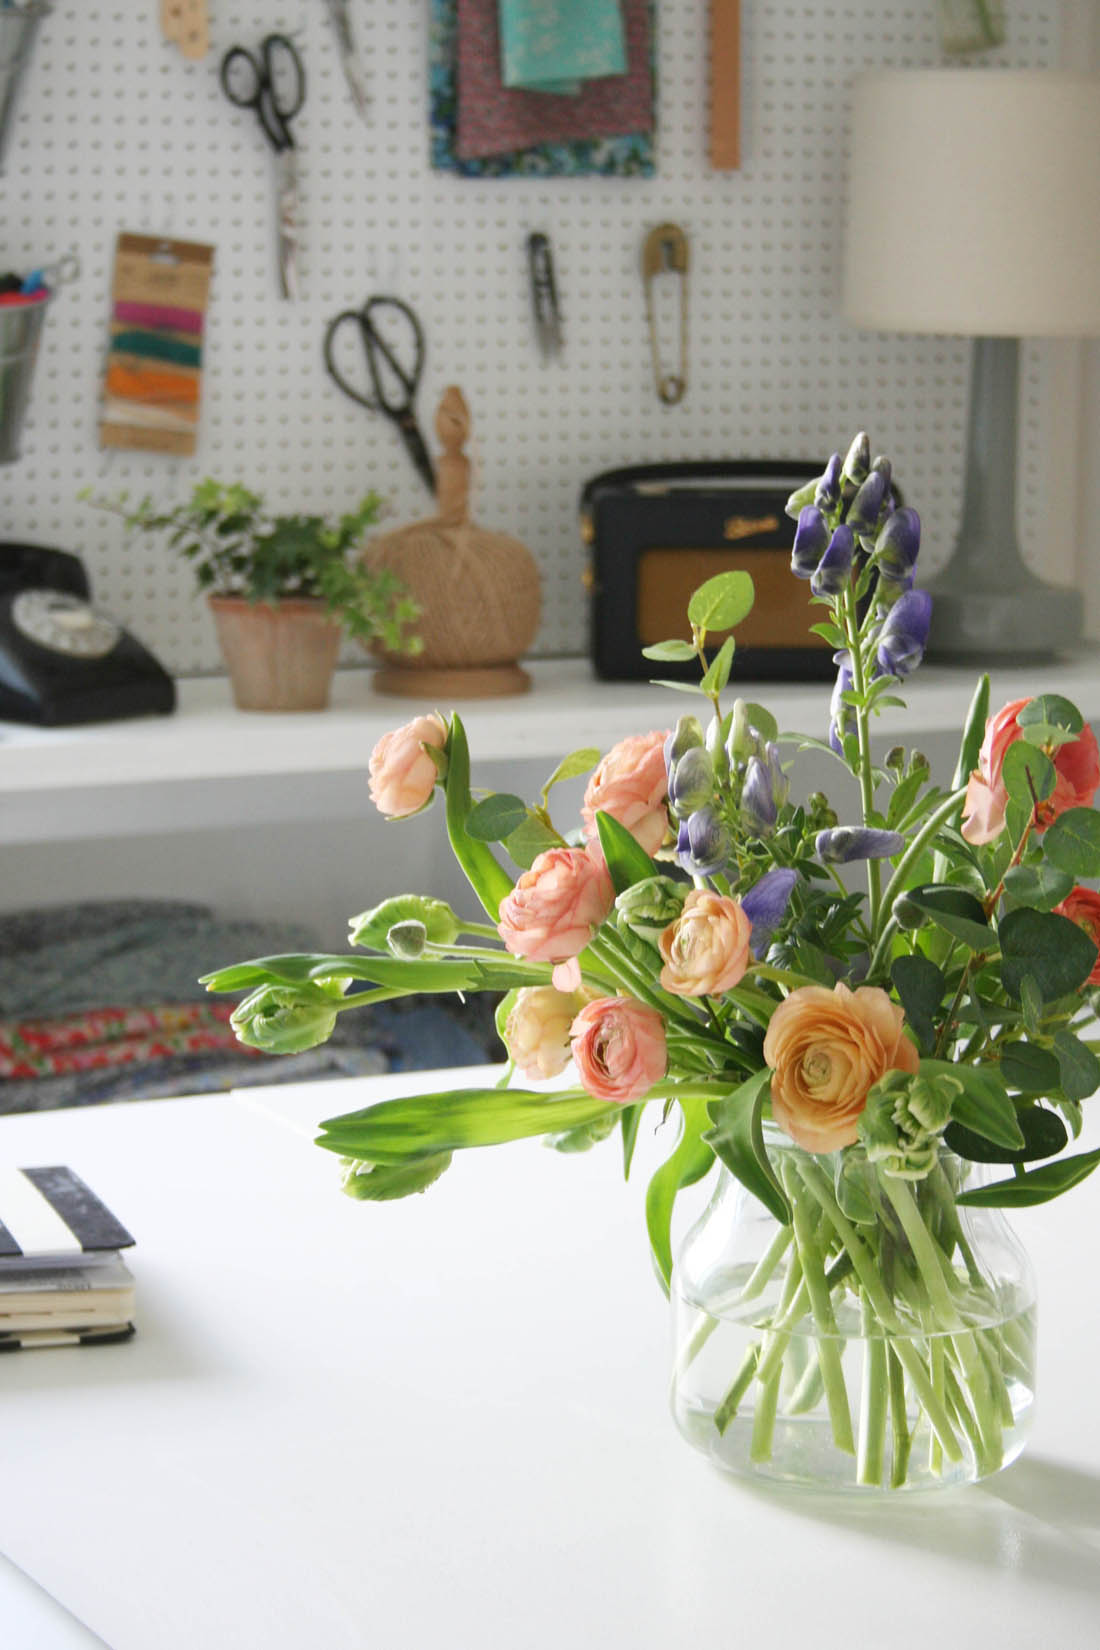
Our living room and kitchen makeover is all finished but dragged on and on because the delivery of a new sofa was very delayed and without that I couldn’t finish off the living space. We are now at a stage where the final finishing touches need to happen and I’ve hit a bit of a wall, mostly because I have felt so floored by all the drugs I am on but also because when so much work has gone into getting the ‘big’ stuff sorted it’s easy to run out of steam doing the smaller jobs e.g. framing art work, deciding on lighting, potting up plants, hanging mirrors etc.

So, I have put together a list of helpful tips if you are in the same situation and hopefully it will help me along the way too!

1. Ask for a trusted opinion

When you’ve been working on redecorating a room for a while it can become all a bit of a blur and you can no longer see the wood from the trees. You can end up having no idea whether the room actually looks nice or not because you have looked at it and studied it for so long! That’s why it’s a great idea to call on someone whose opinion you trust to come over and gauge their reaction. Make a little list of things you have been struggling with – placement of art work, cushion choices, whether the big houseplant should go on the left or the right of the window – and ask their opinion. I did this a couple of times last week and it has really helped me refocus and trust that I am making the right decisions.

2. Make a comprehensive list

I can find it a bit stressful when I think there is still loads to be done and therefore I do nothing. Making a clear list makes everything feel more manageable and can remove some of that stress as more often than not you realise there isn’t as much to do as you had built up in your mind.

3. Plan your budget

If you know that you still need to buy finishing touches for your room/s plan your budget carefully. Perhaps space out the purchases over the next few months and plan towards that.

4. Take your time

I think it can be a positive to take your time on the finishing touches of a room as it makes it feel more organic and a break after doing major changes can be refreshing as you come back to the room with a new perspective. However, you do need to be firm with yourself about what needs to be done and plan some sort of timescale as I have seen soooo many people never ever finish a room off as they just get used to it the way that it is.

5. Take photos to gain new perspective

If you are struggling after working on a room for too long and you feel unsure about what it needs to pull it all together try taking a few snaps. Seeing the room on film can really help give you a new perspective and a bit of distance, which should help you identify what you need to add to make it feel finished.

6. Break it down

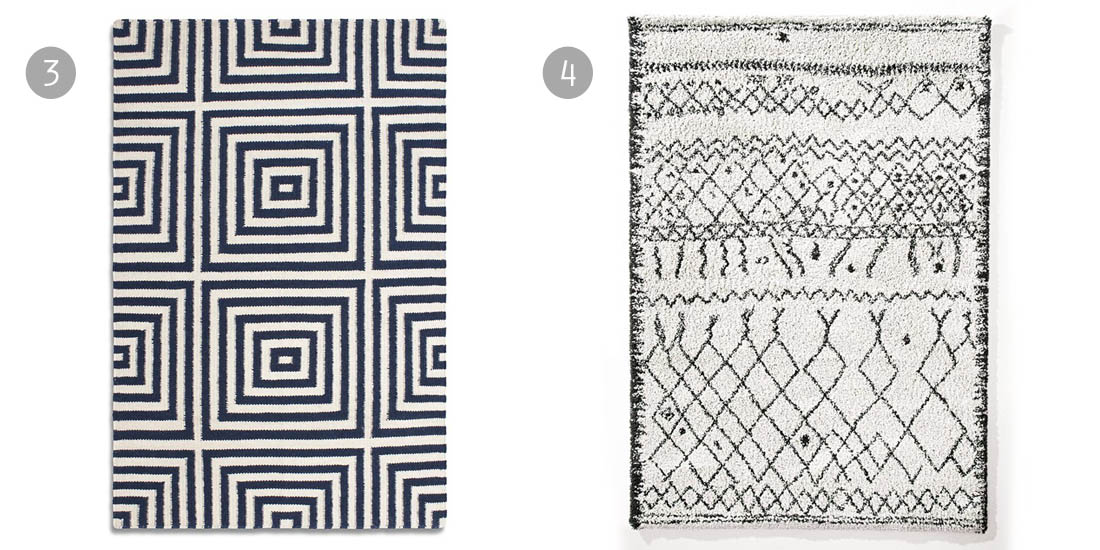
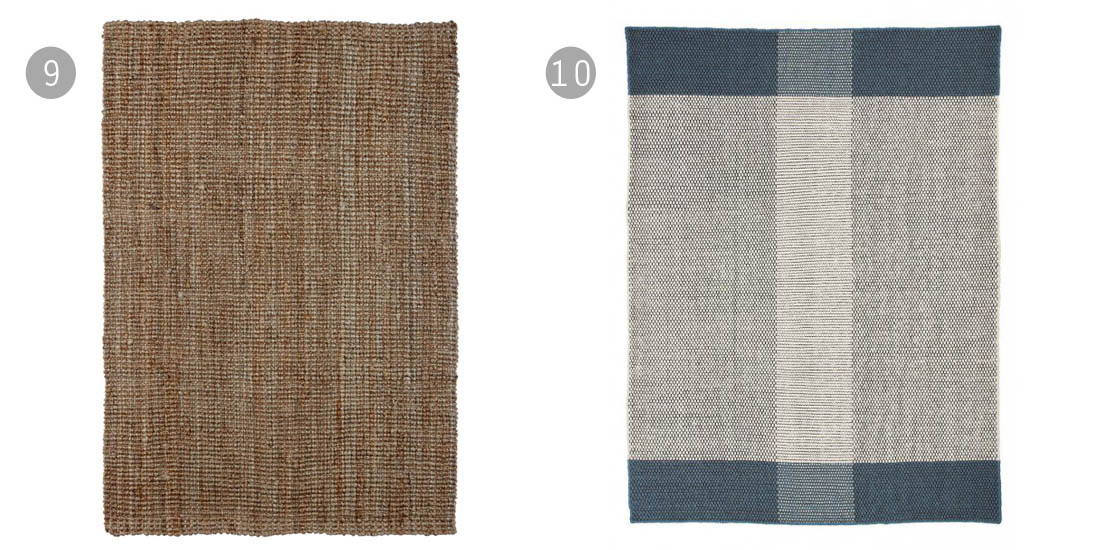
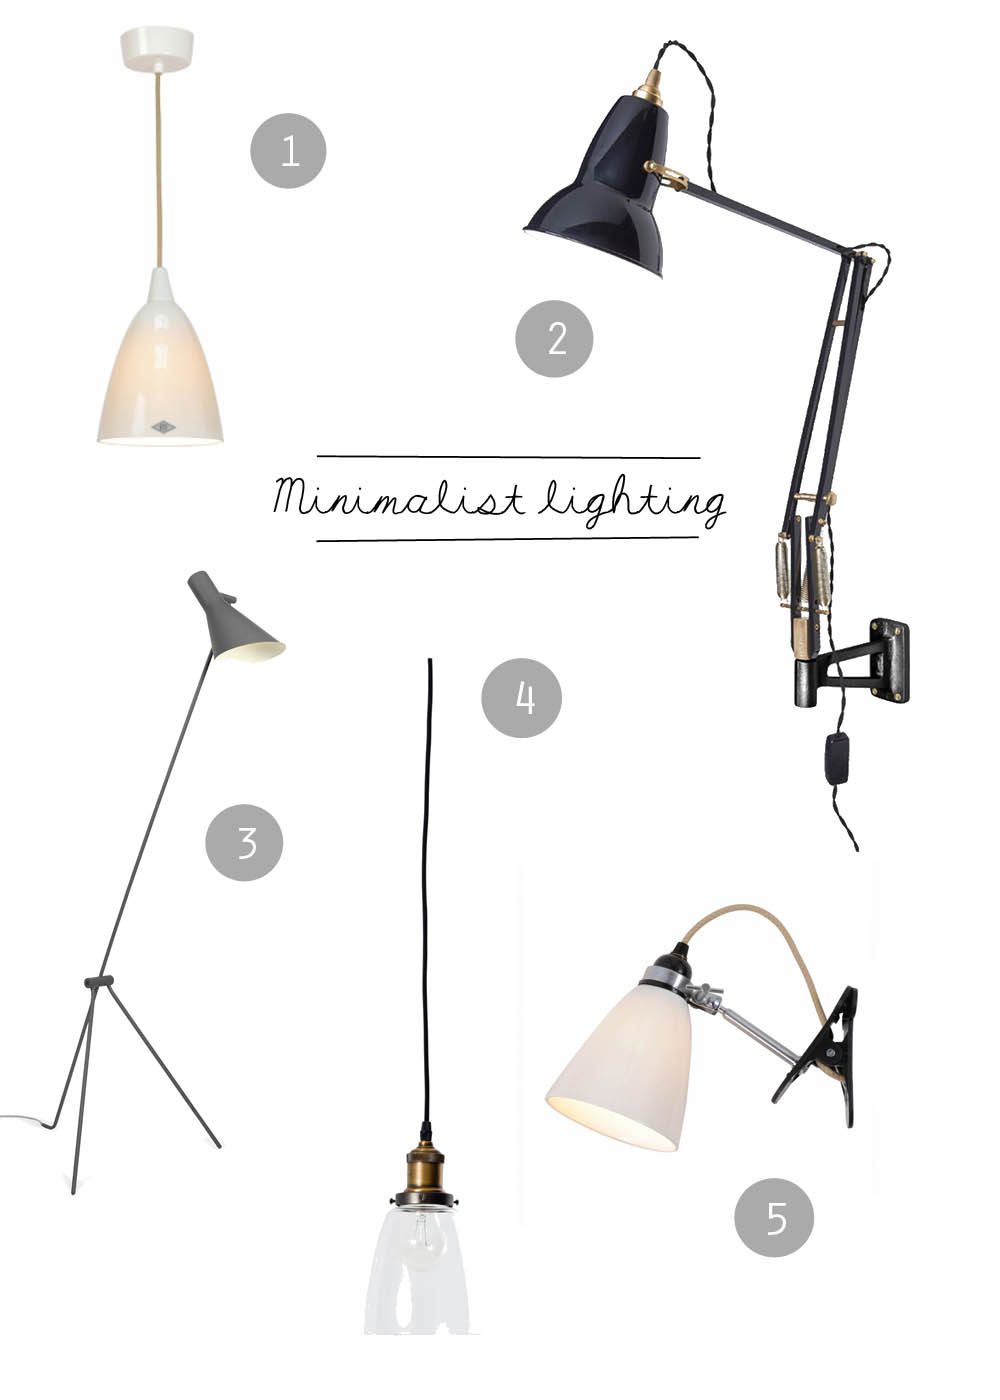
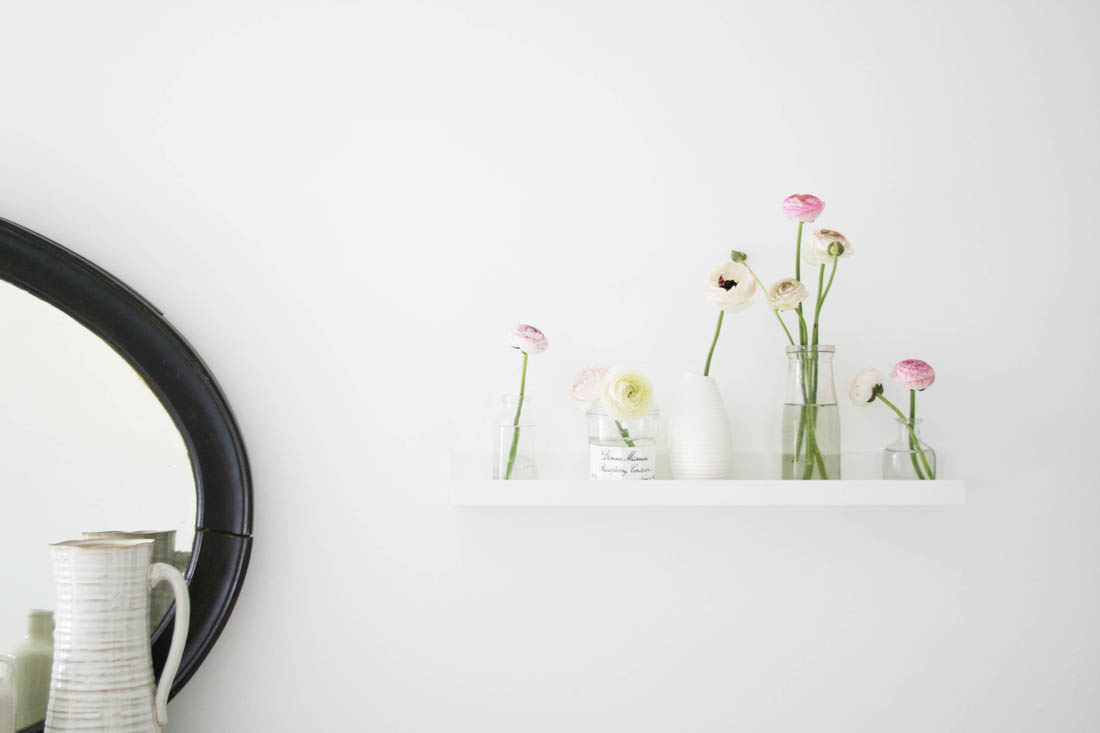
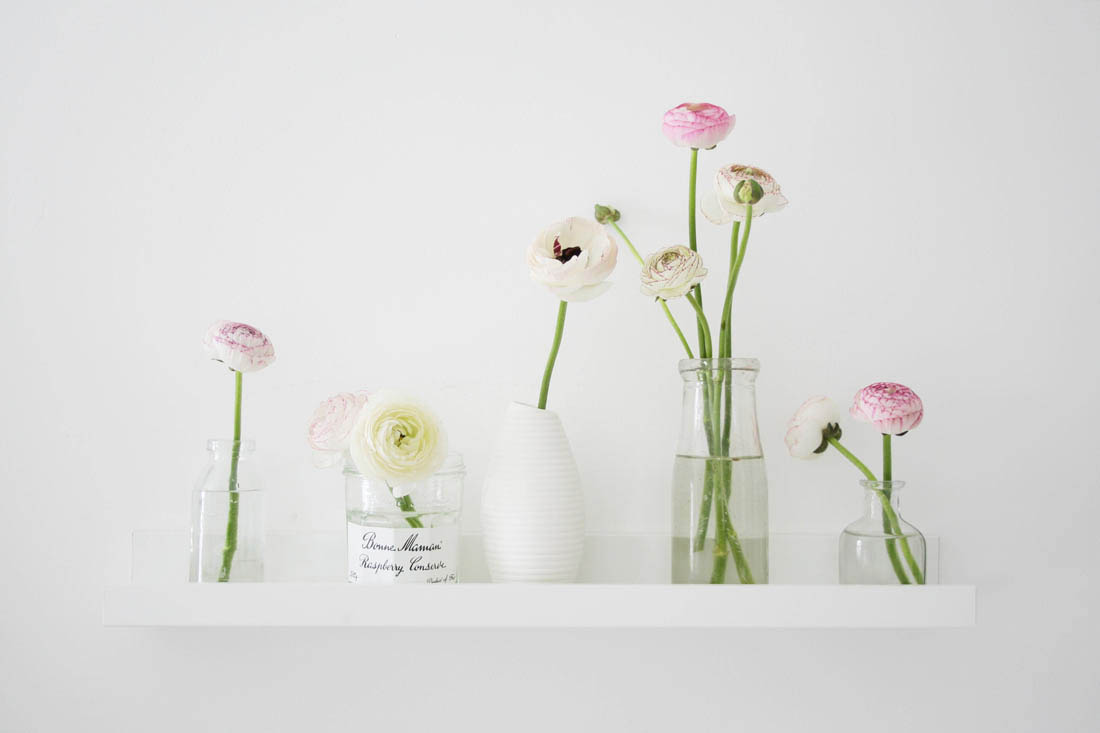
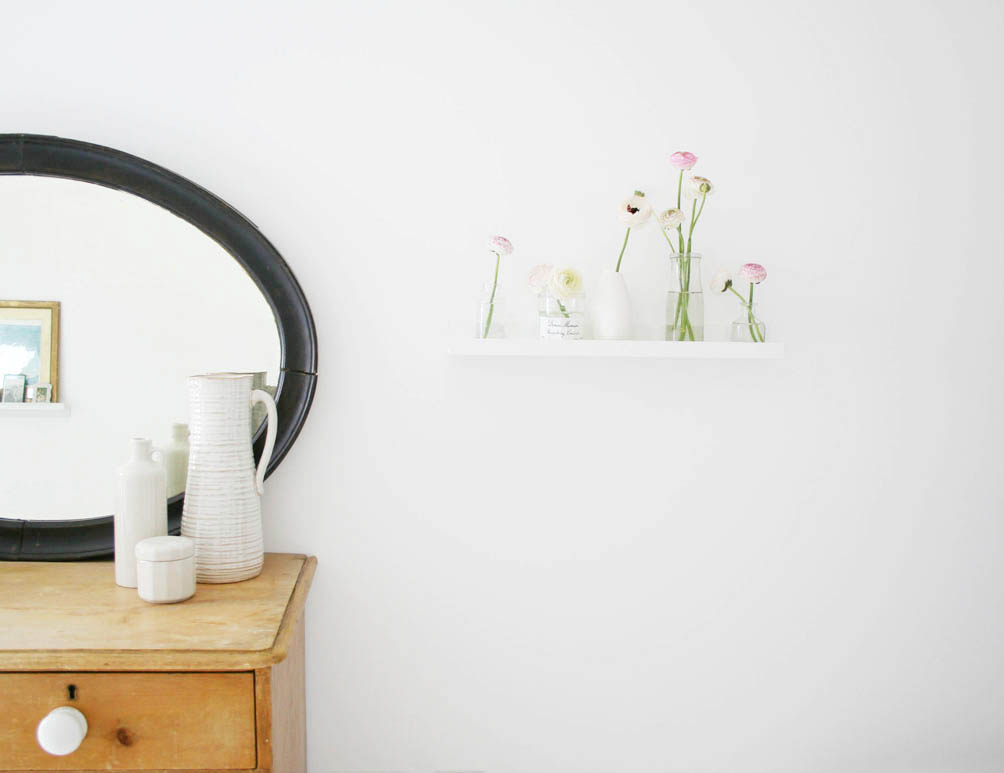
Once you have the big stuff in place i.e. new wall colours, furniture, room layout, flooring, it can be helpful to categorise the finishing touches to help you figure out what you need. Think about a) lighting – at least three light sources in each room b) textiles – curtains, rugs, cushions, throws c) walls – art work, prints, shelves, mirrors d) decorative accessories – plants, books, objets d’art. Work through each category in that order.

Adding the finishing touches to a room | Apartment Apothecary

7. Be prepared

Be clear about the colours you want to use in the room and carry a paint colour card as well as fabric swatches for your sofa/curtains/cushions around with you in case you see something you want to buy (yes, I actually do that). It will save you so much time and umming and ahhing if you can make a decision there and then as you come across things you like. Also, always have a few snaps of the room on your phone so that you can reference those if you are in a shop and trying to make a decision on whether to purchase something or not.

I have been choosing between different rugs, lighting and artwork for my living room over the last couple of weeks so I’d like to share that decision making process with you this week as it may provide some good inspiration if you are making changes to your living area.

Hopefully be back tomorrow with lots of lovely lights that I’ve been lusting over.

Katy x

Styling the Seasons – April

My kind friend Farah popped in yesterday with some beautiful flowers for me and I knew they would look lovely in separate bottles. As I was putting them on a little shelf in my bedroom they looked so pretty and added a touch of Spring, perfect for this month’s Styling the Seasons. This sort of floral display also looks beautiful on a windowsill or dot the bottles in different rooms throughout your home to make a bunch of flowers go that bit further. Farah also gave me a bunch of tulips and told me that adding a copper in to the vase would keep them fresher for longer – has anyone else tried that?

Sorry that I’ve been a bit quiet over here and on Instagram; I will try and get a few more posts up this month if I can but hope May will be a bit more productive.

Styling the Seasons - April | Apartment Apothecary

Styling the Seasons - April | Apartment Apothecary

Styling the Seasons - April | Apartment Apothecary

Styling the Seasons - April | Apartment Apothecary

Styling the Seasons - April | Apartment Apothecary

Styling the Seasons - April | Apartment Apothecary

Charlotte and I would love for you to join us this month and style a surface in your home to show what this month means to you. Blog about it or post a picture on your favourite social media platform and tag us in so we can see.

Happy April styling everyone!

Katy x