Liberty print advent bunting

I made this cute project in 2014 for the Liberty craft blog but the whole blog has since been removed (sad face) and I had an email from a lovely reader who had started to make it last year and wanted to finish it in time for advent this year and could no longer find the tutorial. Therefore, I thought it would be a good idea to publish it here and it may be just in time for any one who didn’t catch it the first time to make it for this year (just two weeks to go!).

How to make Liberty print advent bunting | DIY advent calendar | Liberty print sewing project | Apartment Apothecary

You will need:

Hessian (felt, heavy cotton or linen would work well, too) – approximately 1 metre

Liberty print cotton (any light or medium weight fabric will work) – approximately 1/2 metre of fabric

4 metres of bias tape

Fabric paint pen

Stencil and pencil

Ribbon, fabric glue and bells to decorate

Step-by-step instructions:

1. Cut 48 rectangles of hessian. Each rectangle should measure 12 x 14 cm.

How to make Liberty print advent bunting | DIY advent calendar | Liberty print sewing project | Apartment Apothecary

2. Cut 24 rectangles of your Liberty print. Each rectangle should measure 12 x 8 cm.

How to make Liberty print advent bunting | DIY advent calendar | Liberty print sewing project | Apartment Apothecary

3. Turn over a hem of about 0.5cm of each Liberty print rectangle. Press this well.

How to make Liberty print advent bunting | DIY advent calendar | Liberty print sewing project | Apartment Apothecary

4. Sew the hem using cotton that complements the prints you use.

How to make Liberty print advent bunting | DIY advent calendar | Liberty print sewing project | Apartment Apothecary

5. Place the Liberty print rectangle on top of one of your hessian pieces. Place another piece on top.

How to make Liberty print advent bunting | DIY advent calendar | Liberty print sewing project | Apartment Apothecary

6. Sew three sides of the rectangle using a zig zag stitch to prevent fraying. Leave the top of the rectangle open.

How to make Liberty print advent bunting | DIY advent calendar | Liberty print sewing project | Apartment Apothecary

7. Turn each flag inside out carefully, poking out the corners.

How to make Liberty print advent bunting | DIY advent calendar | Liberty print sewing project | Apartment Apothecary

8. Use a stencil and pencil to draw on the advent numbers 1 – 24 on each flag.

How to make Liberty print advent bunting | DIY advent calendar | Liberty print sewing project | Apartment Apothecary

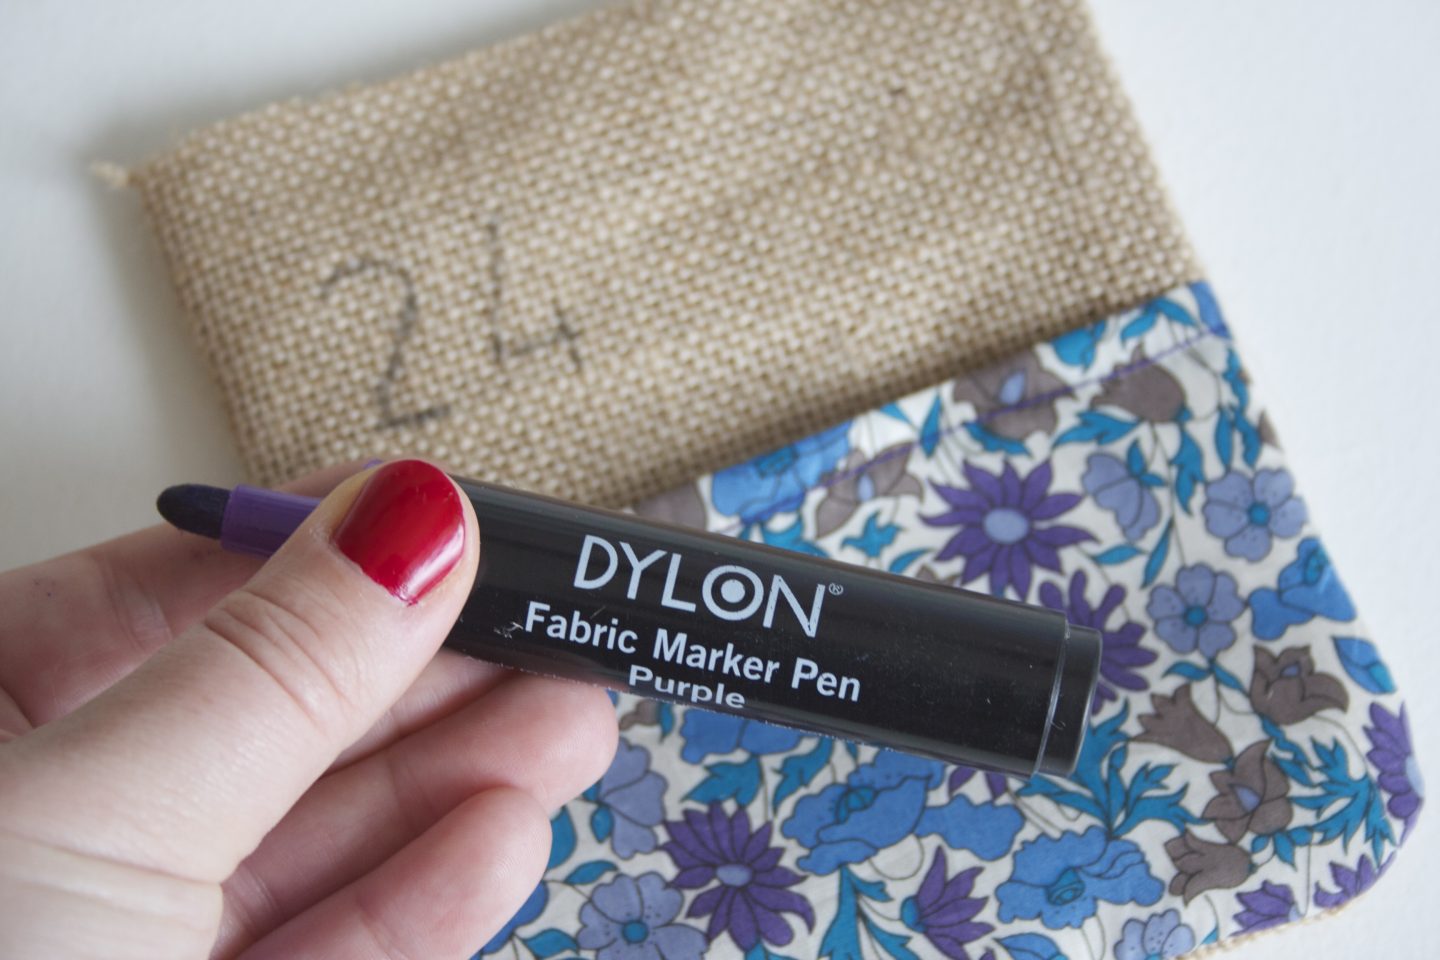
9. Go over the pencil number with a fabric paint pen.

How to make Liberty print advent bunting | DIY advent calendar | Liberty print sewing project | Apartment Apothecary

10. Decorate your flags using ribbon or bells.

How to make Liberty print advent bunting | DIY advent calendar | Liberty print sewing project | Apartment Apothecary

11. Use fabric glue to stick on strips of ribbons.

How to make Liberty print advent bunting | DIY advent calendar | Liberty print sewing project | Apartment Apothecary

12. Sew your flags together by pressing the bias tape in half. Pin each flag at regular intervals into the tape and sew together.

How to make Liberty print advent bunting | DIY advent calendar | Liberty print sewing project | Apartment Apothecary

13. Fill each pocket with chocolates or presents!

How to make Liberty print advent bunting | DIY advent calendar | Liberty print sewing project | Apartment Apothecary

Here are other advent calendar ideas that I have done the last couple of years…

2016

This year’s calendar is an easy chalk board idea using beautiful Houseology baubles. See the full post here.

DIY advent calendar | Blackboard advent calendar | Christmas decorations from Houseology | Apartment Apothecary

2015

Last year I made these sweet advent packages sewn in to Christmas shapes with a hidden treat inside. See the full post here.

Twelve days of Christmas with West Elm | How to style your Christmas table with dusty pink | Apartment Apothecary

What are your advent calendar plans this year?

Katy x

DIY advent calendar with Houseology

Ok, I know it’s early but bear with me on this… to prepare a DIY advent calendar that begins on December 1st takes a bit of planning and time to get it ready so blogging about Christmas at the end of October in this case is perfectly acceptable, right? Plus, if you aren’t already excited about the festive period then that just makes you a big grouch in my books 😉

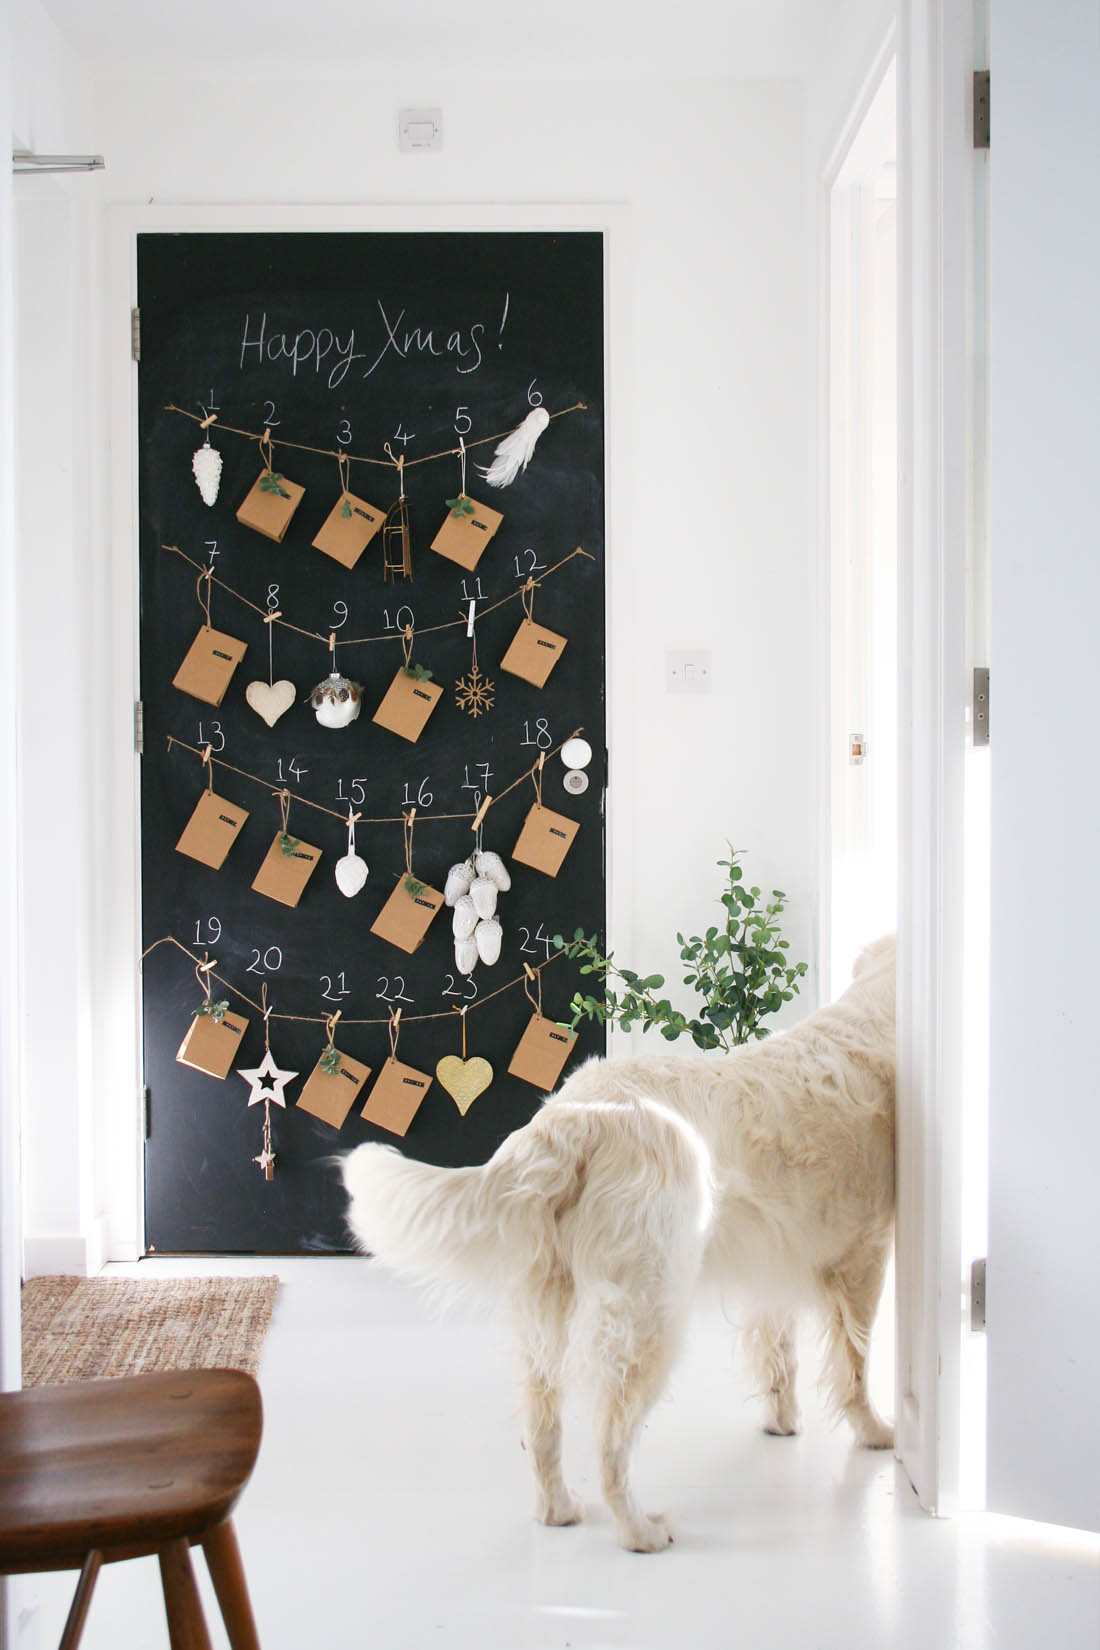
This is a really simple idea for a slightly more interactive advent calendar than the bog standard chocolate ones as some days there are Christmas baubles from Houseology (aren’t they beautiful?) to add to the tree and other days there are little brown packages filled with whatever treats you like. It really didn’t take long to put together and a chalkboard door or wall is the perfect backdrop.

Otto definitely gets more than his fair share of the advent treats but Jules also gets some of his favourite chocolates stuffed into the brown paper bags. Adding christmas baubles to the calendar makes it feel a lot more festive and it is such a nice tradition to steadily add more and more decorations to the tree as advent goes on until Christmas eve when the tree should be full.

DIY advent calendar | Blackboard advent calendar | Christmas decorations from Houseology | Apartment Apothecary

All you need to create the calendar are lengths of string, clothes pegs and small brown paper bags (so much quicker than wrapping individual parcels) with a hole punched in the corner. I decorated each one with a sprig of Eucalyptus and a label for each day.

The Houseology collection pine garland is the perfect decoration to use year after year either draped on a mantel piece, along the Christmas table, over a doorway or you could even hang your advent calendar gifts from it. Take a look at the rest of Houseology’s gorgeous christmas collection this year – it will definitely start to get you in a festive mood! I can’t wait to get my LED christmas tree out from last year.

Two of my favourite decorations from the Houseology collection are these glitter and feather baubles and this cluster of glass pine cone lights. So beautiful!

DIY advent calendar | Blackboard advent calendar | Christmas decorations from Houseology | Apartment Apothecary

Other baubles I have used are: pearl pine cone, jute snowflake and hammered gold heart bauble.

So, you’ve got about four weeks to go…are you ready?!

Katy x

*This post was written in collaboration with Houseology.

DIY advent calendar | Blackboard advent calendar | Christmas decorations from Houseology | Apartment Apothecary

Pin me!

Our new house – the estate agent pics

Oh hello blog, my old friend. And hello, lovely readers! I am so sorry for being absent for so long – the last three months, since I blogged last, have flown by in a haze of running around after a very adventurous toddler and spending every nap time desperately trying to push the purchase of our new house through dealing with surveyors, solicitors, agents, builders and mortgage advisors. It was definitely not a straightforward purchase and after buying my previous two flats, which were both new builds and therefore pretty easy in terms of the conveyancing, it came as quite a shock to the system just how much time, energy and headspace this purchase would take. I immediately knew when I saw the house that it would be perfect for us and I was so invested from the first moment so when it looked like the purchase might fall through on a couple of occasions I felt sick to my stomach. This was the only house we could afford in Ladywell, which is the area we wanted to be in (as it is a probate property that needs renovation and therefore that bit cheaper than equivalent houses), so that really added to the stress levels. Also, my levels of productivity throughout the process fell to an all time low because I felt so stuck in the limbo of having no idea whether or not we would be moving on and whether we needed to pack up and I lost all pleasure in being in the flat because I wanted to be elsewhere. I have discovered that living in a half packed home is not good for my mental well being.

Anyhoo, the good news is that we finally completed the purchase last week and the sale of our flat went through really smoothly so it’s all done! We can’t actually move in to the new house for a few months as it needs to be completely renovated so we are currently staying with my very kind sister who is willing to put up with us all for the summer. Mimi is completely obsessed with her so she’s very happy about the temporary move although Otto isn’t quite so pleased and it seems like he’s desperate to ‘go home’, which is making me sad. Hopefully he will settle down soon.

I’m hoping to be able to post here more regularly now that I HAVE A WHOLE HOUSE TO DECORATE FROM SCRATCH!!!!! It’s actually too exciting for words. I will have my mum and sister on hand for a bit of help with Mimi so fingers crossed I will have more time to dedicate to the blog as up until now I have only had enough time for interior decoration projects with clients.

So, do you want to see this old run down house of ours that we have bought?! It’s definitely not a looker from the street, that’s for sure…

All images from estate agent Acorn, Catford (who I would highly recommend if you are buying/selling in the area).

The house was built in 1929 and needs quite a bit of work to make it look nicer from the outside. It’s never going to be a handsome house but that was a compromise I was willing to make as I think that everything else about the house will work for us. We don’t have the budget to contract out any of the work to the outside of the house so anything we do will be DIY. I’ll do a more detailed post about it but in brief we plan to paint the outside of the house white, build a new brick wall, tile the path leading up to the door, replace the side access gate, create a porch and use an original 1920s/30’s front door and do some lovely planting to add a bit of green and colour.

The house has been rented out for years and years so it’s in a pretty poor state. The plasterwork throughout is shot, the flooring is horrible cheap laminate sheets, the bathroom is in a horrid state and most importantly it is begging for walls to be knocked down to open out the small rooms. I love the proportions of 1930’s houses as they are so square and the layout really works but this house is very small so we decided as soon as we saw it that it needed to be open plan downstairs. Here is the current floor plan:
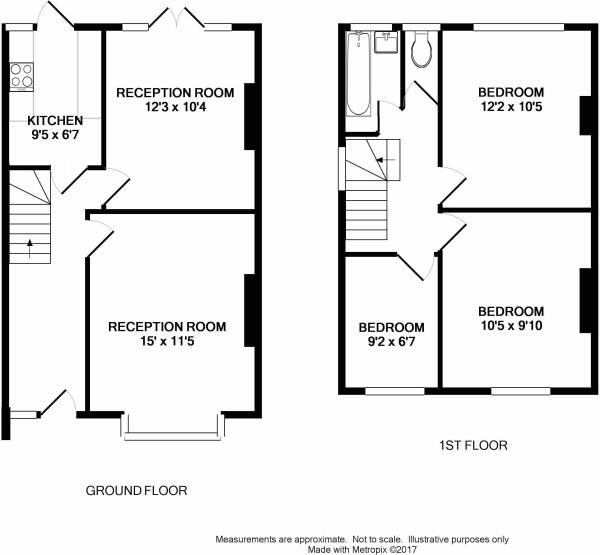
I love the way the whole width of the back of the house opens out onto the garden and we plan to make the most of that in the future by building a glass extension but for the time being we will knock down the wall between the two reception rooms and the wall between the back reception and the kitchen.

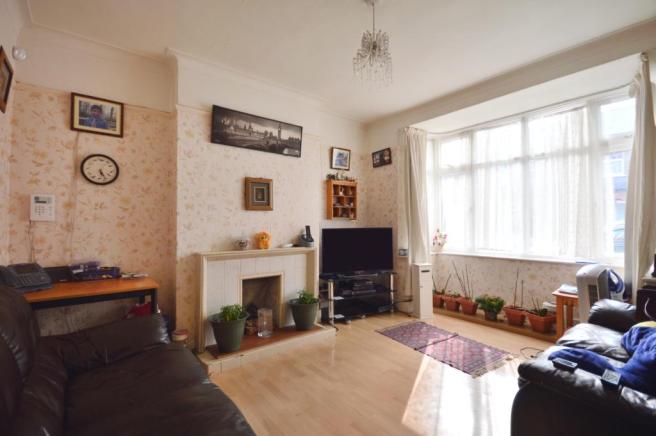
This is what the front reception and kitchen currently look like:

The reception rooms have their original doors, coving and picture rails and lovely big windows so the house is wonderfully light and by knocking all the rooms downstairs together we hope to make it even lighter. I’ll tell you more about our extension and kitchen plans another time as they won’t be part of the first round of works.

In the future we will also do a loft conversion to make a really good sized master bedroom but for the time being we’re more than happy with the bedrooms as they are. Having a third bedroom, albeit a very small one, will make a massive difference to us as it will give us the extra storage and a guest bed that we didn’t have in the flat.

Upstairs there’s also a bathroom with separate toilet and we plan to knock them together and completely re-do the room, which I’m very excited about as I have never planned a bathroom from scratch.

So, there you have it…a quick tour of our new house as it looked before we bought it. I plan to do some decorating and furnishing inspiration posts as well as detailed posts about some of the DIY jobs we will do that I hope will be helpful on a practical level. Let me know if there is anything particular you would like to know about that I can potentially cover during the renovation project. Our contractor doesn’t start until the end of May but fingers crossed we will be able to move in by the end of summer. I’m so pleased to be back on the blog and look out for lots of new posts soon!

Katy x

Last minute easy Christmas decoration and present ideas

Ok, it’s the 15th, we still have a few more days of work and then for some of us the whole family is descending next weekend. Let’s not panic! If you still haven’t quite got on top of the hosting game but want to add a few last minute handmade touches to your festive decor, wrapping or presents then I have found a few great ideas that we can all steal and anyone can make these happen with very few resources or crafty skills.

Last minute Christmas decoration and present ideas | Apartment Apothecary

Why not make a lovely little display with the stockings on a branch from the park with an odd sprig of Mistletoe or any foliage from the garden. Use command hooks to hang it on the wall or from the ceiling. Image via: The Merry Thought

Last minute Christmas decoration and present ideas | Apartment Apothecary

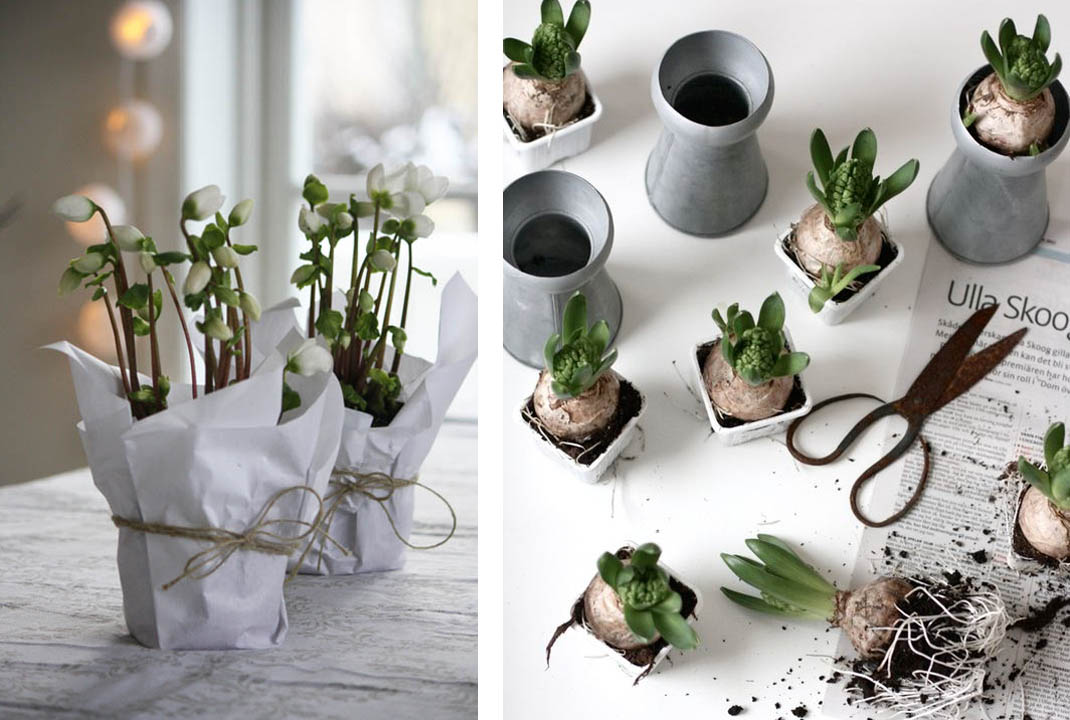
Need a few festive touches for the table? Buy some Hyacinth bulbs from the supermarket (don’t tell me you won’t be going there this week!) or your local florist or greengrocer and pot them up in sweet jars. Alternatively, wrap potted plants or herbs in white tissue paper with string. Done. Images via: Annixen /  The Waves We Make

Last minute Christmas decoration and present ideas | Apartment Apothecary

A lovely last minute gift idea for anyone that deserves the special handmade touch. Details over at Style Me Pretty.

Last minute Christmas decoration and present ideas | Apartment Apothecary

I bet we’ve all got a drawer full of dinner candles (I’ve got a box of them from Ikea that I’ve had for years!). Stick them in glass bottles and place around the dining room to make it feel magically festive. Alternatively, find some bendy twigs to make into a heart shape or brittle twigs to make in to a star shape, add some lights and you have an instant wall decoration. Images via Decor Dots / Peek and Pack

Last minute Christmas decoration and present ideas | Apartment Apothecary

Chuck a few apples, oranges and spices into a pan to make you home smell amazingly welcome and Christmassy before your guests arrive. Details over at How Sweet It Is

Last minute Christmas decoration and present ideas | Apartment Apothecary

A couple of easy ways to make your wrapping extra special is by using potato printing or little brown bags with sprigs of Eucalyptus. The smallest token gift will seem so much more thoughtful wrapped in either of these ways. Images via Trendenser / The Beauty Dojo

I hope everyone can enjoy the last few days leading up to Christmas!

Katy x

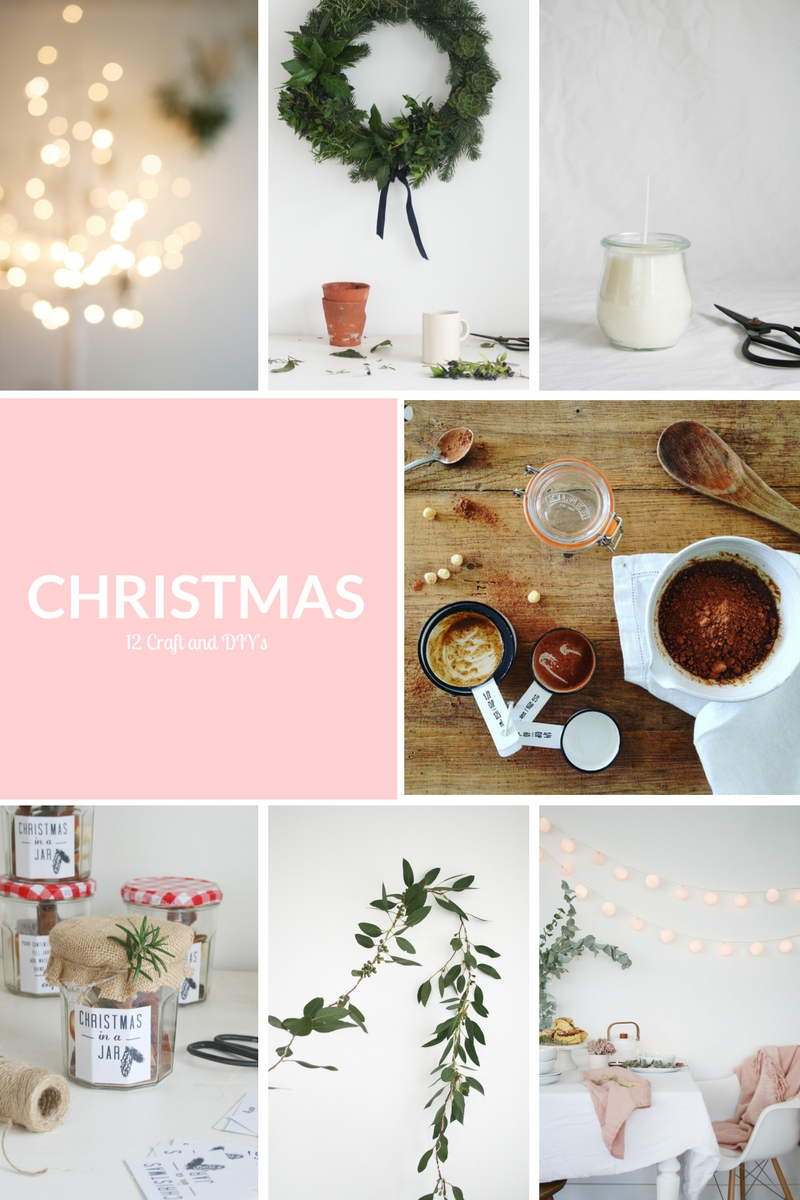
12 Christmas crafts and DIY’s

Stuck for ideas for Christmas decorations, homemade presents or table settings this year? Well, I have rounded up twelve of my favourite Christmas projects that I have done over the last couple of years and I hope they will give you a bit of inspiration. I know it can seem like a lot of effort to get into craft or DIY projects at this time of year but don’t see it as a chore: it is such a wonderfully relaxing thing to do when it is cold and dark outside, the Christmas lights are on and you’ve got mince pies or a box of chocolates to keep you going. There really is nothing better to bring the festive feeling alive…

img_9837

1. Liberty baubles

Find the full tutorials here:

1. Liberty print baubles
2. Gold tipped feather baubles
3. Dried Hydrangea wreath
4. Gingerbread syrup recipe
5. Homemade nutella recipe
6. DIY candles
7. Succulent and herb wreath
8. Christmas in a jar gift
9. Eucalyptus garland
10. Christmas table
11. Advent calendar
12. Paint dipped baubles

1 copy

2. Gold dipped feather baubles

wreathtutorial7

3. Dried Hydrangea wreath

making-candles-3a

6. DIY candles

Natural Christmas garland | How to make a Eucalyptus garland | Apartment Apothecary

9. Eucalyptus garland

pink-plate

12. Paint dipped baubles

I hope some of these projects will get you in the festive mood and you can enjoy a crafty afternoon here and there over the next couple of weeks.

Katy x
12 Christmas crafts and DIY projects | Apartment Apothecary

Pin me!