DIY desk for child’s bedroom

Firstly, I want to say a big hello and I’m sorry that I’ve been away from the blog for so long. Unfortunately, the blog was hacked back in May and it took a long time to restore it (there are still a lot of images missing) and then I took the summer off whilst Mimi was on holiday before she started primary school a couple of weeks ago. I’m not quite sure how we have got to the primary school stage but there you go! Anyhoo, I hope you are all well and I look forward to updating you on what we have been up to in our house and some of the projects I have been working on for clients.

We struggled with Mimi’s room throughout the pandemic as we had planned to update it for her changing needs from toddler to child just before the first lockdown but then got stuck with everything closed etc etc so it became a real mish mash over the last eighteen months. We finally got it together to sort it out, minus the high bed she really wants but I reckon that will make a good Christmas present.

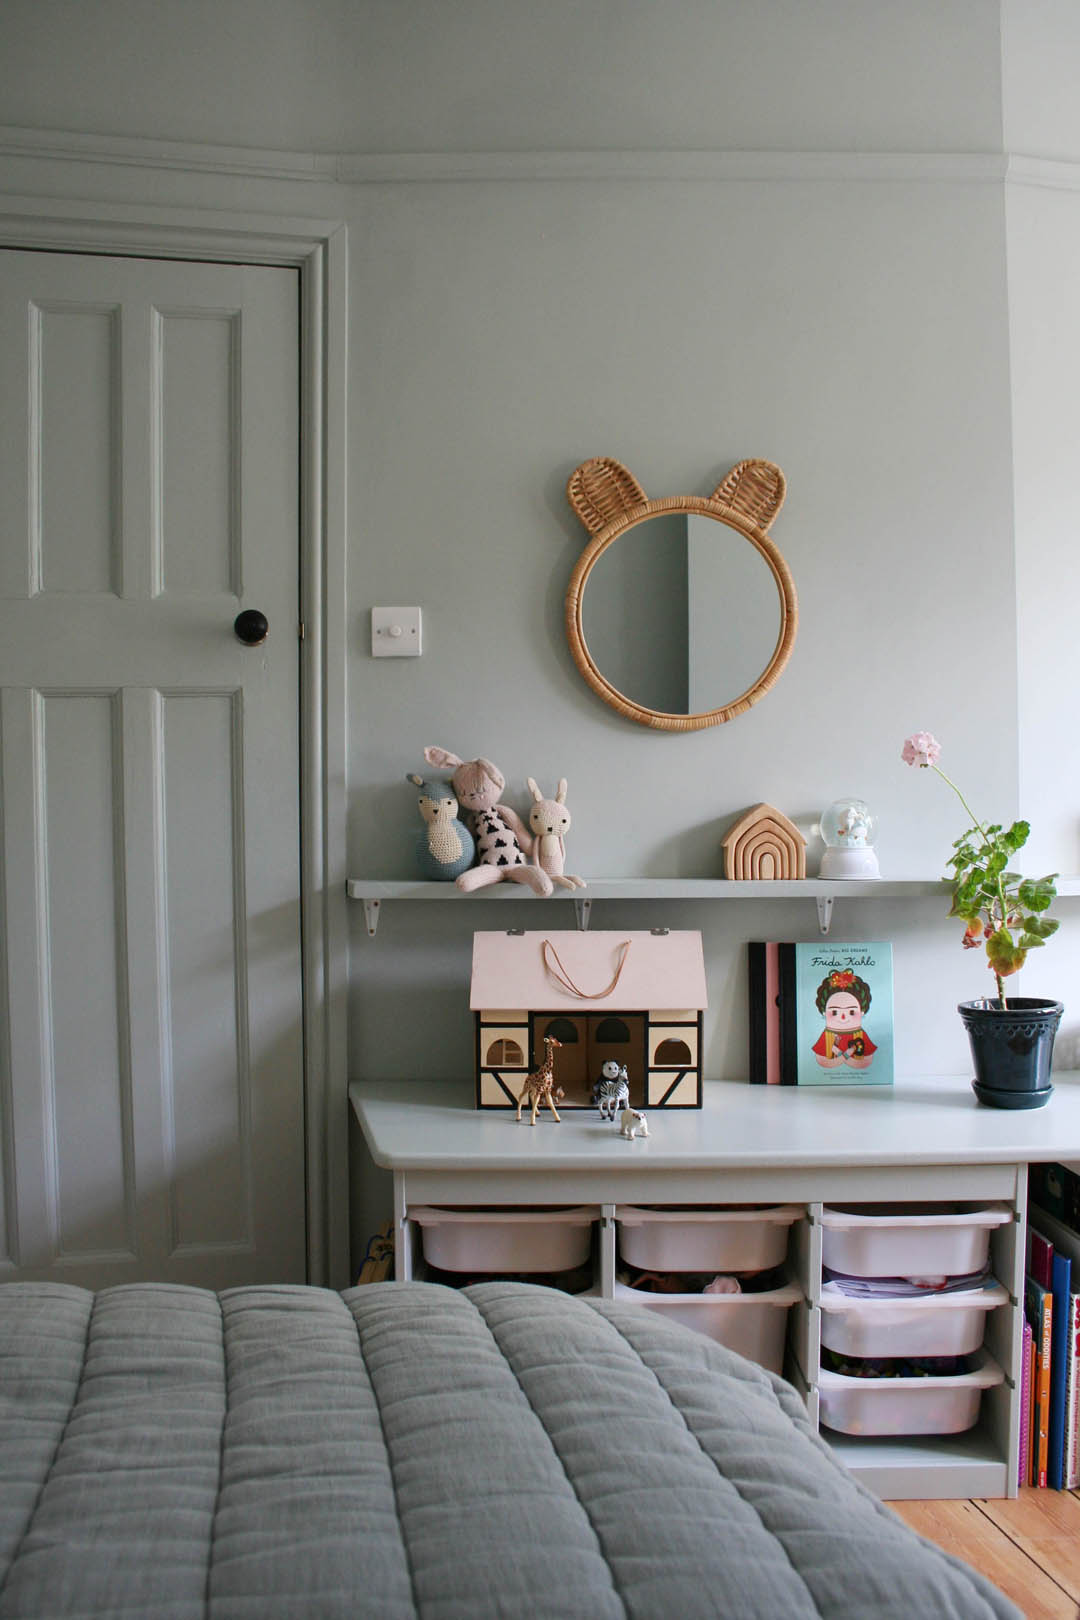
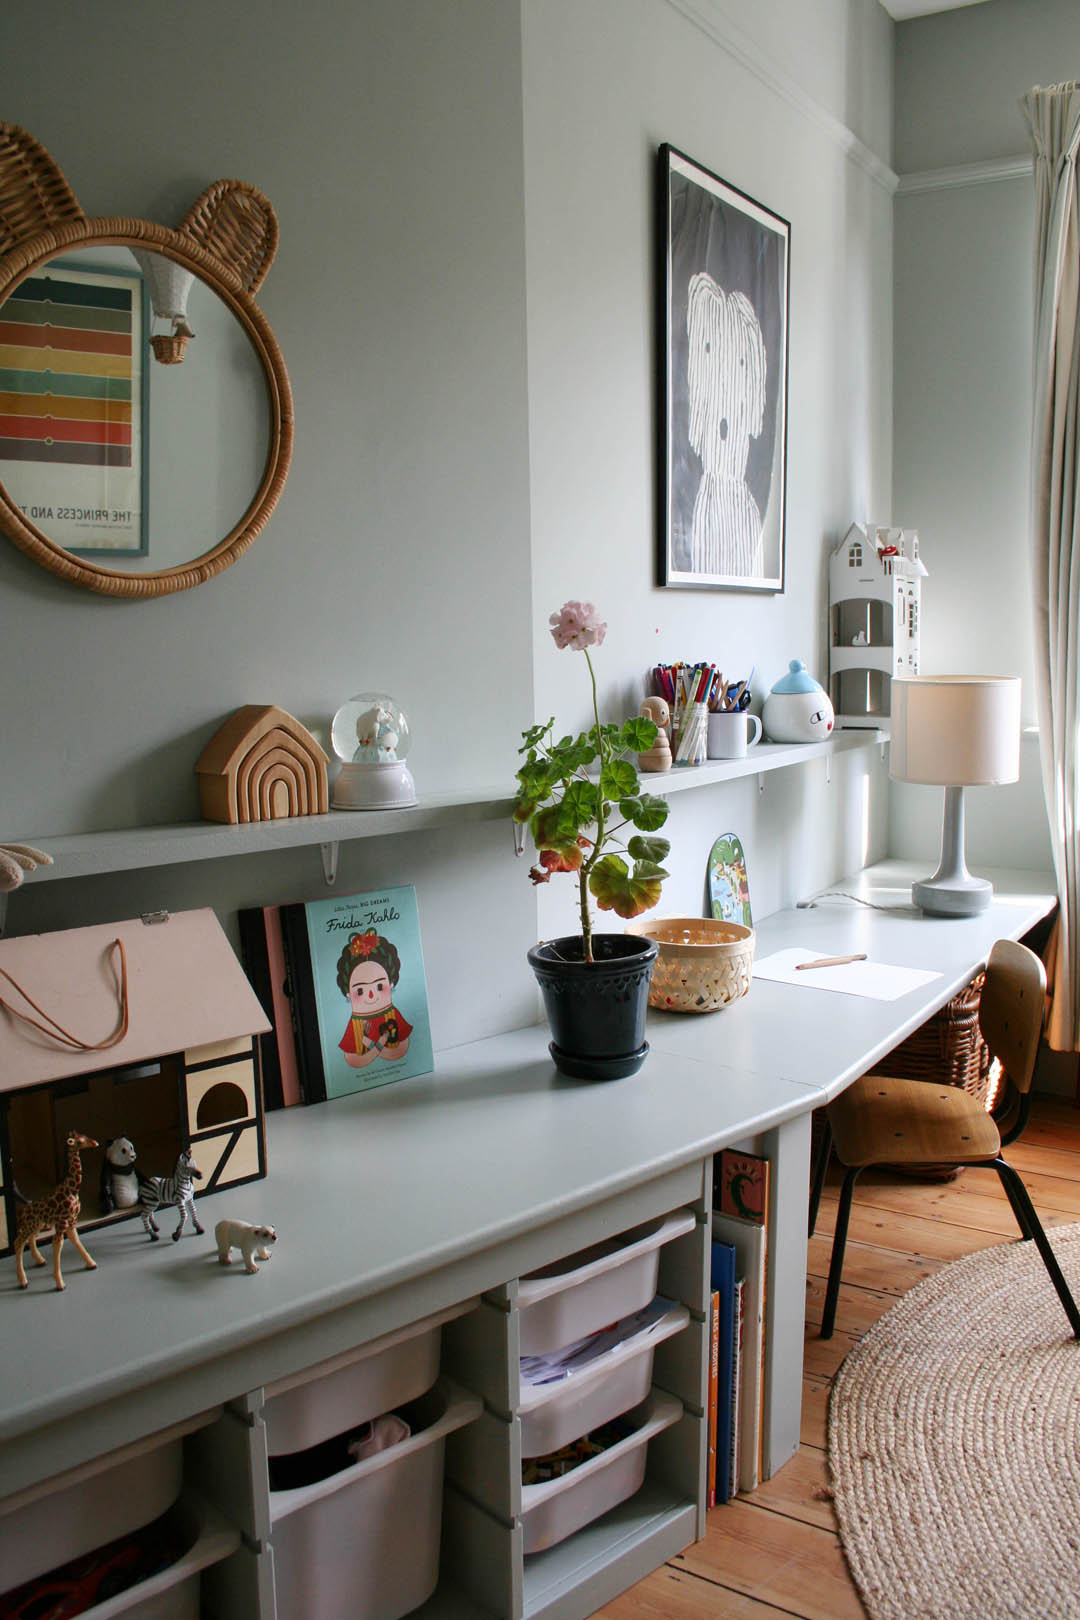
The biggest issues were needing somewhere to put all her trinkets, papers, toys as well as somewhere to sit and draw. I also didn’t want to spend very much and use leftover paint from our initial renovation three years ago. I designed a desk to wrap around the slightly awkward angled wall in her room from one £48 piece of MDF that provides storage and a very large surface for toys and an all important dedicated place to draw, colour and write, which are the things she loves to do most. Everything has been painted in Light Blue by Farrow & Ball – the walls are Estate Emulsion and the woodwork/desk are Estate Eggshell because we have loads of it and I love the colour! Please note that Light Blue is neither light nor is it particularly blue. In some lights it has quite a lot of green, at other times it is very grey or silvery and it never appears ‘light’. I would also not advise using it in a north facing room as it can appear rather drab without a decent dose of sun light.

So, this is where we were at with the room by the end of the third lockdown…

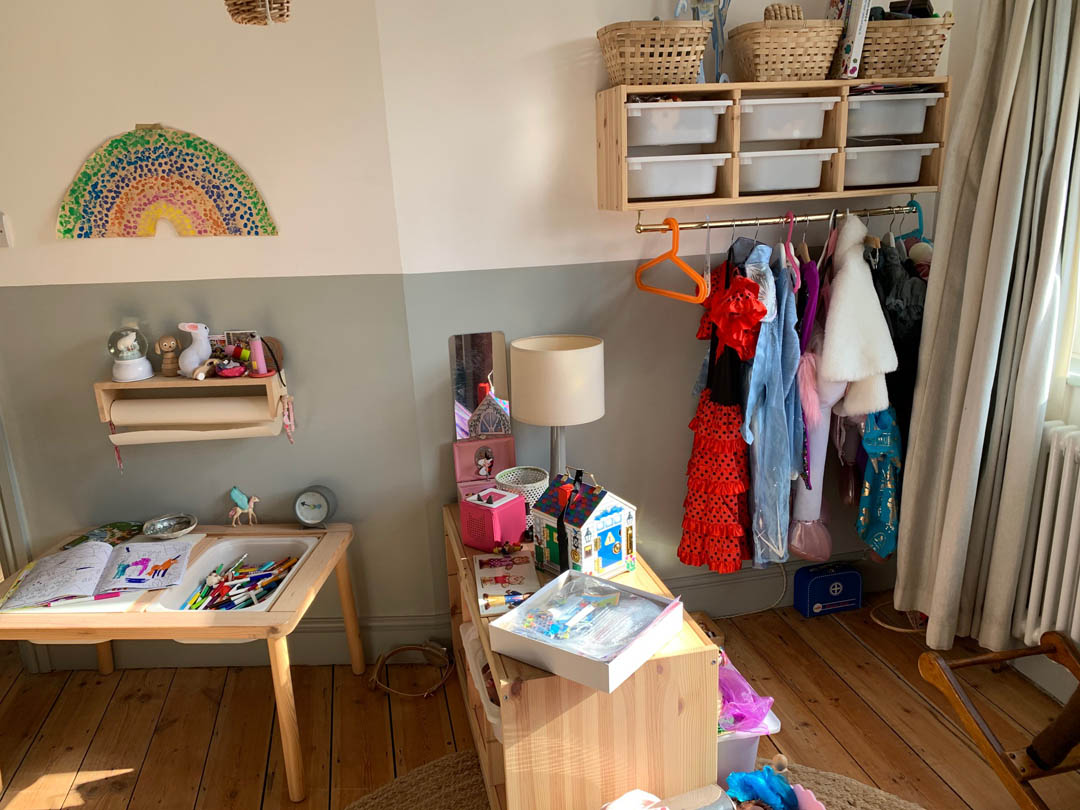
There wasn’t enough space for anything, stuff was always on the floor and she had outgrown constant dressing up so this side of the room just looked a mess and she just stopped using it altogether. No surface was big enough for her to spread herself out and everything was a jumble. I started by painting the whole room, including above the picture rail, Light Blue to make the space feel bigger.

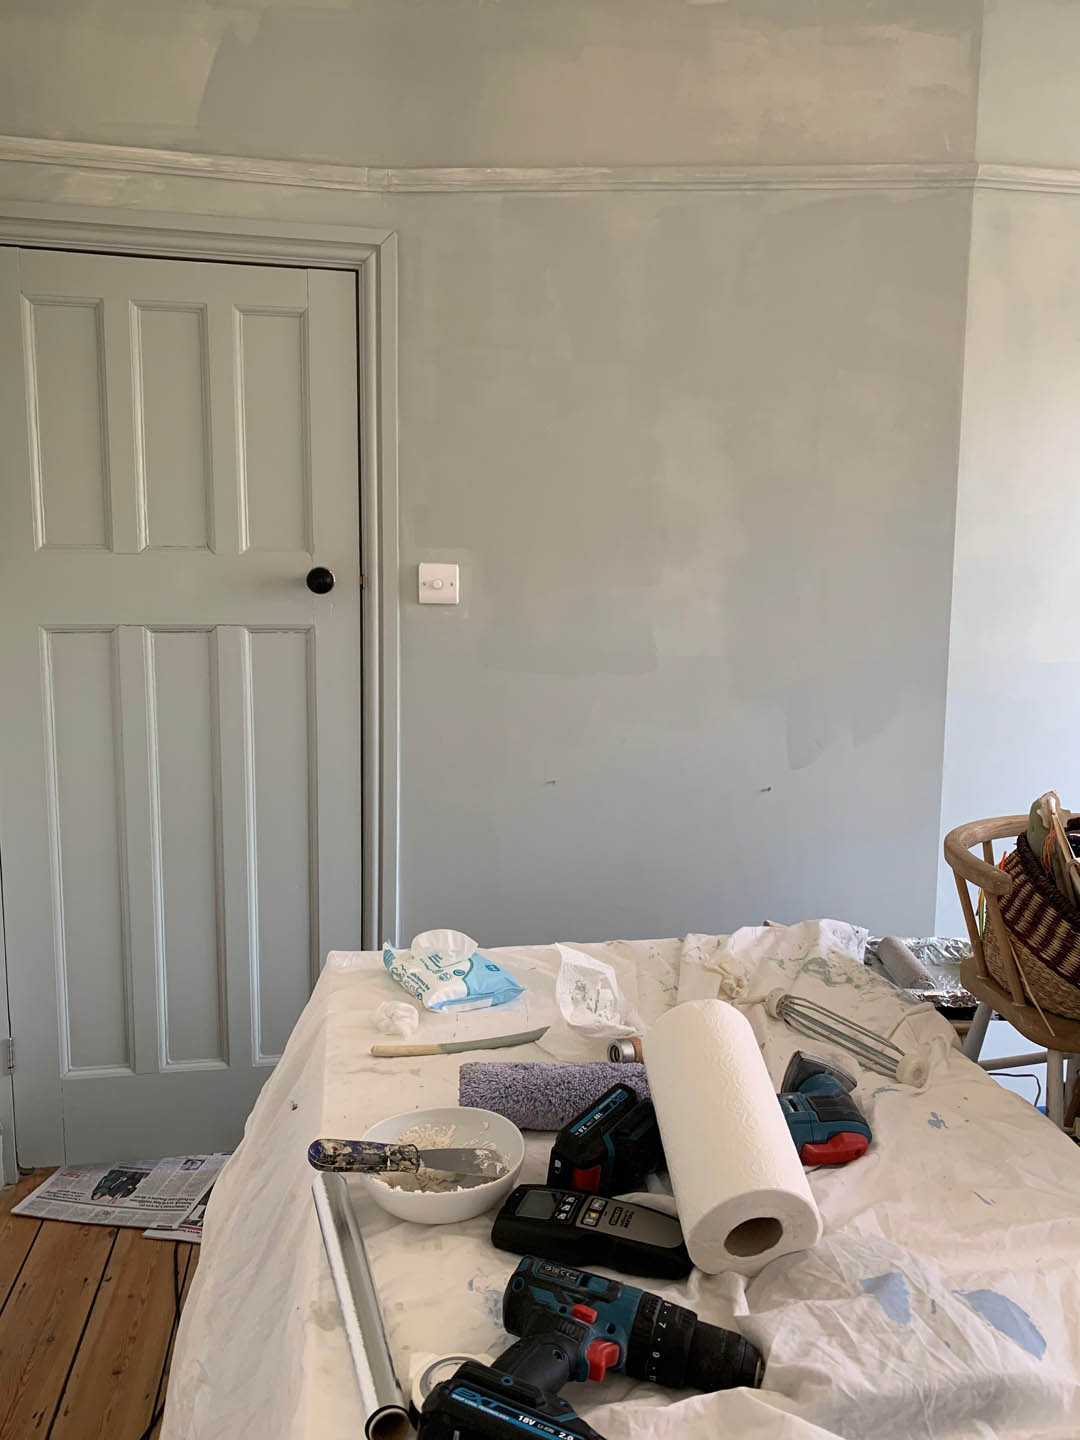
You can kind of see in the images above how taking the colour above the picture rail stretches the walls upwards and makes the room look and feel bigger. The door and woodwork was already Light Blue and I chose to keep it that colour mainly because I really, really didn’t want to re-paint all the woodwork (!) and also because the colour block effect does make a small room feel less disjointed.

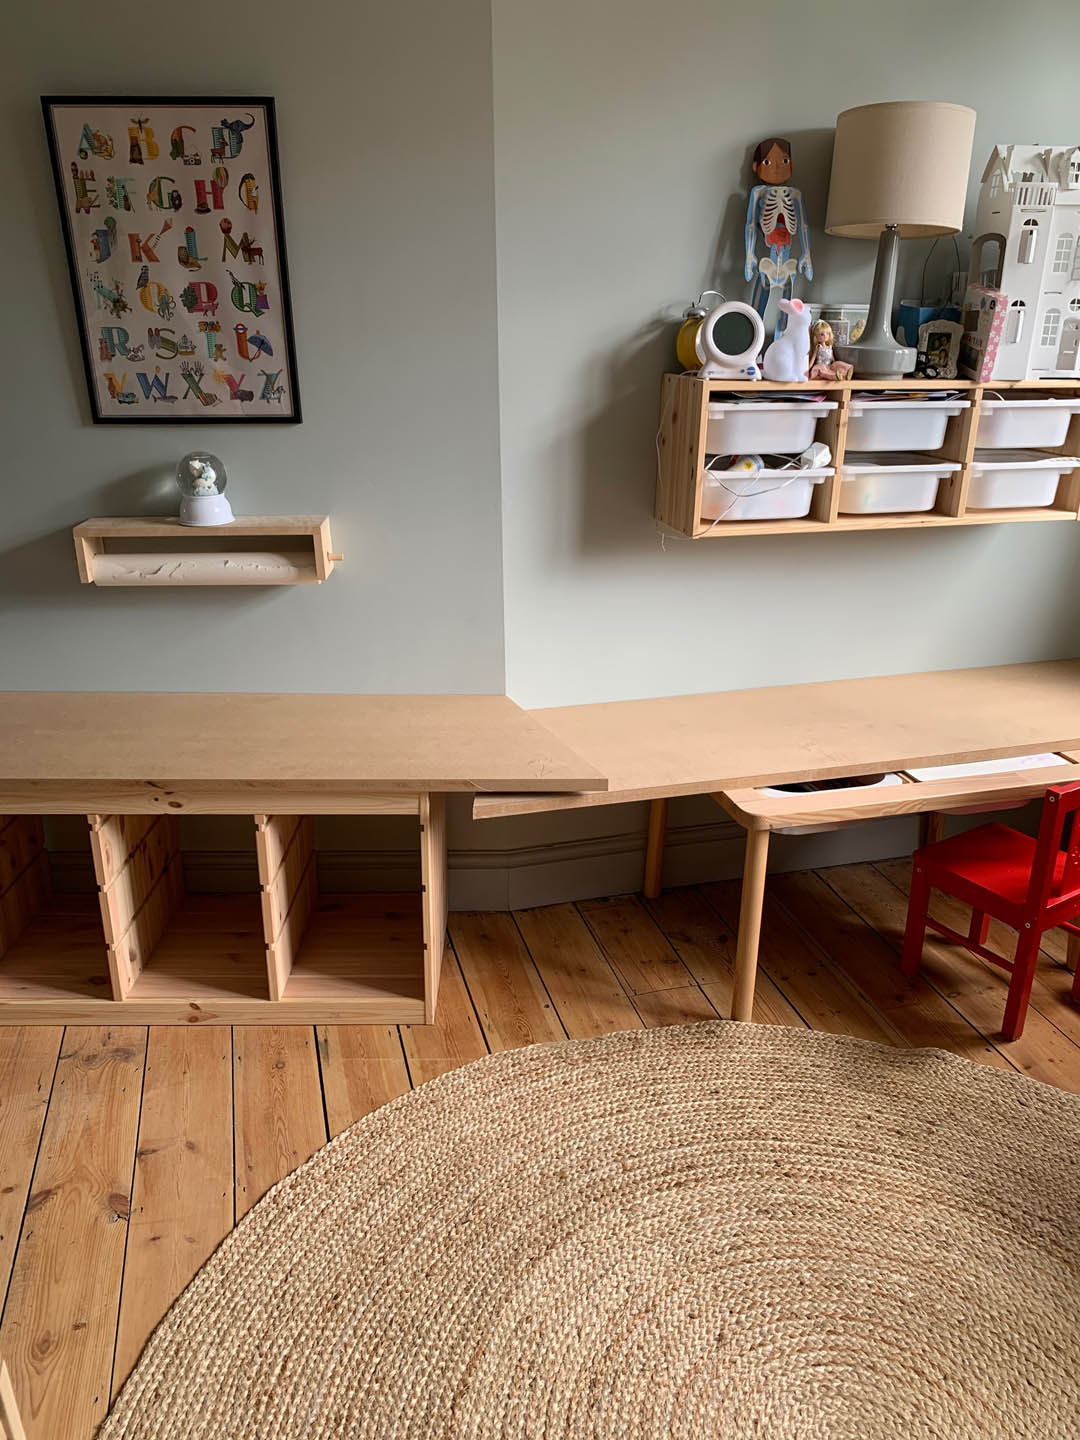
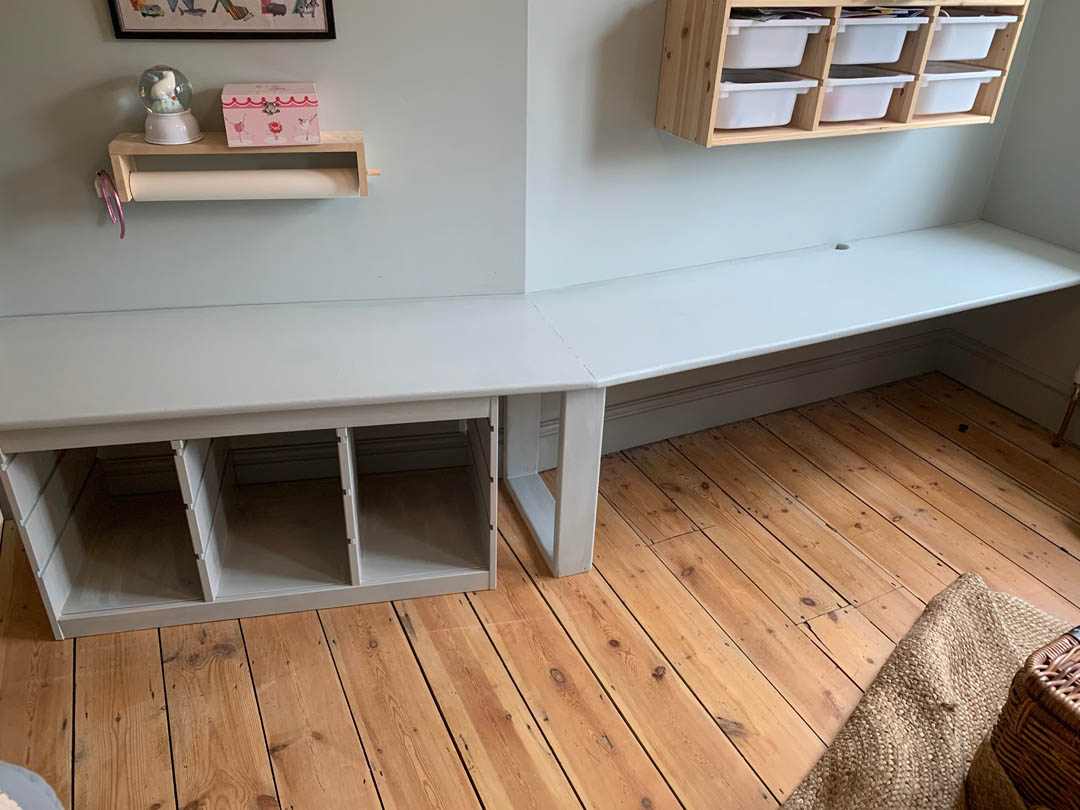
We then used one sheet of MDF to create two lengths that join in the middle where the room angles outwards. It would have been sooooo much easier had the wall angled inwards but we needed to create a support for the two lengths, which we did with some of the MDF. We also decided to integrate the exisitng IKEA Trofast unit into the desk for more storage.

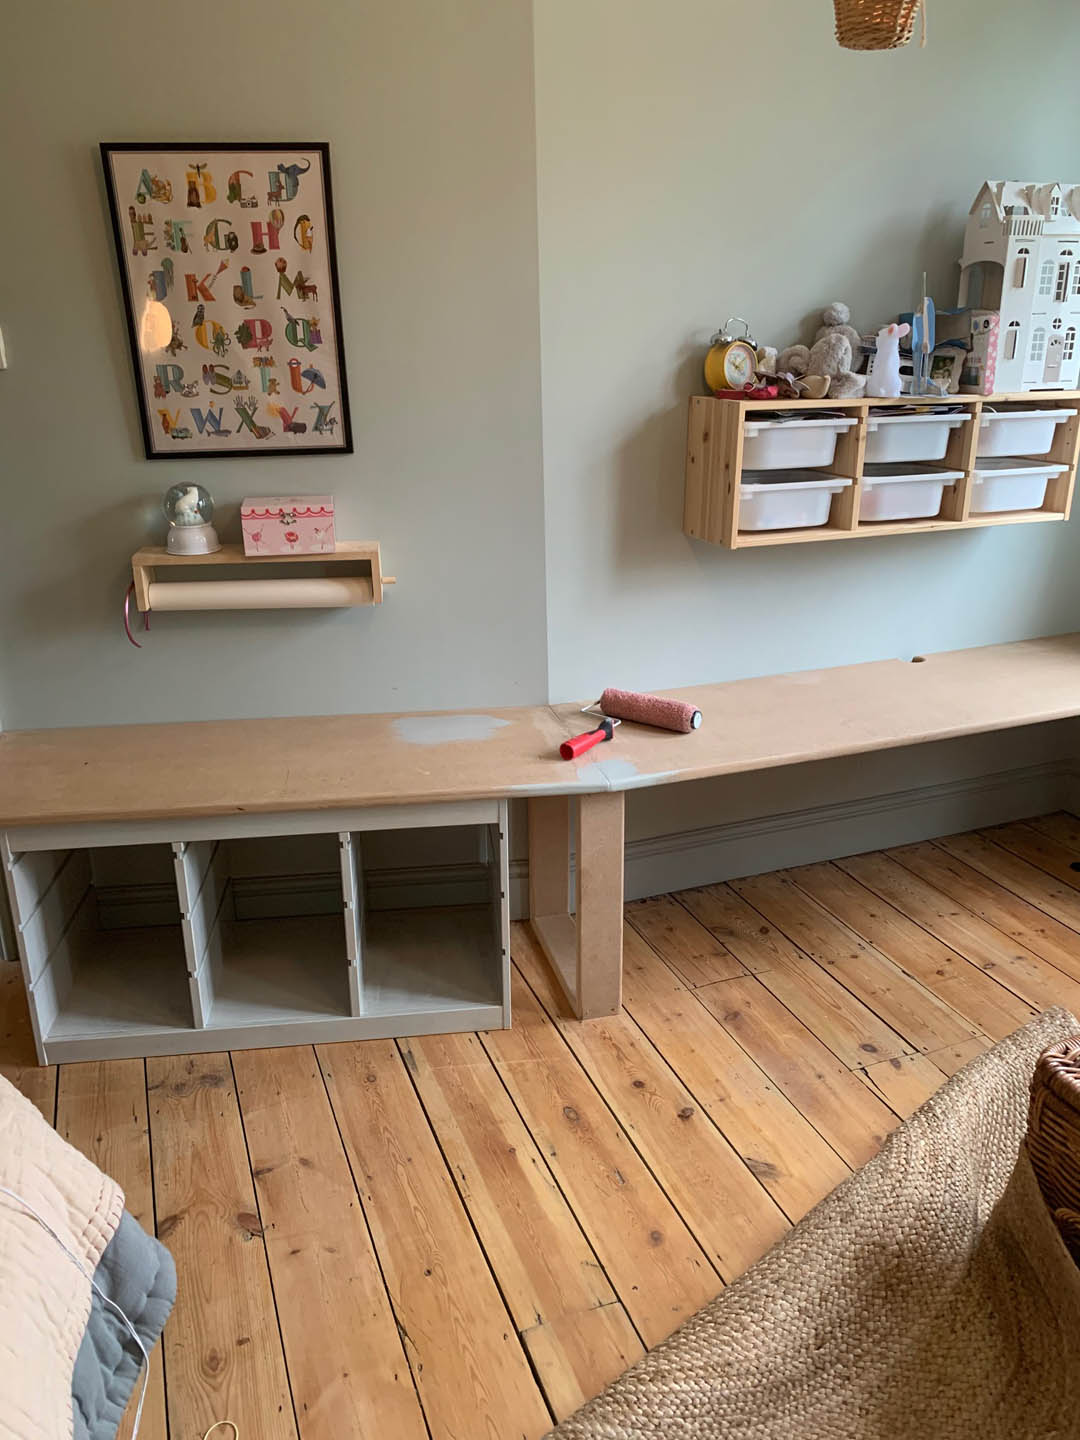
The left hand MDF surface is supported by the Trofast unit and then on the right hand side we put MDF batons on the wall at the back and on the right hand wall. We also cut a notch out of the back of the right hand length to reach the plug hole.

We really went to town sanding the edges and corner of the MDF, which makes all the difference. We used woodfiller to fill the gap where the two lengths of MDF meet. I then painted the lot, including the Trofast unit in Ronseal All Purpose primer and then Light Blue Estate Eggshell (I would have used Modern Eggshell but I was trying to use up old paint and the Estate Eggshell has actually worked really well).

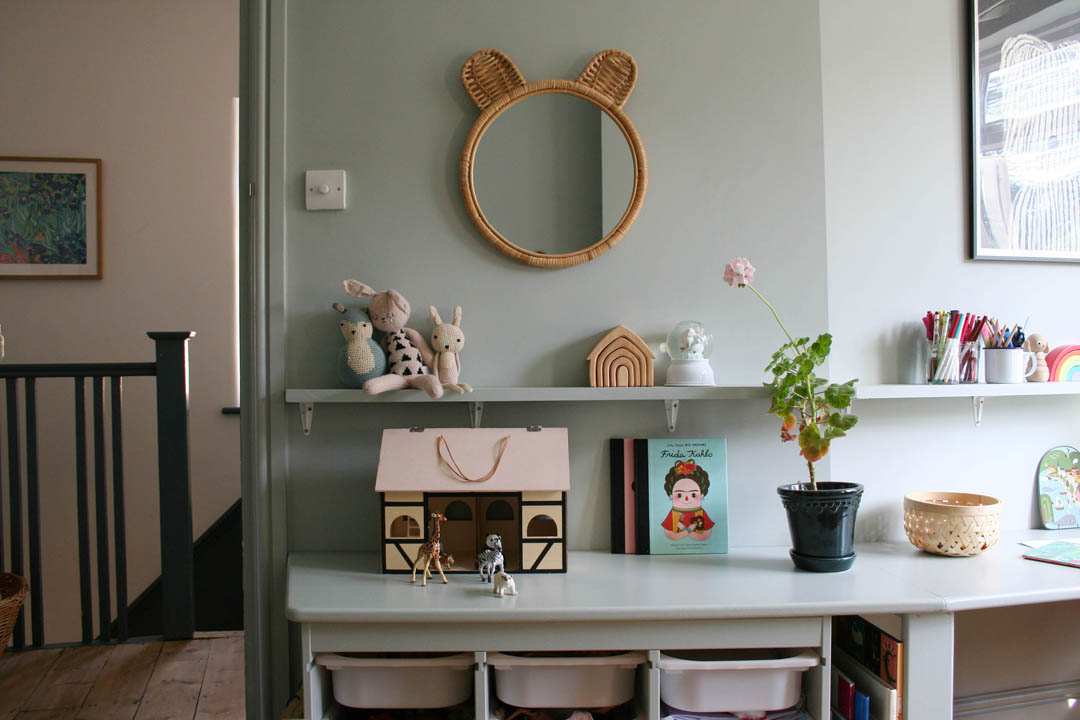
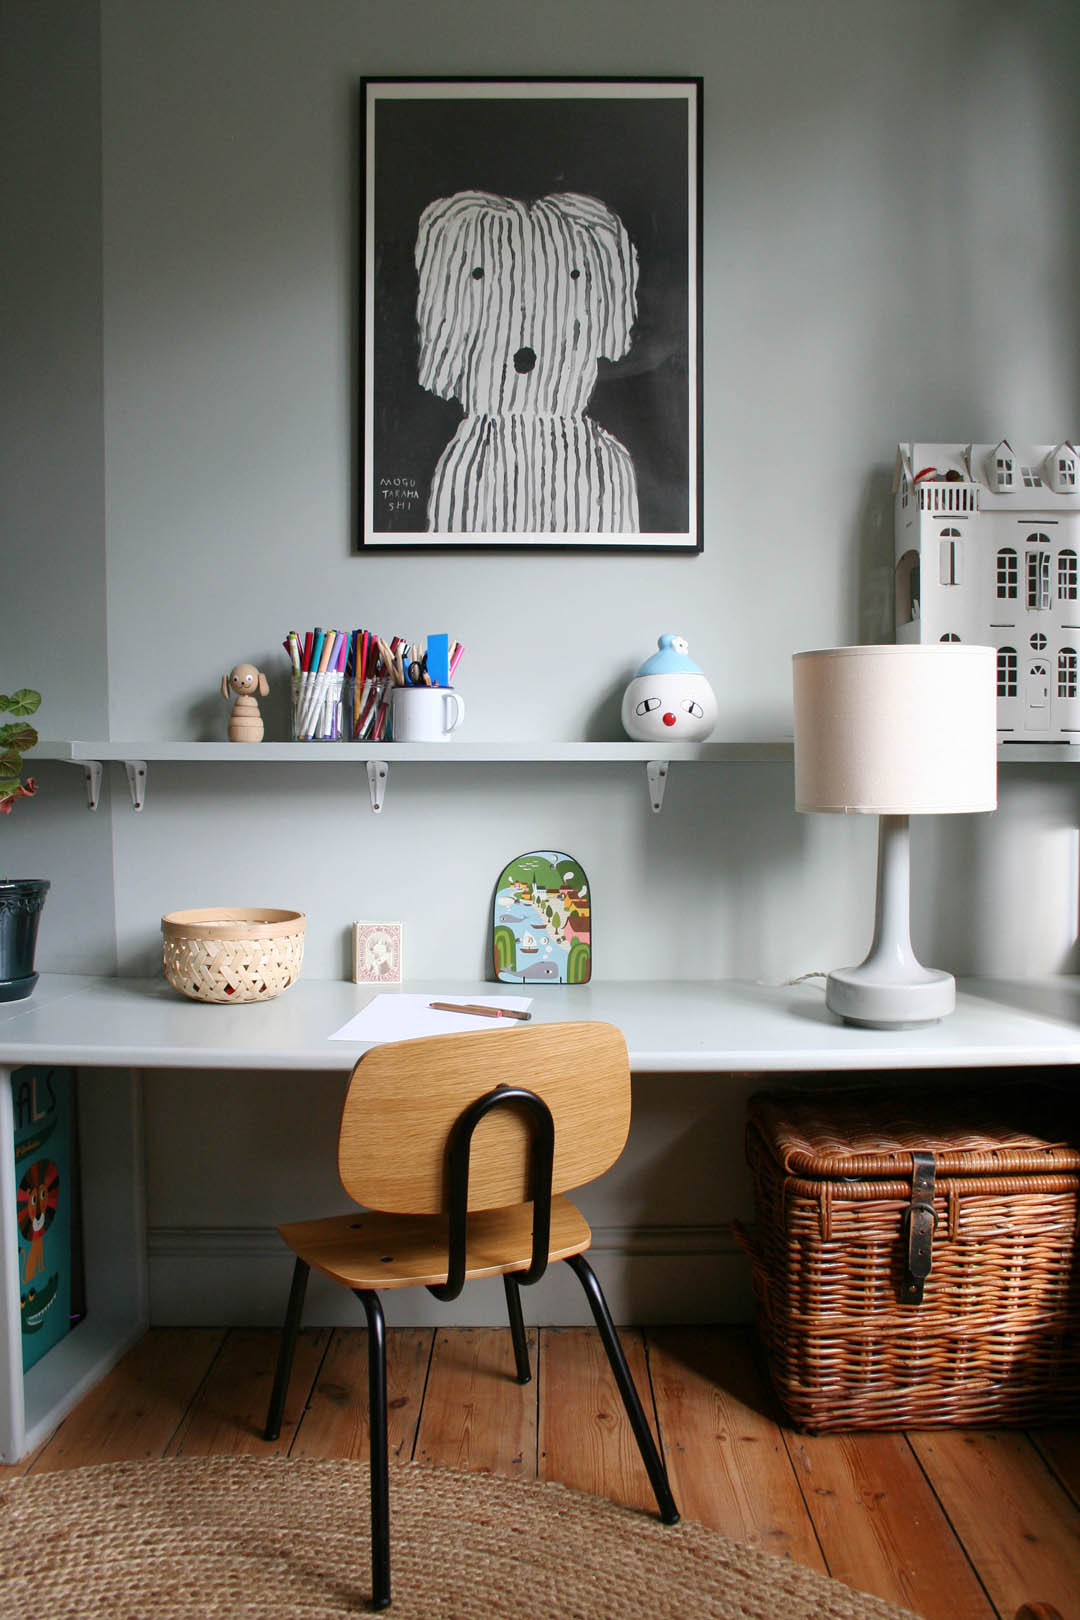
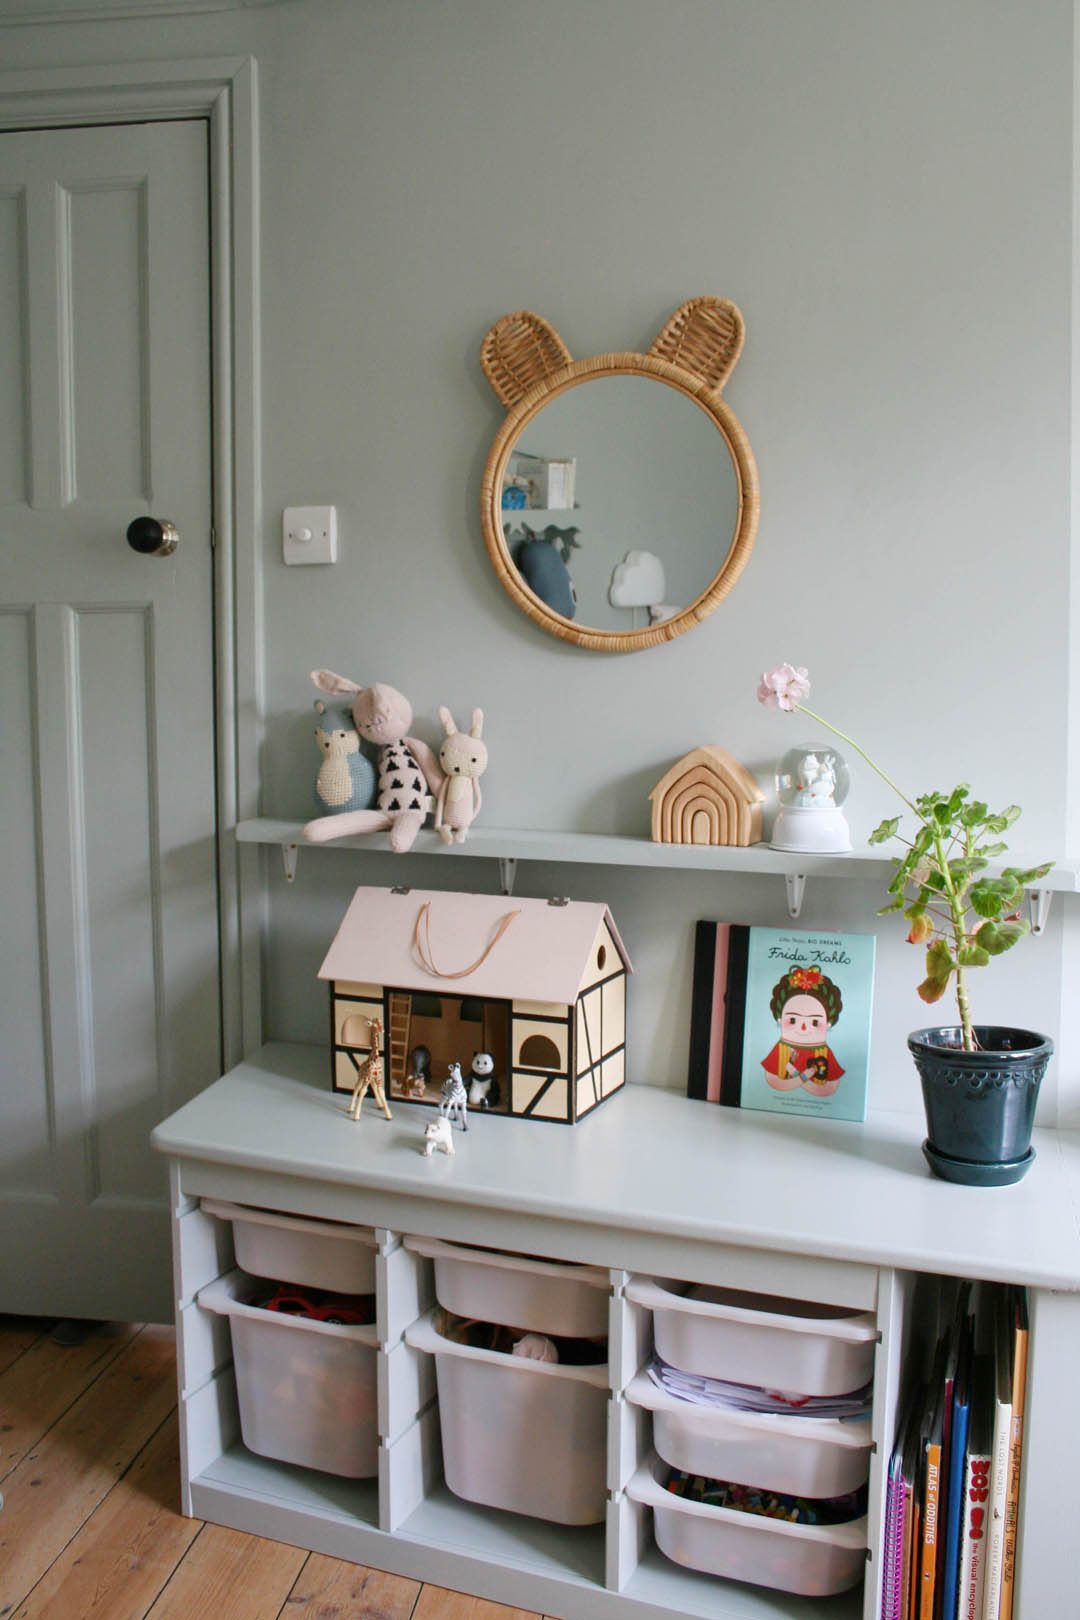
We also took down the shelves that were on the wall and used the rest of the MDF sheet to make one long shelf that runs above the desk. Mimi calls this her ‘special shelf’ and puts all of her little trinkets on it (I have to admit I moved a lot of them to take photos!!).

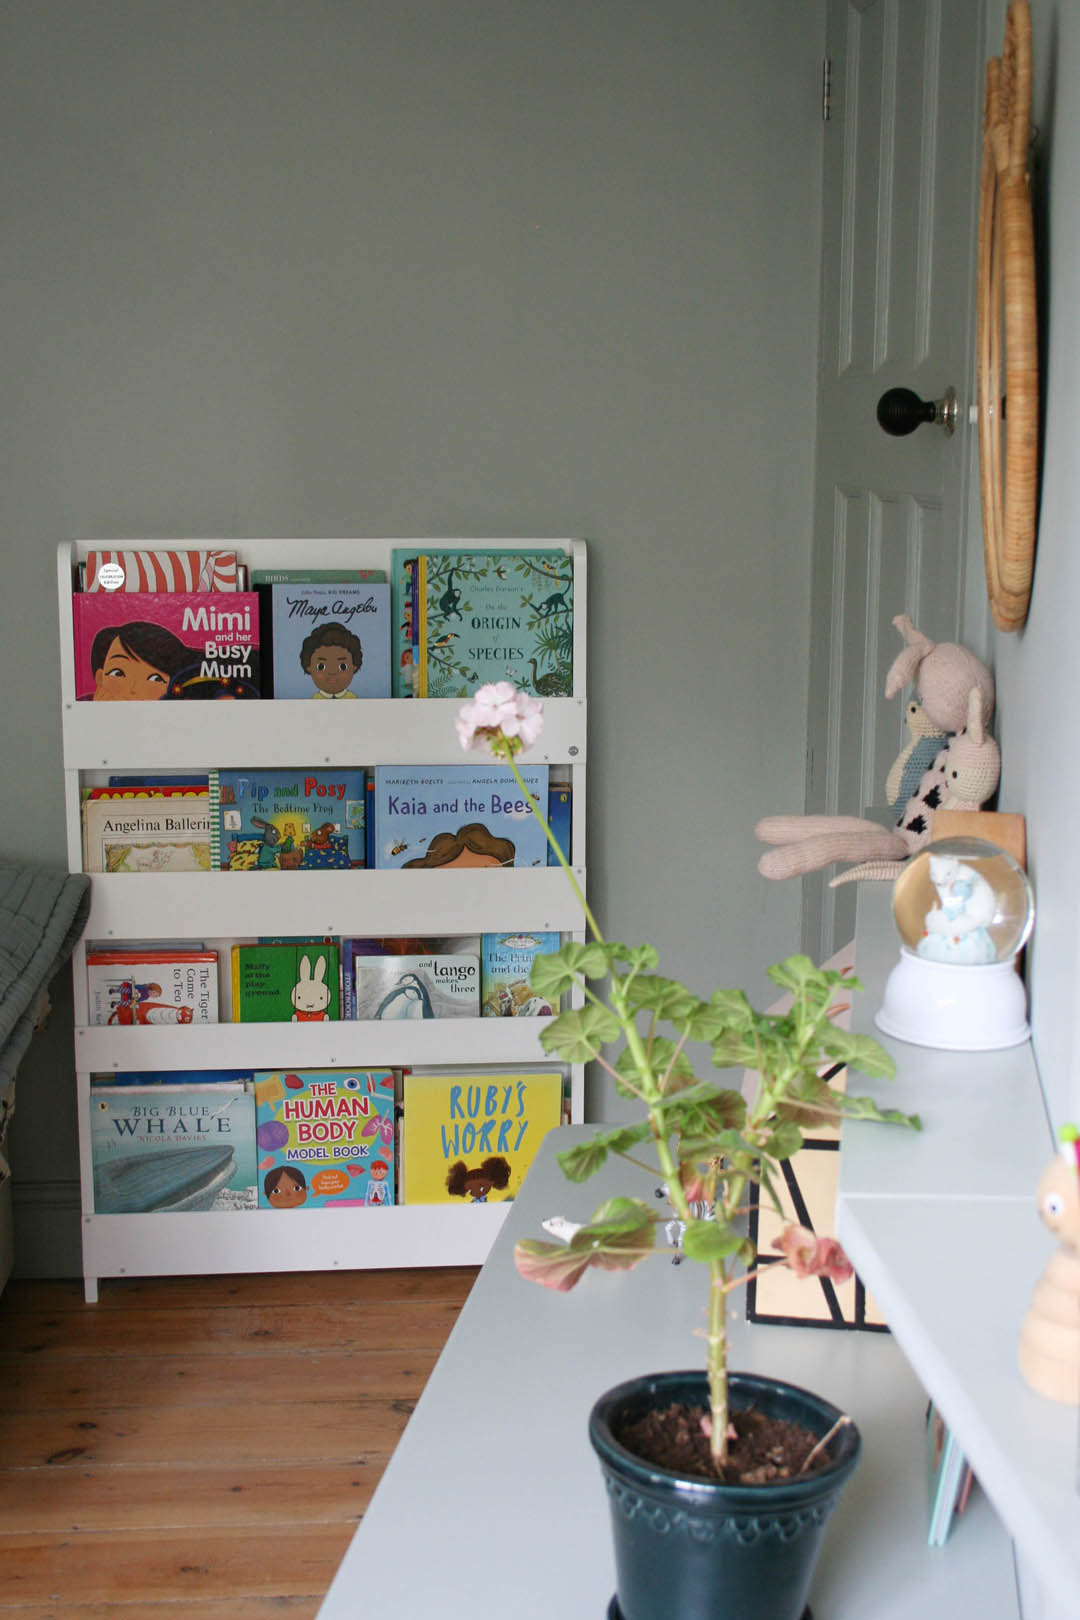
I didn’t originally like the support we made for the centre of the desk where the wall angles outwards but I realised we could use the nook it created for all of the oversized books that Mimi has, which is perfect! I bought a new chair for the desk as her old IKEA one that we got from a neighbour was too small and she was complaining of a sore neck.

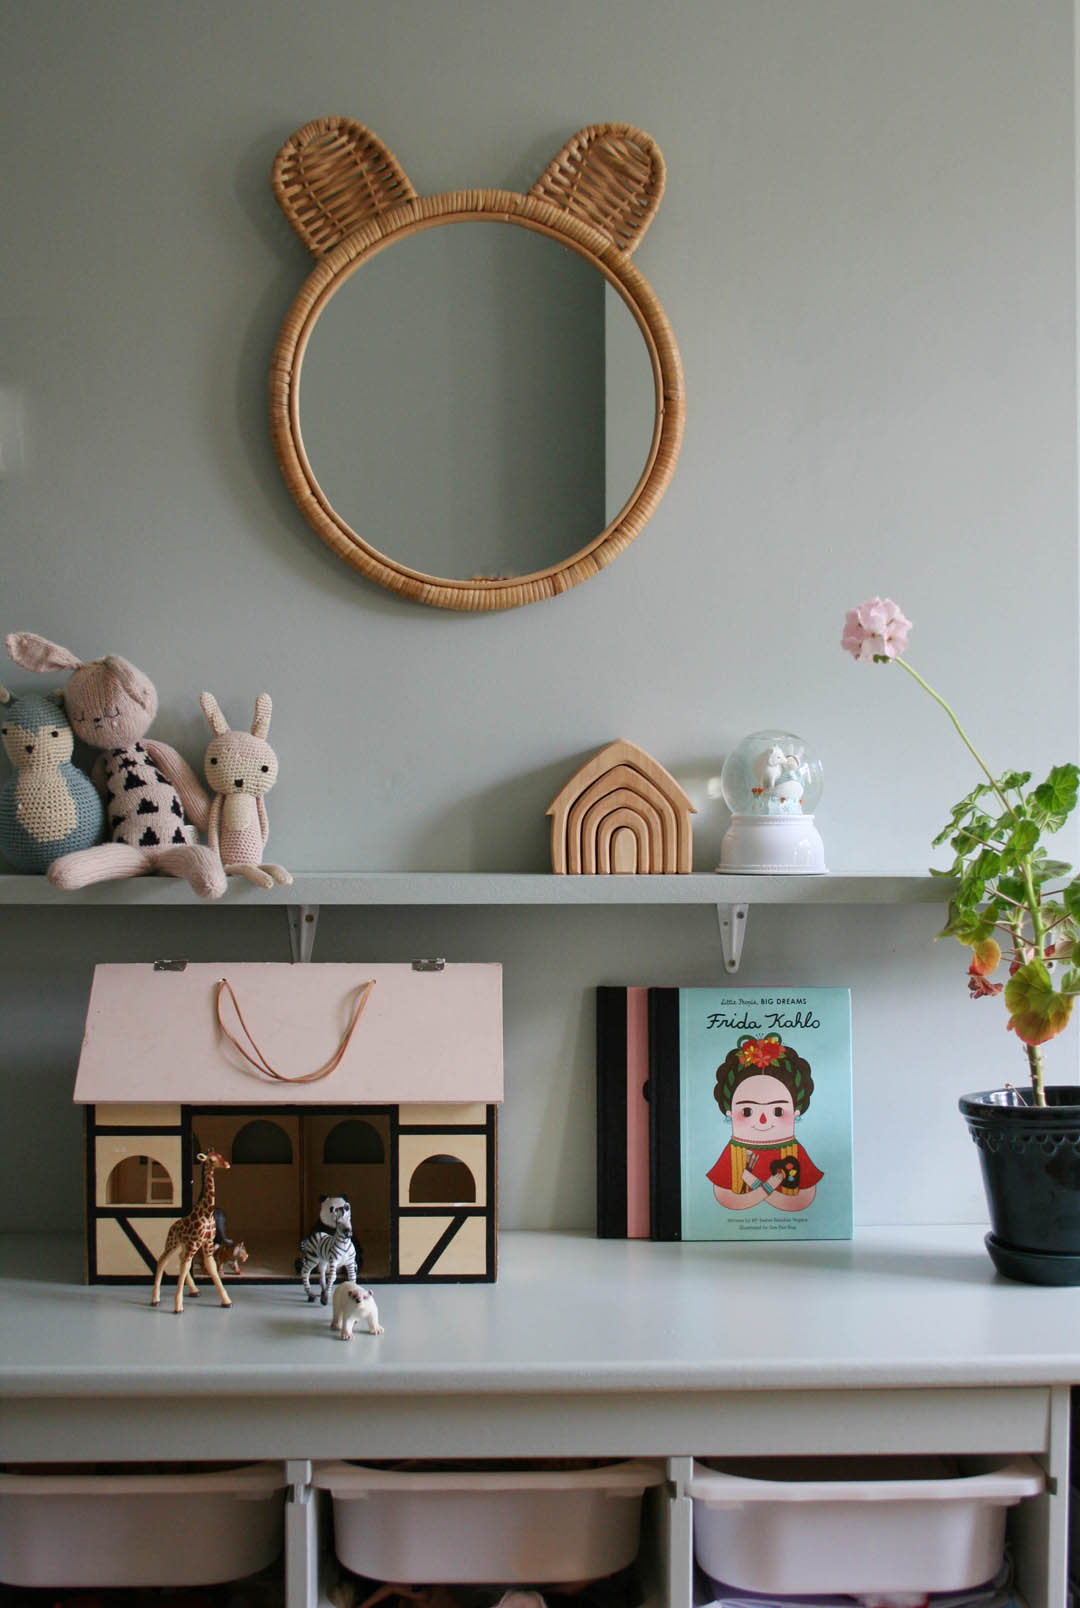
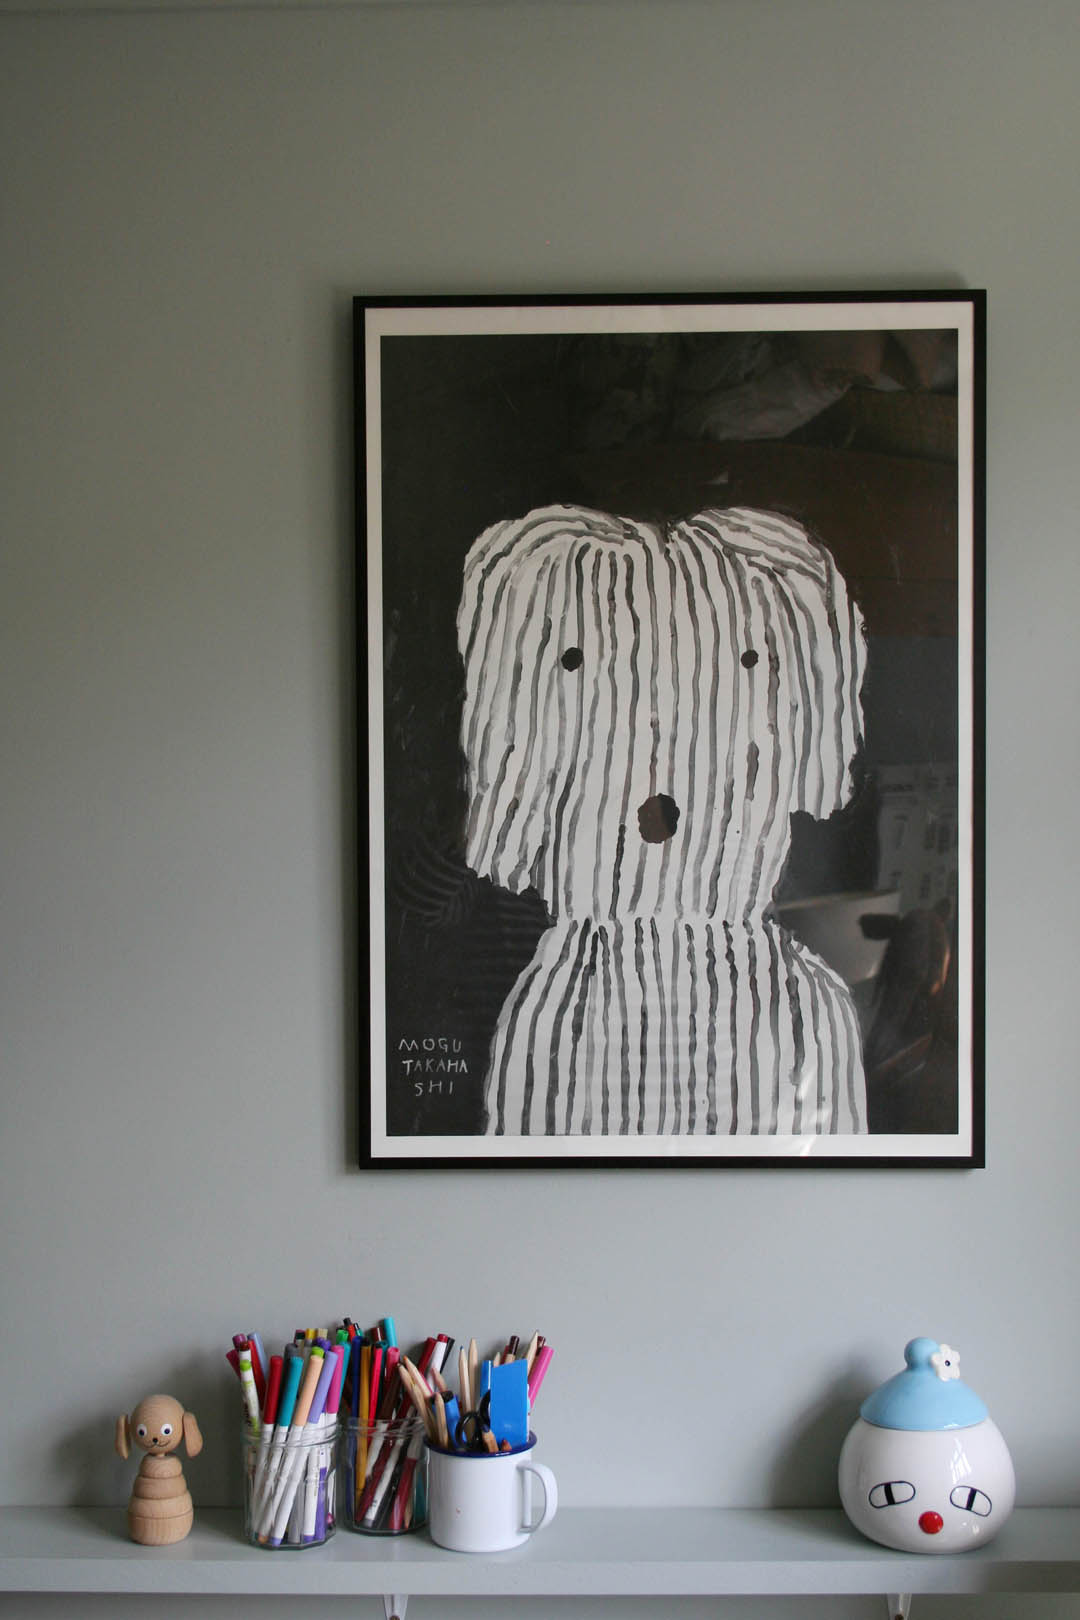
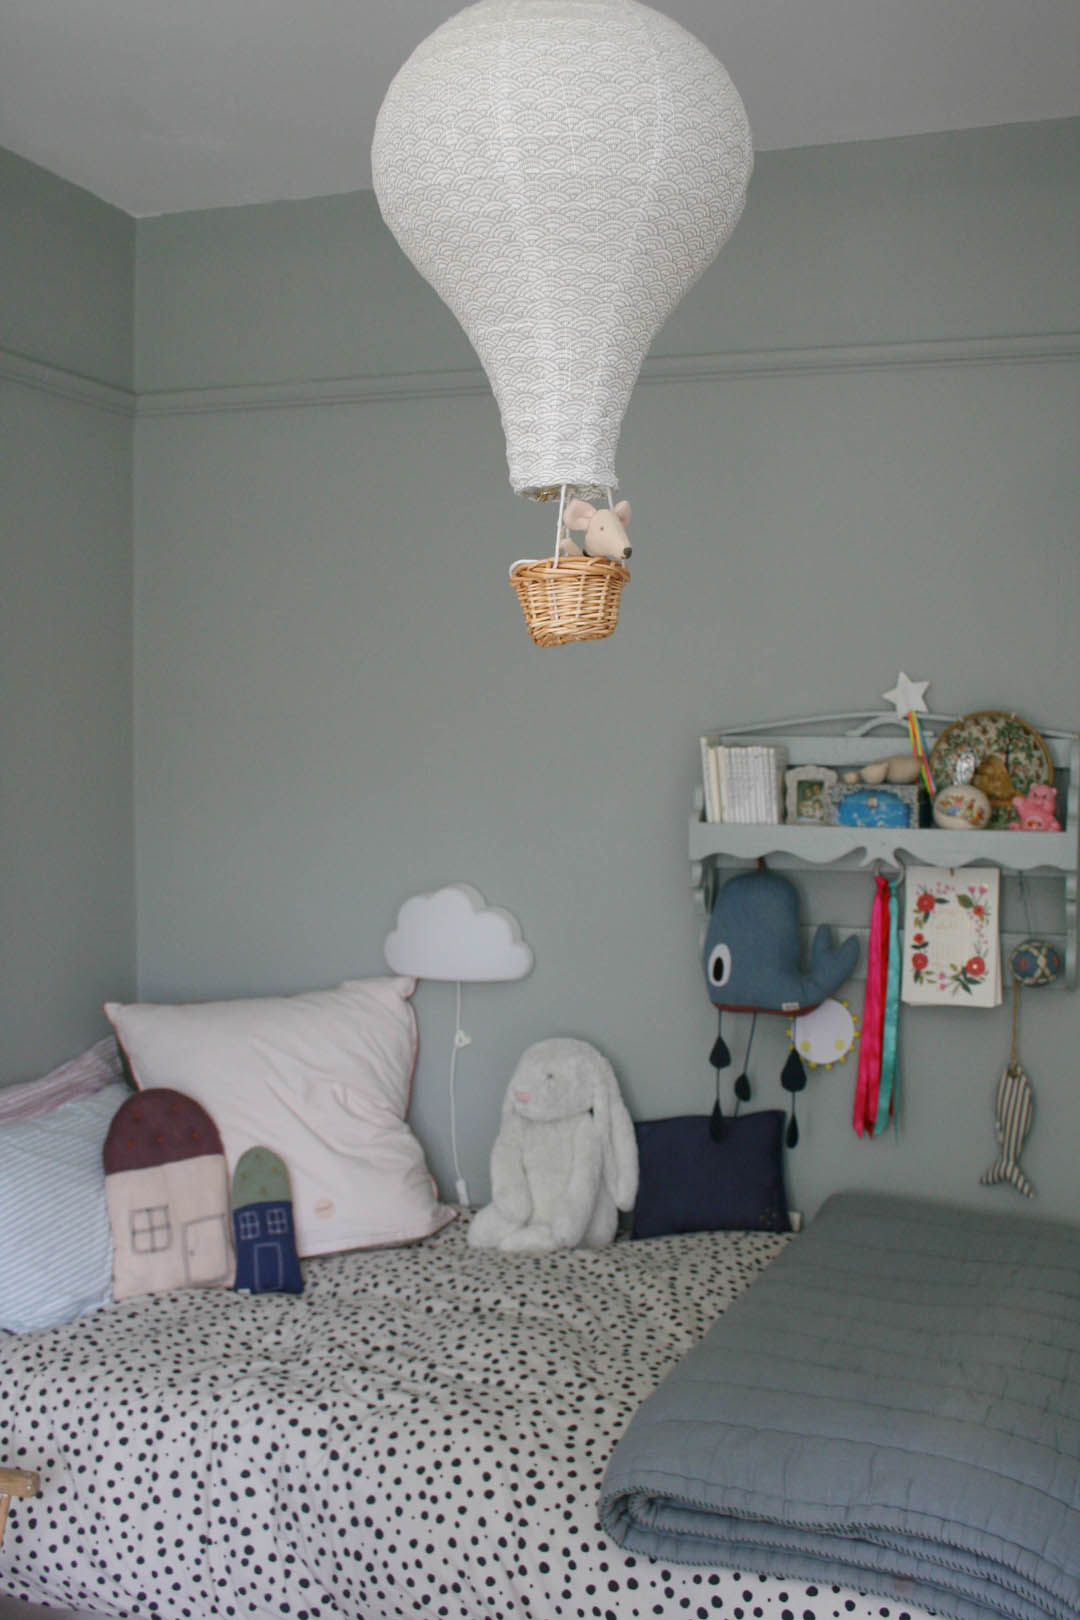
I also bought a new duvet cover and poster to add a bit of contrast and to ground all of the blue. On the most part though we have kept things from her original nursery including the quilt, pillows, cushions, toys.

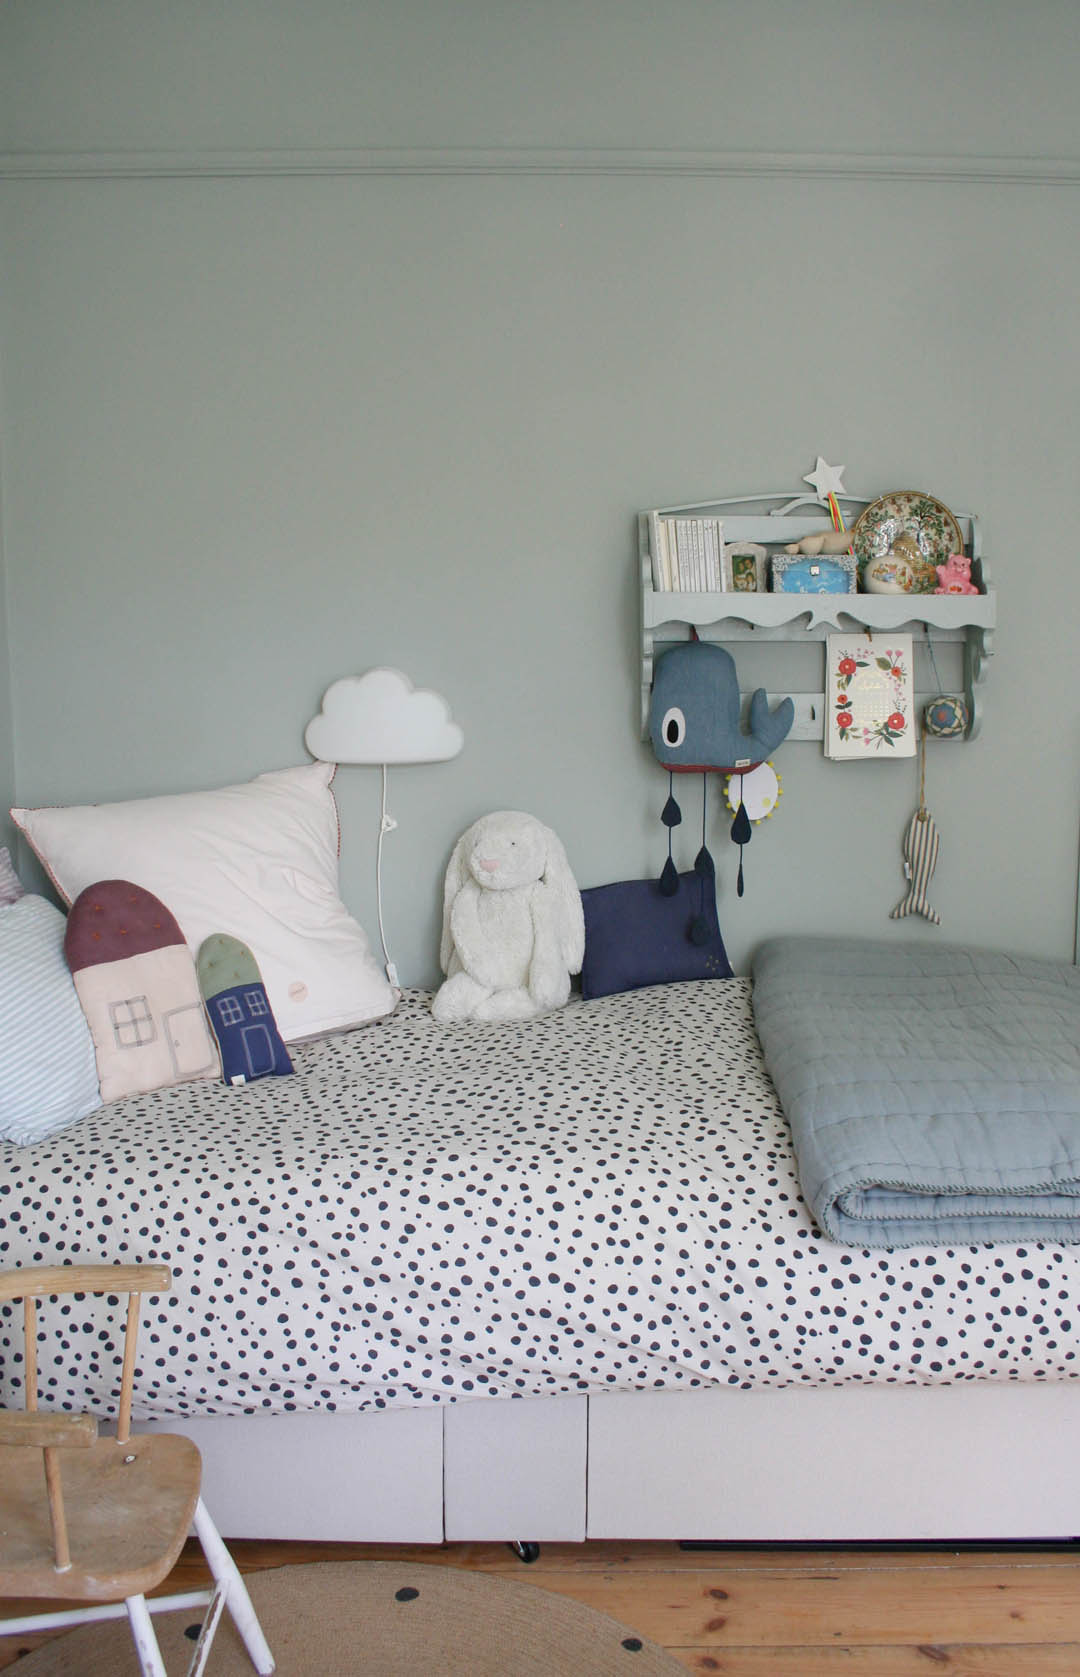
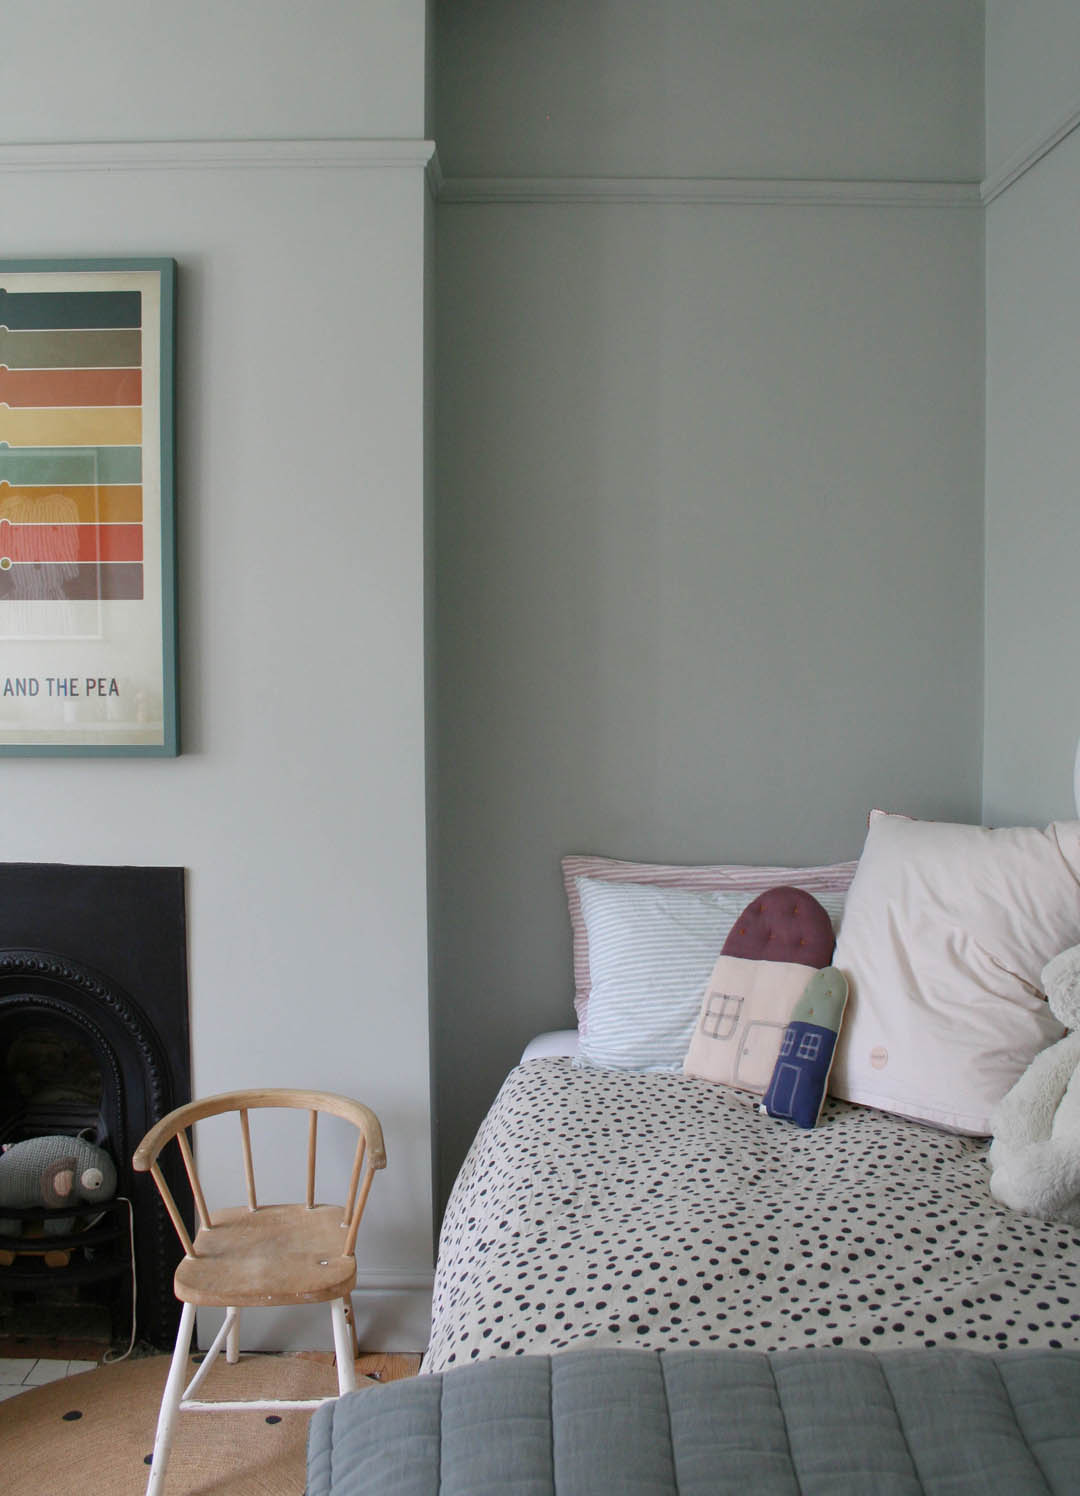
We haven’t done much on this side of the room as this is where we plan to put the high bed – for now Mimi has the old single divan that used to be in what is now our home office.

The great thing about the new desk set up is that the floor is no longer absolutely covered in stuff and it will definitely grow with her even if we have to raise it slightly. And for now it’s just right for our big school kid!

Katy x

Source list:

Walls – Light Blue Farrow and Ball Estate Emulsion

Woodwork, desk and shelf – Light Blue Estate Eggshell

Trofast drawer unit – IKEA

MDF sheet – A standard sheet 2440mm x 1220mm but it needs to be 25mm thick. We got it from a local wood merchant delivered.

Shelf brackets

Desk chair – Sebra

Cane mirror – Kidly

Fine Little Day Jaxx poster – Tea and Kate (I used an old IKEA black metal 50x70cm frame)

Monochrome spot duvet cover – H&M

Bookshelf – Tidy Books

Rejuvenating my bedroom for Spring with The Fine Bedding Company

*This is a paid collaboration with The Fine Bedding Company

Happy New Year everyone! Having spent the last week holed up in my bedroom in isolation (desperately trying to ensure Mimi didn’t get Covid right in time for the start of term!) I have never been more motivated to give this room a deep clean and freshen everything ready for the new year (I’m skipping right over winter and going straight to spring if that’s ok with you). Serendipitously I had agreed a collaboration with The Fine Bedding Company in December and they sent me a coverless duvet to try out, which is a new-to-me product. I immediately got it on the bed when I knew I was going to be isolating and it honestly made the time so much more pleasant!

So let me start by explaining what a coverless duvet is, as I have to admit I found it difficult to get my head around at first. Basically it is a duvet that is washable so no cover is needed. Instead of changing bedlinen each week the whole duvet goes straight into the washing machine and you can then fling it over the line, or the banisters in my case, and it dries in a couple of hours (I’ve tried it and this really works!). Therefore, there are many advantages to this type of bedding as it means less effort in terms of changing bedlinen, less storage needed as multiple sets of bedlinen aren’t required and the duvet can be kept a lot fresher compared to a feather filled duvet that can’t be laundered at home.

The first thing I noticed about the Night Owl coverless duvet was the fact that it feels so cosy. I’m one of those people who actually really enjoys snuggling into the duvet when the cover has been taken off to be washed before a new one goes on. There is something so nice about being in direct contact with the duvet rather than the cover. There is none of that really annoying excess duvet cover as the duvet itself bunches up – why am I always the one left covered in just sheet?! It is also super light and a few quick shakes is all it takes to make the bed in the morning; no re-jigging to get the duvet straight inside its cover.

I chose the plain white seersucker coverless duvet from the Night Owl range as I really like the freshness of white bedlinen. It arrived in a drawstring bag and it made me realise how easily stored it is, which also makes it absolutely ideal if you have regular guests to stay. No hassle of sorting and changing bedlinen or never having quite enough for guests. It would be so easy when the guests leave to just pop the duvet in the washing machine, super quick to dry and ready for the next guests.

There are a couple of other coverless duvets from the Night Owl range that appeal to me including the Outdoor Duvet, which would be PERFECT for camping trips as I so miss a cosy blanket when we camp. Normal blankets or duvets get damp due to the condensation but the outdoor duvet would be a revelation! The other design that I would have snapped up a couple of years ago when we were potty training Mimi is the Junior Duvet as there were far too many occasions that I had to wash duvet covers and pray that feather duvets were kept dry.

I also have the breathable pillows from The Fine Bedding Company and I have to say that in combination with the coverless duvet I really have been the perfect temperature whilst in bed. I am normally far too hot and end up pushing the duvet off but that has not been the case with these pillows and duvet.

I don’t think there will be much staying in bed all day for the foreseeable (I can’t believe I am actually saying this but I really hope there isn’t!) but it felt so nice yesterday to pop everything in the wash and a couple of hours later it was all ready to go back on the bed, clean and fresh and ready for a new year.

Katy x

1930s hallway

(AD – this blog post contains PR products*)

Our hallway was never finished after our initial renovation three years ago as we ran out of funds. It’s been a case of waiting patiently not only to make the space look nicer but to add the much, much needed underfloor heating as our hallway is FREEZING due to draughty floorboards and the external wall on to our side access. We can now finally warmly (literally!) welcome people into our home and coming home ourselves to a warm space is a game changer. Let me chat you through what changes we have made.

Victorian black and white quarry tiles | Walls and Floors* (PR product)

Flooring

First and foremost on the priority list was to install underfloor heating. This meant we would have to cover up the original boards, which was just something I had to accept as I would have loved to keep the boards and have a lovely kilim rug BUT practically speaking this was just not an option. Underfloor heating and tiles were the answer to make the hallway significantly warmer and easily cleanable (having Otto in mind, as ever). I’m very happy with our tile choice – Black and White Victorian Quarry tiles from Walls and Floors* (PR product). Considering thirties properties were not traditionally tiled I didn’t want to choose anything too intricate or Victorian and I really didn’t want anything too contemporary as it’s just not my thing. I feel the black and white quarry tiles are classic and importantly they certainly won’t date. They will also enable me to change the decor in the future (I envisage a plaster coloured hallway in a few years!). They are so easy to clean and the black grout means they won’t end up looking mucky like some encaustic tiles and lighter grout can do. Importantly for me, the Victorian White Quarry Tile is not brilliant white but rather an off white that almost directly matches the Shaded White paint on the walls. This makes a huge difference as the white tiles don’t feel as stark as bright white ones can so I’m very pleased about that. The other bonus of these tiles is that they stretch out the space and make it feel so much bigger as well as reflecting the light so it really has a different feel to the old wood that absorbed all the light. They’re perfect.

Our tiler was very impressed with the quality of the tiles and how easily they cut , which makes the fact that they were the least expensive tiles that I sampled even better! Our tiler did a brilliant job as I asked for the tiles to be laid in a diamond formation as I think that makes them look more traditional but it makes laying them much more difficult. I chose to buy a small border tile to go around the perimeter of the space to add a traditional touch but border tiles are very expensive so even though I wanted a thicker border comprised of two or three tiles there was no way we could afford that. The border tiles I bought were black individual rectangle tiles 150x25mm and they are exactly the same texture and colour as the black square tiles we have used in the main area. The black Mapai grout is brilliant as our walls aren’t straight and there were quite a few kinks to work around so where there were gaps the black grout fills in so well.

We did discuss with our builder the option of removing all the skirting (that we had put on new three years ago) and removing all the original boards but in the end we opted to keep the boards and use a more expensive UFH system called Schluter. This did mean that we have ended up with less skirting as the level of the floor is higher but it really isn’t noticeable. It also meant far less labour for the builder so the whole job ended up being £1700.

Three weeks in and the combo of UFH and tiles is dreamy. I still can’t quite believe I’m able to walk around in socks in comfort and Mimi lies on the floor every morning whilst I faff around trying to get us both out of the door. Otto is also a massive fan and has been really enjoying his new napping spot. We’re all very, very pleased!

Storage and seating

The next big change I wanted to make was to remove the ‘temporary’ console storage table I bought secondhand three years ago for £15. It always looked so untidy as the storage was open and we always ended up going into the sitting room to change our shoes as there was no where to sit. Therefore, I was very sure that I wanted a storage seat and I did have a good look at antique options, specifically Hungarian settles, but generally they are either too big or too small for our space. They also have very high arms, which can make a space feel more cramped, and often the storage seat isn’t fully acessible. I did find one but the seller let me down so I was thrilled to come across this Elkstone Oak Monks Bench from The Cotswold Company* (PR product). Not only is it the perfect length but it has no arms, which makes it feel far less imposing and we can perch on the end if necessary. Also, the entire seat lifts up so there is SO MUCH storage as well as a soft closing function. We can now store woollens, bike helmets, excess shoes, shopping totes and all those other bits and bobs that are unsightly but need a home in a hallway. We are going to try and find some dividers to make the storage more organised. We can just tuck every day shoes under the bottom of the bench too as it stands on legs. It’s completely ideal.

Hallway storage bench | The Cotswold Company* (PR product)

The Cotswold Company have a huge amount of hallway furniture and accessories and I have to say it was up there with one of the best furniture orders/deliveries I have experienced. Not only was the bench ‘in stock’ so no huge lead times but it arrived about two days after the order was placed and the delivery company was brilliant; great communication, changed the allocated day for me with no issues and they were super careful when they made the actual delivery. The packaging was great and there wasn’t a single quality issue, which if you order furniture regularly you’ll know is extremely rare. Anyhoo, having a seat in the hallway makes everyday life much easier and we’ve found when guests come they are much more likely to leave coats and bags on there rather than bringing them into the sitting room, which is something that drives me a bit mad (just me?!).

The other storage we added was a little street find shelf that we had mounted as a shelf below a mirror but I realised that if we turned it upside down we could add some hooks and use it as a peg rail and the shelf above is very handy for glasses etc.

Wall colour

The woodwork has stayed exactly the same and was painted Inchyra Blue three years ago. I still really love it. However, one big budget saver we made was agreeing to have all walls in the house painted brilliant white. I knew I would change them slowly as we got to know the house and I’ve actually really enjoyed the process of taking my time. I painted the walls myself before the tiles were laid and chose Shaded White to complement the Inchyra Blue (both Farrow & Ball)and bare wood of the doors. It brings so much more warmth to the space. I haven’t painted the ceiling yet (the brilliant white really sticks out like a sore thumb to me) but maybe after Christmas! I decided to paint up to the cornice as that makes the ceiling feel higher and as it’s not a nice cornice it doesn’t emphasise it more than needs be.

Lighting

A huge priority for me was to improve the lighting in the hallway during this process. I’ve been desperate for wall lights to add some really warm light so I asked the builder to add a plug socket behind the bench which cost £100. I didn’t want to pay more to have the lights chased in and a socket gives flexibility if we ever shift things around or want a floor lamp, for example. I found relatively inexpensive wall lights on sale although I share the link with the warning that they come with plastic cabling (that I’ve removed in order to change it), bright white lampshades and euro plug adapters (so I will have to add UK plugs when I re-wire them). However, even with new lampshades, new cable and plugs they have still worked out about half the price of what I would have paid for an equivalent wall light. I bought new lampshades from the very talented Munro & Kerr that work so well in combination with the tiles and colours as well as adding some lovely texture and I ordered some linen coloured fabric cable that was delivered today so I will add that to the lights later. I am thrilled with the warm cosy light – thrilled!

Beautiful handmade raffia lampshades | Munro & Kerr

Accessories

The huge 80cm round mirror above the bench is perfect and bounces much needed light around. A plant up on the shelf makes more difference than you could ever imagine and I would really like to find a lovely piece of art to go where the portrait currently is next to the front door but all in good time.

Still to do

You may have noticed that the stairs are still in their raw state but we don’t quite have the strength to deal with those and I know I want to install Unnatural Flooring manmade sisal when we can afford it so there’s not much motivation to go to all the effort to paint them. We shall see. The front door is still very much on the list of something to change but in the mean time I plan to re-paint it a lighter colour as it feels very dark with the new tiles.

But other than that it really does feel like a finished space now, which is amazing after three years of it feeling like the remnants of the renovation building site. If you have any specific questions about the tiles or anything else do let me know and I hope you like the changes!

Katy x

Current colour crush

The work on the hallway floor is well underway and the underfloor heating and tiling should be done by the beginning of next week. If you follow me on Instagram you will have seen that I painted the walls Shaded White before the work began and that has made the space feel so much warmer to balance the cooler Incyhra Blue below the dado rail. The walls were previously a budget-saving Brilliant White, which I always knew I would change down the line once I got a good feeling for the space and had saved up again after the initial renovation budget was blown. I really disliked the Brilliant White after a while as it is so cool and actually makes a space that lacks natural lighting quite dingy; it is definitely not a good choice if you want to brighten or warm up a room. So, the combination of Inchyra Blue and Shaded White is a great one and extremely practical as the blue hides all sorts of scuffs and dirt at dog and child level. However, I want to add another colour to the hallway to make it more welcoming and cosy but one that will work well with the rest of the house and all of the greens and blues. Therefore, I want to add some deep reds here and there. The inspiration came from this DIY lamp that I spray painted a while ago and I just love the way that colour sits with the blues and greens downstairs and it really adds a touch of warmth and rich colour. I also have reds and rust colours in the rug in our home office and it adds so much to that space and even glimpses of it from the landing seems to wrap the whole first floor up in a lovely warm glow.

I’ve been noticing a lot of gorgeous red, rust and wine-coloured homewares and paint colours and I’ve decided to paint the inside of the front door Refectory Red, which is a deVOL furniture and joinery paint (hoping it works on our uPVC door as it’s been primed and painted with eggshell previously so it can be treated like interior wood now…famous last words) as well as adding a couple of other red touches with accessories. Obviously I wish it were a beautiful original 30s front door that I will be painting but it really doesn’t look plastic anymore and I hope the Refectory Red will add a big dose of cosiness to the space whilst still being dark enough not to highlight the ugly the ugly mouldings on the door.

Refectory Red paint by deVOL

Here are some other beautiful reds that I have spotted for some inspiration for adding these colours to your home…

The home of Sarah Brown who has used Chop by Plain English to perfection.
Carl Hansen recently partnered with Ilse Crawford to develop a new colour palette for the first chairs that Hans Wegner created for Carl Hansen in 1950. Of the five colours I love this red, called Falu, and now seriously contemplating painting a couple of my dining chairs!
Preference Red adding a gorgeous dose of contrast to the blues at The House on Dolphin Street

Before I go I just wanted to come back to deVOL’s Refectory Red that I have chosen for the inside of the front door and show you the difference it makes to this white pantry cupboard…

What do you think of these colours – can you be convinced? I’ll keep you up to date on how I get on with the front door!

Katy x

Narrow hallway storage solutions

I asked whether this would be a useful post over on Instagram and the answer was a resounding yes. It seems to be a very common issue, no matter the type of flat or house. I count myself extremely lucky having a wider than average hallway and I can honestly say it is a complete game changer compared to homes I have lived in before this one. I recently did an interiors consultation for a family who live in a five bedroom house but their hallway is the width of the front door and it was driving them all mad so we really focused on how to solve the storage issues that come from having an extremely narrow hallway.

Obviously the decor of a hallway has a huge bearing on how it looks and feels but I won’t be focusing on that here other than to say that the lighting is absolutely key to how well a hallway works. If it is badly lit and gloomy it makes functioning in the space so much more difficult i.e. not being able to find shoes, keys, tie laces, see into bags etc. I would say that the first thing to do is really assess your lighting and whilst you don’t want it to be harsh and too bright as that feels unwelcoming, you do need to have a well balanced, even lighting from different sources – a pendant or two combined with wall lights is ideal (make sure they are on different circuits so you don’t have to have them all on at the same time as sometimes in the evening, for example, it’s nice to have lower lighting for just passing through the hallway) or a table lamp if you have space for a table and don’t have wiring for wall lights. A dimmer switch for hallway lights is also a good idea to help change the mood of the lighting.

So, moving onto the storage issues…

Coats and bags

Do try to remove as many coats and bags from the hallway as possible – whether that be storing winter coats in wardrobes (vacuum packing is good for big bulky coats) during the summer and vice versa or if you live in a house what about using landing space at the top of the first flight of stairs? If you have to hang coats and bags in your hallway then a high peg rail is what you need. Try to make it as long as possible to space the coats out so they don’t become a massive bunch of coats that will cause an obstacle and get dragged off the pegs as you pass. Also ensure the pegs themselves really do hold the coats to make it easier to hang them and less likely that they will slip off. I love the bespoke rail that Hannah from The Otto House had in one of her previous homes that you can see below. The length of it means coats don’t get bunched up and the shelf above can be used either to store bits and bobs or to display things to make the hallway look and feel more welcoming. Don’t be afraid to hang coats over a radiator as this can actually be quite practical especially in the winter when coats are wet and soggy. Try Etsy for similar peg rails shelves. You can go for a bigger shelf if it is high as this won’t encroach on the space but can be a very handy place to store things that aren’t used everyday.

Image via The Otto House

I have found that children’s coats are much better hung up at their level so that they can be in control of them and because they are generally a lot less bulky they don’t get in the way ion really tight hallways or knocked off their pegs even though they are at hip level.

We hang Mimi’s coats below the dado rail right next to the front door on a cheap wooden peg rail that I painted the same colour as the wall.

Shoes

Come to our house on any day of the week and the hallway is strewn with shoes. It is beyond annoying. Even a neat row of shoes against the wall is annoying, if you ask me. Shoe storage cabinets are really great for narrow hallways for every day shoes and slippers and they also provide a handy ledge for keys, glasses, face masks and all the other bits and pieces that build up in this space. We also make a big effort to keep shoes that aren’t worn often in wardrobes and we often keep walking boots and wellies in the car.

The white shoe storage cabinets above are from IKEA (they do a couple of different models) and MADE make a blue shoe cabinet, which is nice. The image below shows another lovely version that is much more of a feature by MADE.

Image via Made

Hallway table

If you really need a hallway table or console there are some great options for very narrow spaces. You want the table to work as hard as possible so it needs to have storage as well as a surface so go for something with a drawer or a shelf below. This is a great example from Cate St Hill’s lovely blog…

Image via Cate St Hill

Not only is this Ferm Living console table very slim and easily pass-able but it offers a decent amount of storage on the top and bottom, especially with the tray style surface so things won’t be knocked or dragged off as you pass by.

Another option that takes up the smallest space possible and can be used over a radiator, if needs be, is this Urban Size console table with a peg rail below.

Oak Hallway Stand

Seating

It’s impossible to add seating into some hallway spaces due to radiator or door placement but it can be done even in the narrowest of spaces. It seems like the ultimate luxury to me to be able to have a seat in the hallway and I have decided that it is a real priority in our hallway to make the most of a wider than average space. We have had a make-do IKEA console that I got for free second-hand and painted for the last three years until we had the budget to finish the space and so now it is time to choose a seat to replace the console. My family is very kindly gifting me part of a settle bench for my birthday, which has just been. Much like hallway tables I think hallway seats or benches have to work as hard as possible and provide storage. My bench hasn’t arrived yet so I can’t recommend it but there are a lot of options for second hand settle benches if you are interested in one. The one I am getting is £375, so not cheap, but it is a very flexible piece of furniture that can be moved around a house and I’m pretty sure we will have it for years and years to come. I’m hoping we can store some shoes, woollens, bike helmet and picnic blankets in the seat. If you do a quick google and search for ‘settle bench’ you will see the various second-hand and new options.

I am getting a settle bench similar to this but in bare pine.

Another good option for a storage bench is the IKEA Stocksund model as you can see below. A lovely soft seat in the hallway with decent storage. Just bear in mind that textiles in the hallway are prone to getting pretty grubby but saying that Bemz design bespoke washable covers for IKEA furniture that are worth investigating.

Stocksund storage bench – Image via IKEA

If you are tighter on space than the options above allow try a slimmer bench but still with potential shoe storage as can be seen in Jess’s beautiful hallway below. This is a storage bench from MADE and fits in very neatly to a narrow Victorian hallway.

Storage bench | Image via Gold is a Neutral

If you need something with even less depth and have more of an industrial style try a shoe bench like this vintage 60’s one from Vinterior or a new version from John Lewis.

Ultimately, if there is any way of building a bespoke seat storage bench then that is the ideal option as seen below.

Buggys

If you are struggling for space and have a buggy to deal with every day there are a couple of options. I came across this buggy hook called a Strollaway, which would be ideal on an unglazed door. You would have to be organised about not storing loads of stuff under the buggy but worth it, I’d say.

Alternatively, and something I discussed with a client in a two bed garden flat with two children, is the option of wheeling the buggy through the flat and storing it outside in a dedicated shelter.

Image via 600sft And A Baby

I hope some of those ideas help if you are stuck with how or where to store things in your hallway. I can’t wait to show you my new bench when it arrives next month some time.

Katy x