Tea light jars

This is a little craft project you can do to light up parties and summer evenings (can not wait for those). I also thought it’s a nice thing to make for your mum for Mothers’ Day because if your mum is anything like mine, she will prefer something homemade (well, that’s what she says anyway). These little jam jar tea light holders are totally sweet and are hassle free as you use LED tea lights in them. This means when you have a party or drinks with the tea lights about your home or in the garden, you don’t have to waste time changing the candles when they burn out. They are also totally safe for all of you who have kinders running around.

You will need:

Tea light jars

Light material (about 30cmx15cm), PVA glue, water, bowl, paint brush or pencil, scissors, jam jar.

Tea light jars

I’ve chosen to use a Bonne Maman jar (do you see what I’ve done there?) These jars are particularly good for this as they have no lip and the top of the jar is wider than the bottom so it’s easy to line with fabric.

Tea light jars

LED tea lights. I bought six from Asda for £3. Buy here.

TUTORIAL:

Tea light jars

1. Mix PVA glue and water together in equal parts.

Tea light jars

3. Cut your fabric into strips about 2-3cm wide. Make sure they are long enough to reach from the top of the jar to the middle of the bottom of the jar.

Tea light jars

4. Dip your strips of material into the glue and water mixture. Use your thumb and finger to wipe off excess liquid.

Tea light jars

5. Line the inside of the jar (print facing outwards) with each strip. Use your brush or a pencil to stick the strip down the inside of the jar.

Tea light jars

6. This is what it should look like at the end. It does not matter if your fabric overlaps slightly.

Tea light jars

So pretty even if I do say so myself!

Tea light jars

The LED tea lights are really quite powerful and the fabric makes the light very warm and soft. Definitely going to make more of these for the balcony this summer.

Lucky for me I have the best mum in the world to give these to x


Chalkboard boxes

I have a chalkboard in my home for boring shopping lists.  However, whenever someone comes over it ends up being scrawled over with messages of thanks, love or very rude words. Either way, chalkboards to me are very friendly-looking (do you know what I mean?) and can be fun.

Blackboard paint is a bit of a revelation to me. I really want to use it for the back of a door, a whole wall or the inside of cupboard doors. Before I go that far, I’ve decided to use it in a practical way by painting wooden storage boxes so that they can be labelled easily. Plus, I know they will end up with messages all over them and surely this is much more interesting to look at than plain, boring storage boxes.

For those of you with kids, blackboard paint has got to be a winner. Buy bigger boxes, paint them with blackboard paint and add castors and you’ve got yourself fun toy boxes.

This is how you do it:

Chalk storage boxes

I bought these untreated wooden storage boxes from eBay for £12 for three.

Chalk storage boxes

I bought chalkboard spray paint from Amazon, but you can also get it from hardware shops. You need to spray at least two coats, each coat takes twenty minutes to dry. Make sure you do it outside.

Chalk storage boxes

I’m using mine for some of my craft supplies. When I get round to it I will also line the inside with pretty paper or paint the inside with a bright colour.

Chalk storage boxes

Boring storage boxes transformed in less than an hour.


The Barn at Port Farm

Last summer, my wonderful friend Najette took us all down to Kent for our bestest friend Amy’s hen-do (a very civilised hen-do as the bride was six months pregnant). The converted barn we stayed in was just too beautiful to keep to myself.  The combination of old barn and ultra modern interior make this place unique. If you are looking for a large beautiful house with all the mod cons to rent check out their website The Barn at Port Farm. This house has made me realise that the hard, cold surfaces that I associate with modern interiors can be made to feel warm and comforting if done right.

Take a peek…
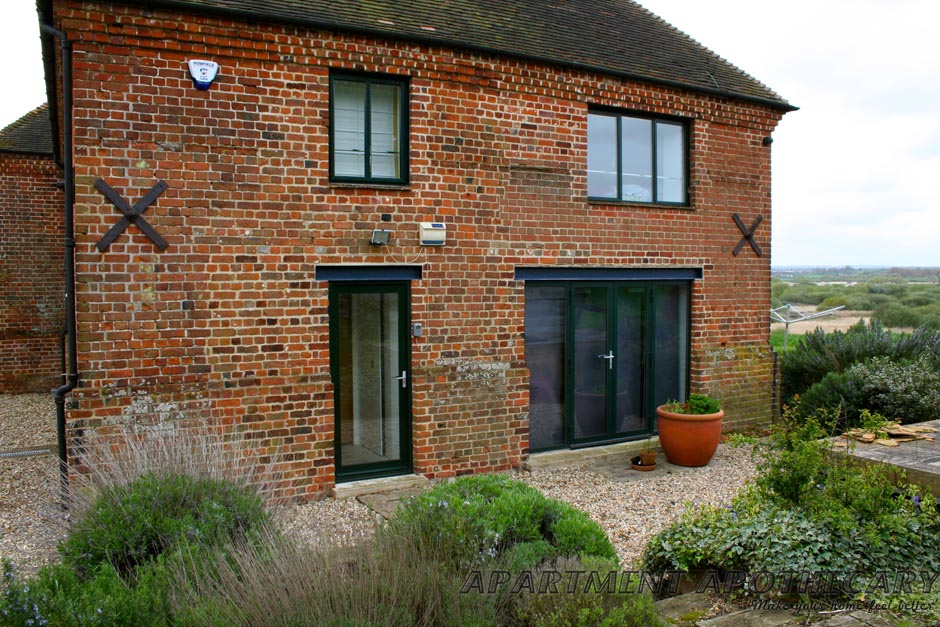
Kent barn conversion

New windows have been installed in the barn, which is the first sign that it has been modernised.
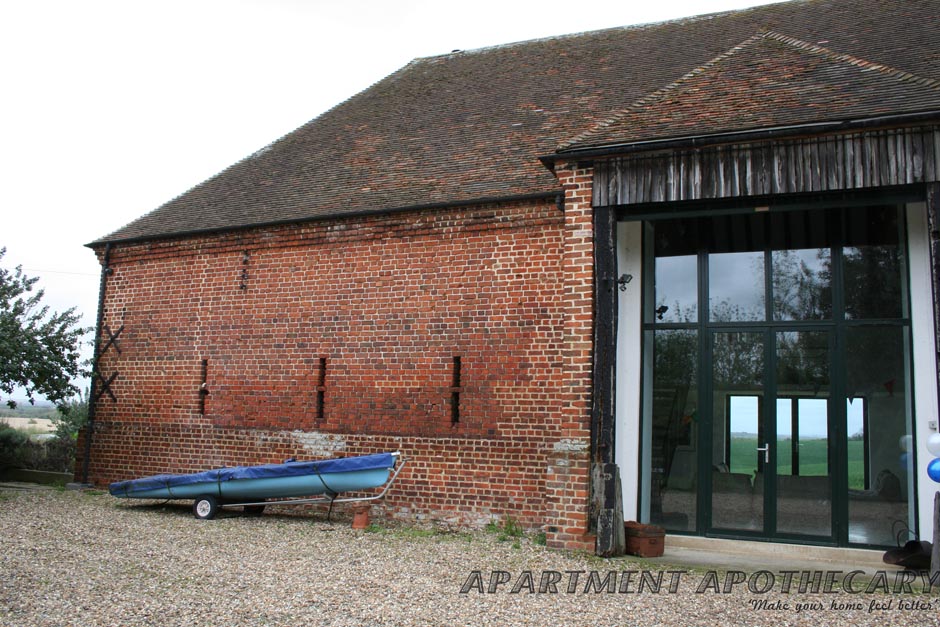
Kent barn conversion

The problem with the design of a barn is the lack of light as they were never intended to be houses. The architect solved this problem with very large windows and doors wherever possible.

Vaulted ceiling with beams

The entrance to the barn is truly impressive. The exposed beams are beautiful.

Converted barn

As you enter the barn there is a cosy group of low seating. The double aspect of this room allows precious light in.
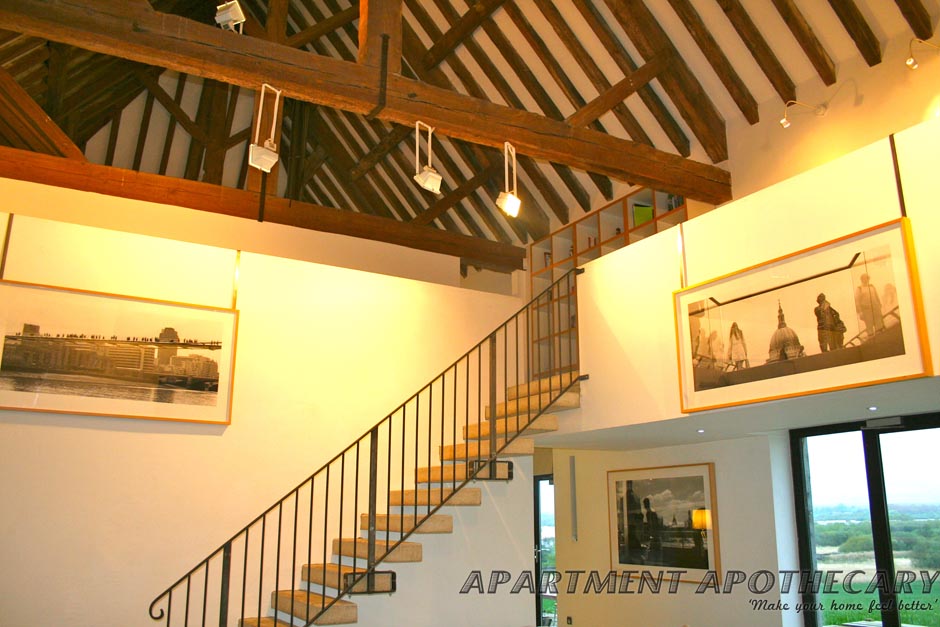
Concrete staircase

Modern hanging lights are used to ensure there is no darkness in the barn.
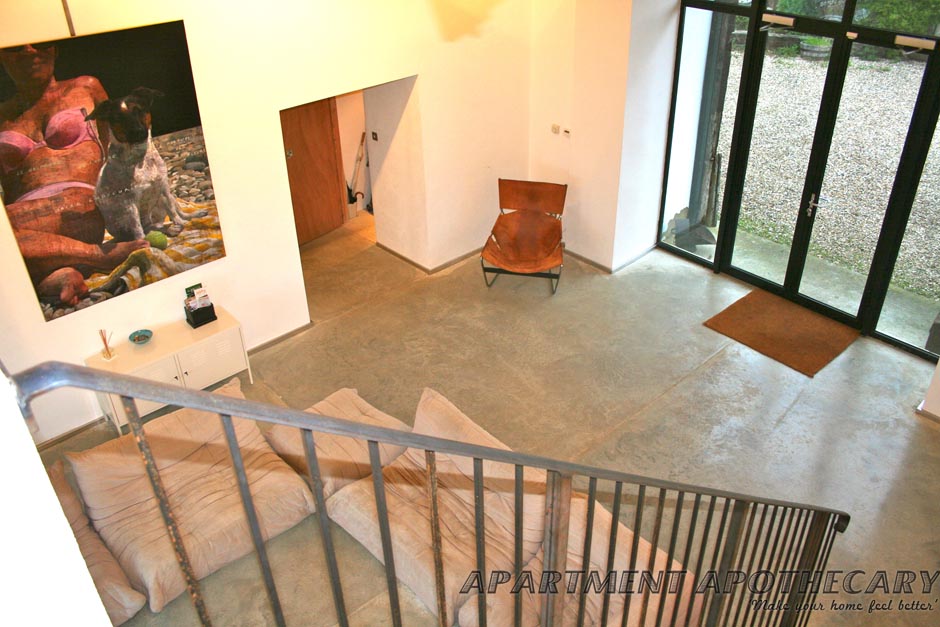
Concrete floor

The concrete floor runs throughout the ground floor of the barn. Underfloor heating keeps it warm, which is essential in order to make the barn feel cosy, yet still cutting edge.

Leather retro chair

Amazing leather mid-century chair. Give it to me!

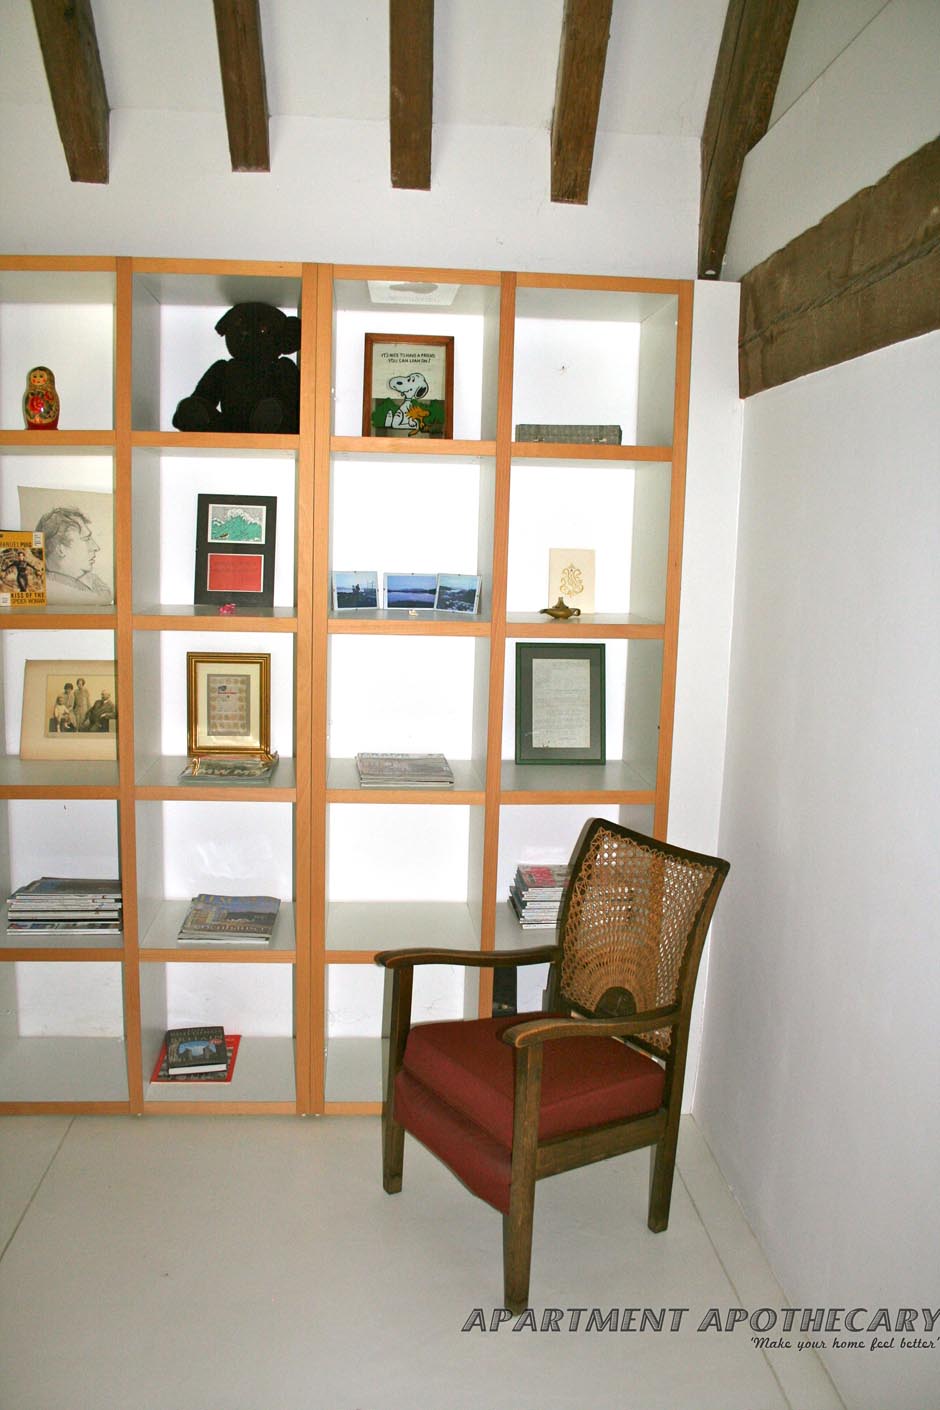
Bespoke book cases

On the galleried landing, bespoke bookcases make effective use of the space and look stylish. The owner displays books and personal possessions, which softens the modernity of the build.
Bespoke bookcases

A mix of old and new is very effective.

Converted barn

On the ground floor there is a further open-plan sitting room/kitchen/dining space.

Converted barn with hanging wood burning stove

The wood burning stove acts as a room divider and instantly attracts attention.

Converted barn

The view of the garden softens the the hard lines of this modern space.

Concrete and stone kitchen

A concrete and stone kitchen blend in with the industrial concrete floor.

The stone work top reflects light.

Swedish chairs add to the contemporary design.

Concrete floor

The concrete floor reflects light, which stops it feeling dull and heavy.

Modern chimney wood burner

Unique hanging wood burning stove. A real design statement.

Converted barn and chaise longue

The master bedroom looks out onto the garden and is sparsely furnished so this chaise longue makes an impact.

Converted barn

Imagine waking up to that every morning!

The ensuite bathroom to the master bedroom has a glass wall that allows the light to reach into every corner of the barn.

Each of the four bedrooms is furnished very simply with crisp white bed linen, white walls and white linoleum floor.
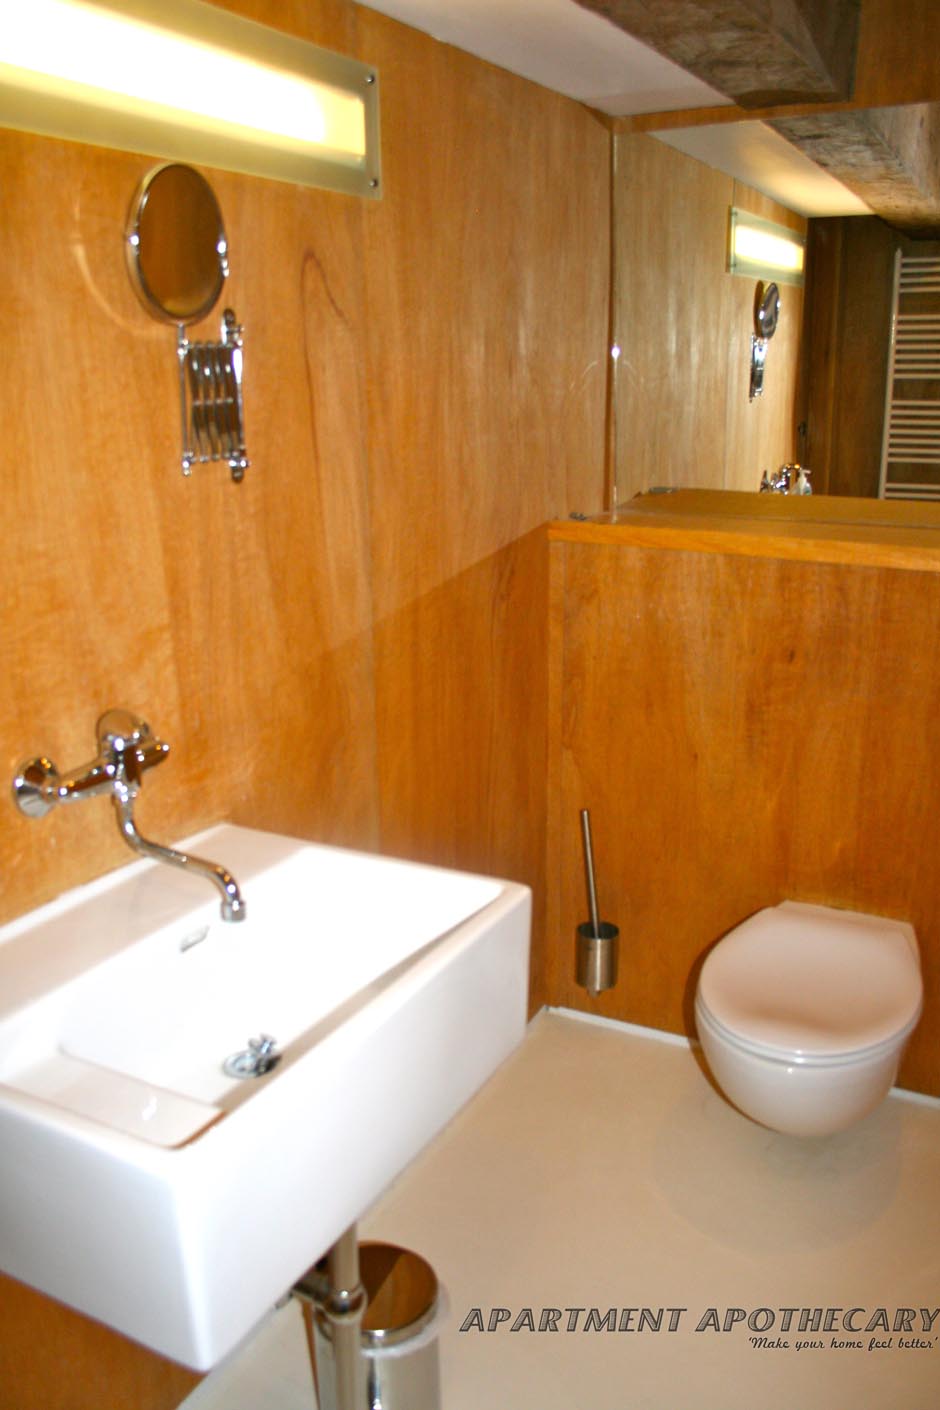
The honey colour of the wood-clad walls in each bathroom stops them feeling cold. The white linoleum floor is bright and the modern-shaped loo and sink are very minimalist.
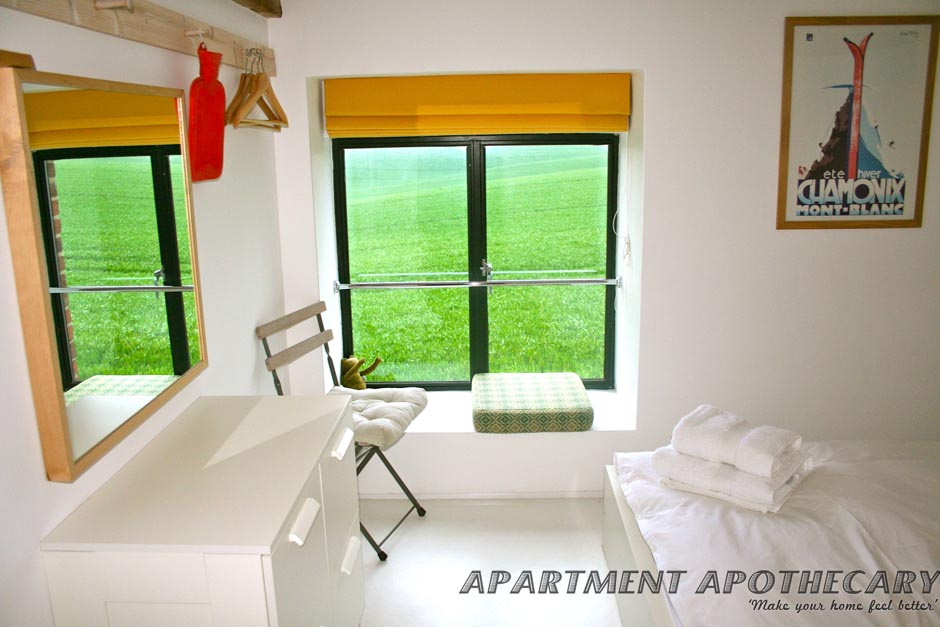
The green view from every window lights the barn with colour.

The juxtaposition of original beams and modern bathroom is very effective.

old sleepers

To one side of the barn there are old sleepers to make a terrace that falls off to fields as far as the eye can see.

Amazing views.


Reclaimed doors have been used to make this outdoor seat.

The barn is surrounded by green with metal sculptures.

These metal sculptures are eye-catching and the rust colour works well against the old barn.

The garden.
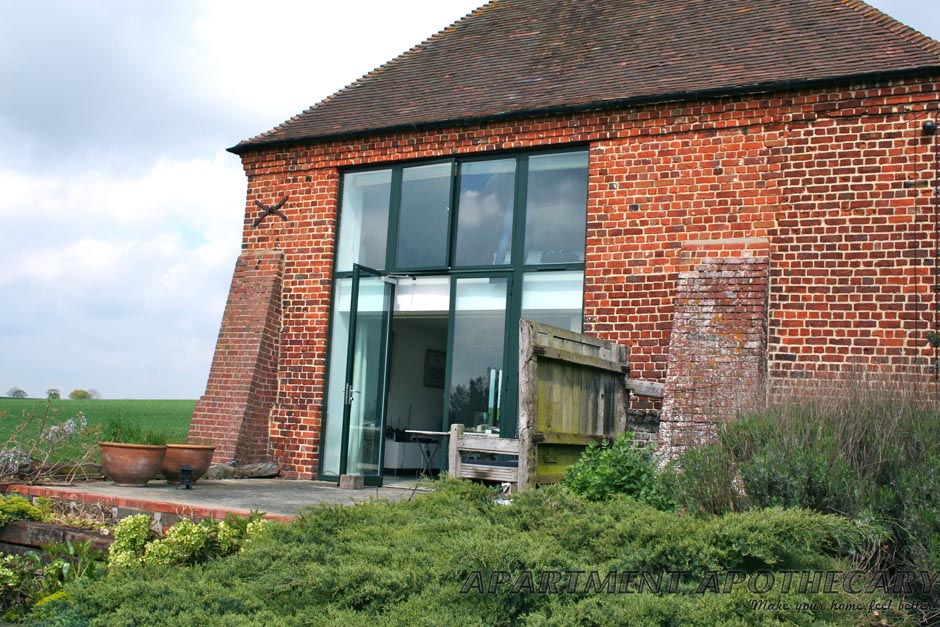
Looking up to the barn from the garden.

Happy memories and a beautiful house x

P.S. Amy and Joe’s wedding was way too much fun and Keir (the baby bump that was) is beyond cute!

The beauteous bride, Amy.


Shallow shelves

If you are the type of person who gets bored of their surroundings relatively quickly, shallow shelves could be for you; they allow you to display the pictures or objects that you love the most with the flexibility to change them with no effort at all. Also, if hanging pictures always seem far too much to cope with, shallow shelves are very easy to put up and don’t involve all the intricacies of hanging a piece of art.  This type of shelf is also a great storage solution without eating up precious living space.  Take a look at some examples to get inspiration:

Shallow shelves

Photographs on a stairwell. So much easier than hanging every single photograph on a difficult to reach area.

A simple, yet effective row of three prints. The shelf has been painted black to make this a feature and tie in with the rest of this gorgeous mid-century feel hallway.

Styled shelves look good in this monochrome work space.

Above a desk and used for a number of different objects: Pictures, signs, mirrors, prints etc. The over-lapping creates a modern, eclectic look.

Wow. This scares me a bit! Far too neat and tidy but I like the idea of storing small objects that you need on a regular basis on this type of shelf.

I like the idea of using this type of shelf to display work you have done with the ability to change it as you move on to different pieces of work. Could help with the creative process.

A very easy way of displaying plates and if you ever need to use one there is no hassle in taking it down and replacing it later.

If you ever wondered where to put all the random prints, pictures, framed photos (we have quite a few stuck under a bed) these shelves allow you to put everything together to create a point of interest.

Use shallow shelves with a lip to display books in a child’s room.

A real feature in this bathroom. Not sure I’d volunteer to dust this room…

Use for magazines and books, not just pictures.

Love the way these pieces of art are grouped together, but with the flexibility to move them around when you get bored.

Shallow shelves

A space to display toys in a child’s room.

This is the usually wasted space behind a door. Very clever.

This shallow shelf has been used to store cotton reels.

Are you inspired? If anyone has tried this please post a link in the comments section.  Have a good week x

What to do with a grain sack

Make a delightful French-style, no-sew curtain, that’s what. I’m excited about this because I have been trying to figure out a solution to the window dressing in our home office/craft room (Jules, would say it is his home office, whilst I would say it is my craft room) for a while.    I don’t want to spend money on curtains and they would be too heavy for this room and I also want as much light to come in as possible, whilst blocking out just enough not to get glare on our computer.  So, I have bought one grain sack on eBay for £20 and a curtain wire and clips from Ikea for £2.50.  The challenge:  To make a delightful cafe-style half-curtain.  Here’s how I did it…

You will need:

1. Grain sack (just type grain sack into eBay search engine and choose the colour and design you like best but don’t pay more than about £20).

2. Curtain wire and clips (I bought mine from Ikea for £2.50 click here to view them)

3. Scissors

4. Drill

TUTORIAL:

1. Cut the sack open and cut off the excess fabric according to the measurements of your window. You don’t need to sew the resulting hems as the fabric is heavy duty but you can if you want a neater finish.

2. Put up your curtan wire following the enclosed instructions (this is the part you need the drill for). I put it about half way up the window.

3. Hang your fabric evenly with the clips.

4. And that is all there is to it!

How to make a no-sew grain sack cafe curtain | Quick and easy DIY project | No sew curtain | What to do with a grain sack | Apartment Apothecary

What could be easier?

Katy x