Floral Easter decoration

I love, love, love Easter so as soon as I saw this hanging candle holder from Out There Interiors I knew I wanted to add a Spring touch so I could hang it over the Easter table. Hanging decorations over dining tables are always a good thing as they leave more space for hot cross buns, chocolate eggs and more hot cross buns.

We always used to spend Easter at my grandparents’ house down in Devon and my Grandma would decorate the table so beautifully so I decided to channel my Grandma today and go back to good old oasis. I will always remember watching her flower arranging at her church and squidging my fingers into the oasis and probably getting told off for doing so. I’ve never used it myself but it seemed like the perfect way to add flowers to this candle holder. Plus, it holds a dinner candle in place perfectly.

Hanging candle holder for a Spring easter table | Easter table decoration | Out There Interiors | Apartment Apothecary

I cut out a piece of oasis the size and shape of the candle holder and soaked it in water for a minute or so. I then placed it into the holder.

Hanging candle holder for a Spring easter table | Easter table decoration | Out There Interiors | Apartment Apothecary

I stuck a dinner candle into the centre of the oasis (otherwise a big pillar candle would stand up by itself).

Hanging candle holder for a Spring easter table | Easter table decoration | Out There Interiors | Apartment Apothecary

I cut some blooms from my balcony (freesias, grape hyacinths, lavender leaves, rosemary) and added a couple that I had bought. It couldn’t be easier to stick them into the oasis – just make sure you are arranging it to look good from below as it will be hanging above you.

Hanging candle holder for a Spring easter table | Easter table decoration | Out There Interiors | Apartment Apothecary

Cute, isn’t it? Just make sure you keep a close eye and don’t let the candle burn all the way down. Happy easter everyone, hope you all have the most wondrous long weekend.

Katy x


*Written in collaboration with Out There Interiors.

Crafting with mason jars

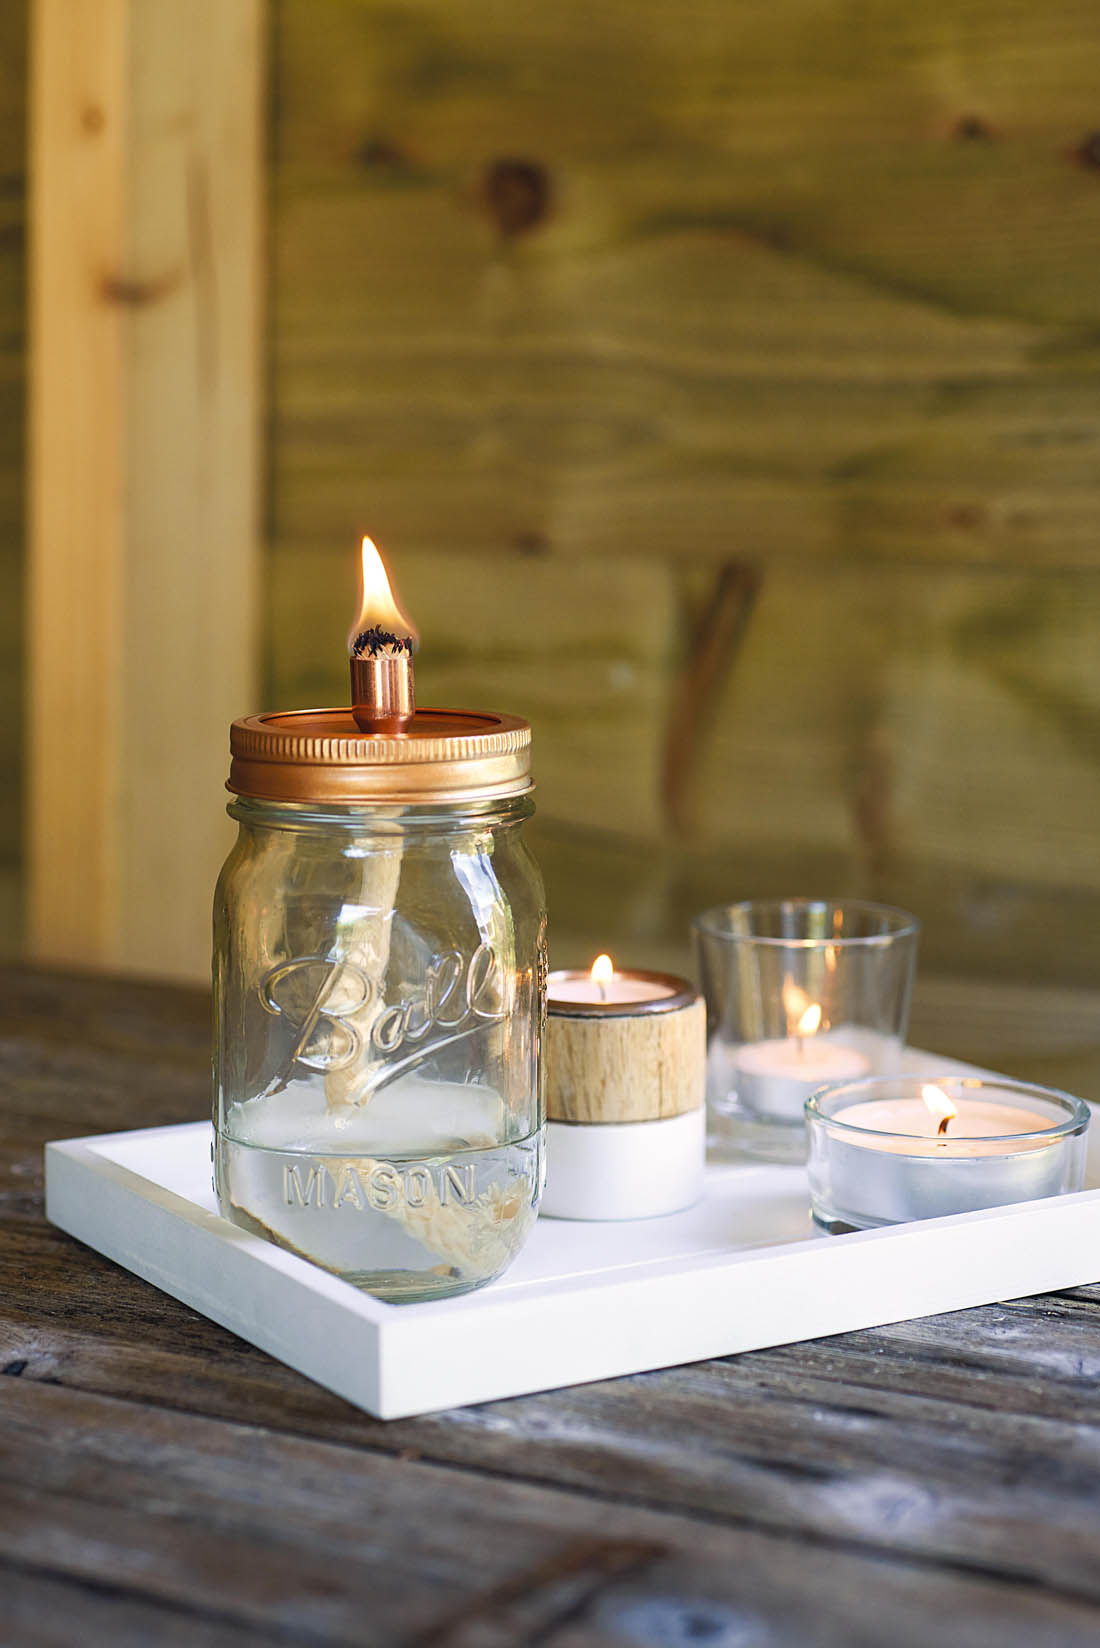
Everyone loves a mason jar, don’t they? I bought a set of them a while ago with grand plans for many DIY projects. I’m now even more inspired to get started after reading Hester van Overbeek‘s new book Crafting with Mason Jars. I’m pleased to be kicking off the blog tour for the new book today and I have picked out a few of my favourite projects to show you.

There are loads of simple but effective projects in the book, all beautifully illustrated with photographs and graphics and clear step by step instructions. Filled with inspiration and clever ideas for gifts, homewares, decorations and storage solutions; some are perfect for crafting novices and others are a little more complex.

Here are my favourite ideas…

Crafting with mason jars | Book tour | A apartment Apothecary

Crafting with Mason Jars by Hester van Overbeek, photography by James Gardiner, published by CICO Books, all images © CICO Books

These drinks dispensers are brilliant for summer parties and well worth investing an afternoon into making one of these.

Crafting with mason jars | Book tour | A apartment Apothecary

Crafting with Mason Jars by Hester van Overbeek, photography by James Gardiner, published by CICO Books, all images © CICO Books

Another perfect project for the warmer evenings – they still seem so far away but I can’t wait for them!

Crafting with mason jars | Book tour | A apartment Apothecary

Crafting with Mason Jars by Hester van Overbeek, photography by James Gardiner, published by CICO Books, all images © CICO Books

I’m kicking myself for having bought one of these soap dispensers recently when I could have made it with Hester’s tutorial.

Crafting with mason jars | Book tour | A apartment Apothecary

Crafting with Mason Jars by Hester van Overbeek, photography by James Gardiner, published by CICO Books, all images © CICO Books

Crafting with mason jars | Book tour | A apartment Apothecary

Crafting with Mason Jars by Hester van Overbeek, photography by James Gardiner, published by CICO Books, all images © CICO Books

I hope you enjoy the rest of the blog tour and I look forward to seeing lots of mason jar upcycling projects!

Katy x


DIY leather kitchen door handles

I’m pretty sure this is the BEST thing I have ever made. I’m super proud of these handles because they look good, they are inexpensive, they are very useful AND they are made from bookmarks, yes bookmarks!

I’ve hated the handles on my kitchen cabinets since I moved in six years ago (you can see them here) but because they are so long I didn’t know what to do about the fact that they would leave two holes – how would I fill one of them in? Well, turns out that the hole is much smaller than I thought it would be and a squeeze of sealant later and you really can’t see it – hurrah! So that left me with a better problem of what handles to replace them with. I sold the old solid steel handles on eBay for £40 and I started looking around and realised that nice handles are pretty expensive. I decided to challenge myself to make myself new door handles for less than I sold the old ones for.

The wonderful Katharine Peachey bought some rather lovely leather handles for her kitchen that I instantly fell in love with – total swoonage!

DIY leather kitchen door handle tutorial | Home of Katharine Peachey | Photo by katharinepeachey.co.uk | Apartment Apothecary

Katharine’s kitchen, photographed by her.

I had a look online and each handle cost between £10 and £20 and I have 18 cupboard doors – you do the maths (ok, I will, a set would cost me between £180 and £360 – wowzers). So I started searching for leather online instead and hatched a plan to make my own.

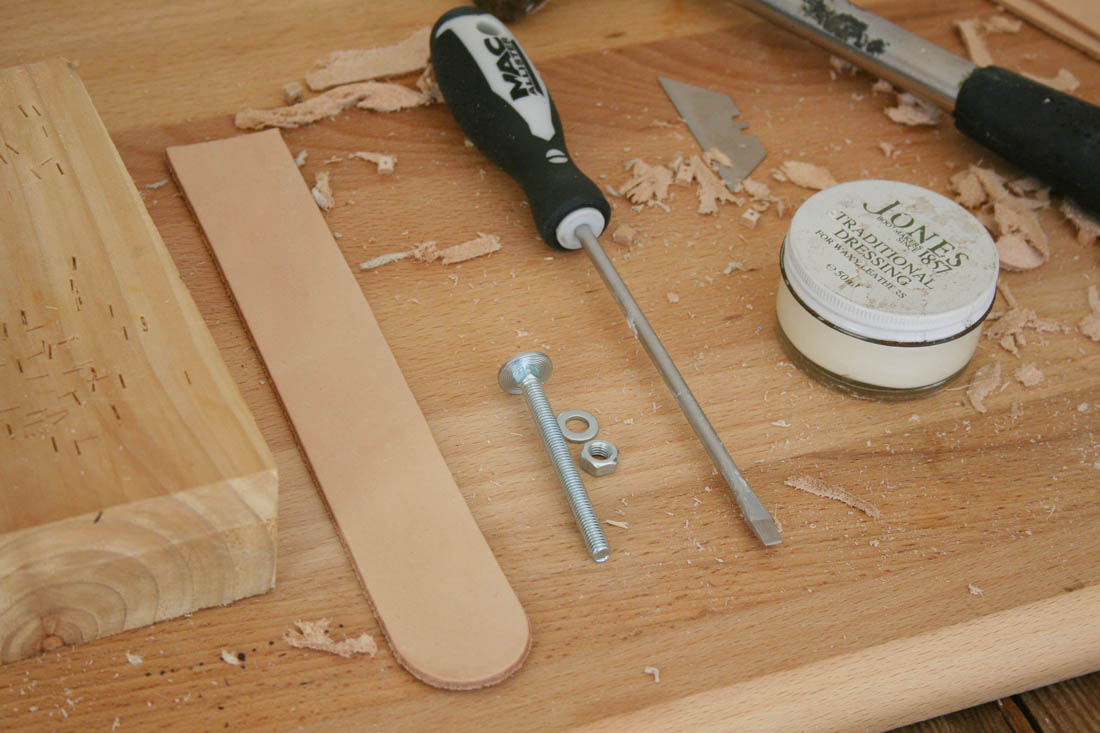
You will need

Leather – I bought these pre-cut bookmarks from The Identity Store £16.50 for a pack of 10. You can oil or stain them if you like.

Cup square bolts – I bought these from B&Q £3.57 for 10

Sharpened screwdriver – I used a 6mm one as it has to be the same width as the square bolt (the little square on the back of the round head of the bolt). To sharpen it I used a diamond stone. Alternatively you can use a chisel.

Hammer

Hacksaw

Pen

Tape measure

Leather wax or even shoe polish (I already had some)

Optional – Stanley knife blades or a sharp craft knife (I already had this but you can also use sand paper for this

Offcut of wood to work on

TOTAL for 20 handles: £40.14  (14p over budget!)
DIY leather door handles for kitchen cabinets | Tutorial | Apartment Apothecary

Step by step

To make 8.5cm long handles.

1. Wax or ‘feed’ the leather strips so that they don’t crack.

2. Measure and mark 5cm from the tip of the rounded edge.

DIY leather door handles for kitchen cabinets | Tutorial | Apartment Apothecary

3. Score this mark with a craft knife – I used a stanley knife blade as that was all that I had. Note the plaster on my thumb by the end of the tutorial 😉

DIY leather door handles for kitchen cabinets | Tutorial | Apartment Apothecary

4. Use the knife/blade to shave off the bulk of the leather from the suede side. You don’t have to do this but it helps the handle lie as flat as possible on the door.

DIY leather door handles for kitchen cabinets | Tutorial | Apartment Apothecary

5. Mark the three points where the bolt will pass through the handle. To make a 8.5cm long handle from a 22cm long piece of leather your three marks will be 165mm, 175mm and 275mm from the straight top edge.

DIY leather door handles for kitchen cabinets | Tutorial | Apartment Apothecary

6. Sharpen the 6mm screwdriver on a diamond stone or whet stone and place the leather on a wooden offcut. Cut out a 6mm square with your mark in the middle of the square. Use the hammer to force the screwdriver through the leather.

DIY leather door handles for kitchen cabinets | Tutorial | Apartment Apothecary

DIY leather door handles for kitchen cabinets | Tutorial | Apartment Apothecary

DIY leather door handles for kitchen cabinets | Tutorial | Apartment Apothecary

7. Use the hacksaw to cut the bolt to the right length to go through your kitchen cabinet door (or wardrobe/drawers) making sure that there is enough length to screw on a washer and the nut.

DIY leather door handles for kitchen cabinets | Tutorial | Apartment Apothecary

8. Fold the leather over so that the scored mark is at the top and the curved end folds over the back and all three holes line up.I didn’t want my handles to be folded in half as I wanted a smooth top edge instead of raw leather.

DIY leather door handles for kitchen cabinets | Tutorial | Apartment Apothecary

9. Screw the bolt through all three holes.

DIY leather door handles for kitchen cabinets | Tutorial | Apartment Apothecary

10. Pass the bolt through the door and use a spanner or socket set to screw on the washer and nut as tightly as possible so that the handle can’t spin.

DIY leather door handles for kitchen cabinets | Tutorial | Apartment Apothecary

And there you have my new DIY leather door handles and a glimpse of my ‘new’ kitchen. Over time the handles should age and take on a lovely patina to the leather.

DIY leather door handles for kitchen cabinets | Tutorial | Apartment Apothecary

They work really well as they are large enough to get your fingers through the loop or you can pull the whole thing to open the cupboards.

DIY leather door handles for kitchen cabinets | Tutorial | Apartment Apothecary

Love them! What do you think?

Katy x


Hand printed Valentine’s posies

I would love to gift all my friends and myself a bunch of pretty flowers this Valentine’s day but cut flowers cost a lot! Therefore, I have tried to find a way of making a little go a long way without too much compromise so that you can spread the love this year. February is great for early Spring flowers (forget red roses!) like Anemones, Paperwhites, Tulips and Hyacinths so I grabbed a handful of them from Borough Market the other day, which cost about £15 in total. I decided to make them into tiny posies with a handprinted pouch for my girlfriends – an easy way to make a teeny tiny bunch of blooms extra special.

Hand printed Valentine's pouches | Apartment Apothecary

You will need

– Bunch of flowers

Calico or cotton

Dylon fabric paint and plastic bag to protect table

– Pencil with an eraser tip

– Sewing machine or needle and thread

– Pins

– Twine or ribbon

– Kitchen roll and clingfilm

– Fabric scissors

Hand printed Valentine's pouches | Apartment Apothecary

Step by step

1. Cover the table with a plastic bag. use the eraser tip of a pencil to print spots on the fabric. Once it is dry iron it to set the paint.

Hand printed Valentine's pouches | Apartment Apothecary

2. Cut the printed fabric into strips 30 x 14cm.

Hand printed Valentine's pouches | Apartment Apothecary

3. Fold the strip in half, right sides together and pin it together. Sew up the sides of the pouch, leaving the top open.

Hand printed Valentine's pouches | Apartment Apothecary

4. I then printed Valentine’s messages using a stamp.

Hand printed Valentine's pouches | Apartment Apothecary

5. Gather your blooms and select a few for each posy, cutting down the stems to fit inside the pouches.

Hand printed Valentine's pouches | Apartment Apothecary

6. Saturate some folded kitchen roll and roll the posy up in this and cover it in clingfilm so no moisture leaks out.

Hand printed Valentine's pouches | Apartment Apothecary

7. Pop the posy into the pouch and tie it up with string or ribbon.

Hand printed Valentine's pouches | Apartment Apothecary

Your posies are ready for delivery to your best girls or boys.

Hand printed Valentine's pouches | Apartment Apothecary

Hope everyone feels the love this Sunday!

Katy x


Natural Christmas garland

I used to love tinsel as a child and we would decorate the whole house with it: up the banisters, along the mantelpiece, over pictures hanging on the walls, anywhere and everywhere. It’s definitely festive, but not necessarily particularly beautiful.

I saw this fabulous Eucalyptus garland tutorial back in November and I was determined to give it a go, having never made a garland before, as it seems like the perfect alternative to tinsel.

This really is as easy as it looks and it can be a last minute decoration that you make to run down the centre of the Christmas table or I think it would look beautiful on a mantelpiece (I wish I had one!).

Natural Christmas garland | How to make a Eucalyptus garland | Apartment Apothecary

You will need:

– Hardy foliage (I bought mine from Columbia Road flower market because I don’t have a garden and very helpfully some lovely people on Instagram were able to tell me that it is called Eucalyptus pauciflora, otherwise known as Snow Gum and it is amazingly hardy!)

Florisrty wire

– Twine

– Scissors

Natural Christmas garland | How to make a Eucalyptus garland | Apartment Apothecary

Step by step:

1. Cut your big branch into smaller pieces around 20cm long.

Natural Christmas garland | How to make a Eucalyptus garland | Apartment Apothecary

2. Unravel 20cm of your twine but don’t cut it, just lay it out on a flat surface. Place one of your pieces of foliage on top of the twine. Cut a 20cm piece of wire and secure the twine to the foliage by winding the wire around and around.

Natural Christmas garland | How to make a Eucalyptus garland | Apartment Apothecary

3. Unravel more twine and place another piece of foliage on to it, slightly overlapping the last piece and secure it with the wire and so on until you have the length of garland that you want.

Natural Christmas garland | How to make a Eucalyptus garland | Apartment Apothecary

If I had a beautiful doorway or fireplace this ‘green tinsel’ would be perfect but I think it will look equally as lovely on the Christmas table.

I’m taking next week off to prepare for January so I will pop in on Christmas day and New Year’s eve to say hello but won’t be back again properly until January 4th with my first Styling the Seasons of 2016. Until then, I hope you all have the most wondrous holiday!

Katy x